One of the most common frustrations or complaints we receive in NetSuite is that native email functionality send emails to the main "E-mail" field on entity records. And the main E-mail field cannot hold more than 1 email address. This is very limiting to businesses as usually there are many different contact points in an organization that would want to be notified about different events with orders or transactions. This limitation can be somewhat overcome with workflows using the Send Email action as you have more flexibility in the parameters of the action to send emails to multiple recipients. There are a few "hacks" that work fairly well to give users the ability to add multiple email addresses on to Customer or Vendor records and then send emails to them, but most include adding a few different email address fields onto the entity record for different departments within the organization. You can also create an Email Address custom field and add it to the workflow, then change the field type to Free Text which will then allow you to add multiple comma separated addresses into the field, but yet still be used in a workflow. All of these are good options but can sometimes pose a problem of form clutter or workflow maintenance.

NetSuite custom fields are configured with a predefined "data type" so data can be easily validated while users are entering it. For example, if you select Integer Number then only integers can be entered into the field vs. selecting Decimal Number which allows decimals. One field type is Email Address which validates that the entered text is at least in the format of a valid email address. It also limits the user to only entering one email address. Alternatively, a Free Text field will allow any text so users can leverage this field type to enter multiple email addresses separated by a comma or semi-colon. Switching between these field types can provide different functionality in different situations so it is good to know which field type you need while first configuring your custom field. It is also very important because when you change field types ALL data entered into that field is erased so be sure to backup your data in an Excel file or by other means before changing field types.
One great trick we've deployed many times is to combine the power of saved searches with workflows to get an easy to manage system for adding, removing and changing the recipients for emails. This customization is fairly easy to setup and leverages many native features so you know it will remain stable throughout future releases.
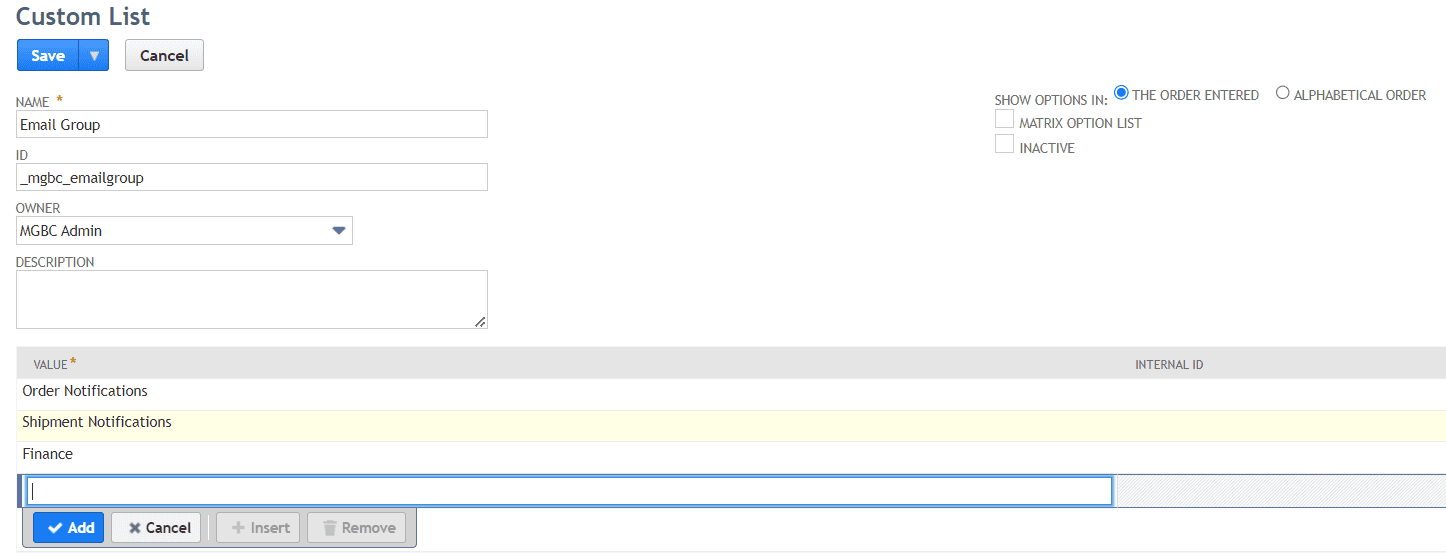
The idea here is to use the Contact records associated with the entity to keep an up to date list of contacts and what transactions they want to be notified of. To start we will create a custom list called "Email Group". This will help us categorize contacts into logical groups for sending emails. (You can also leverage the native "Role" field on contacts for this as well if you prefer).
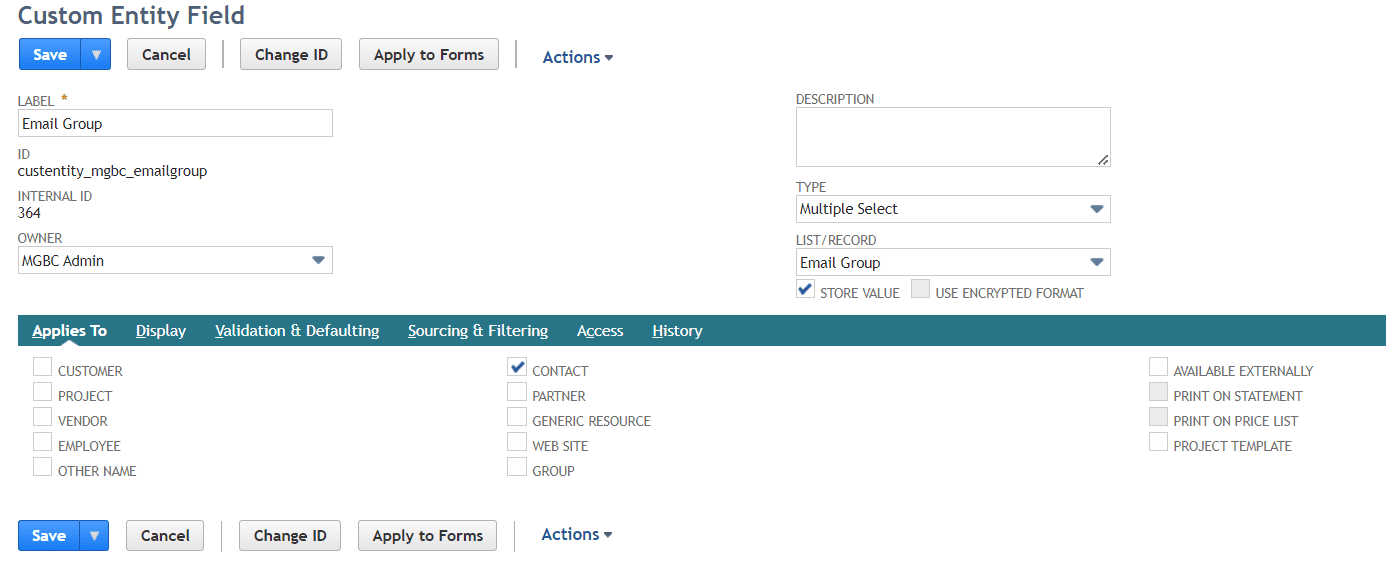
Next we will create a custom field on the contact record that we can use to select what group each contact should be a part of.
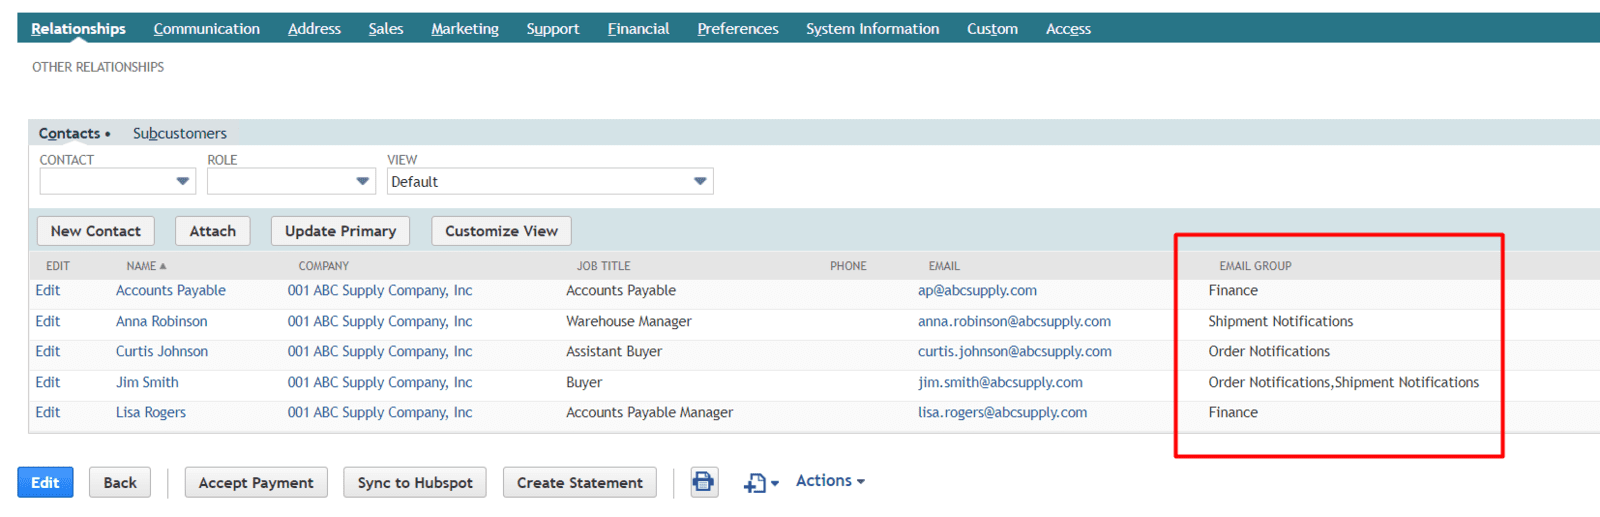
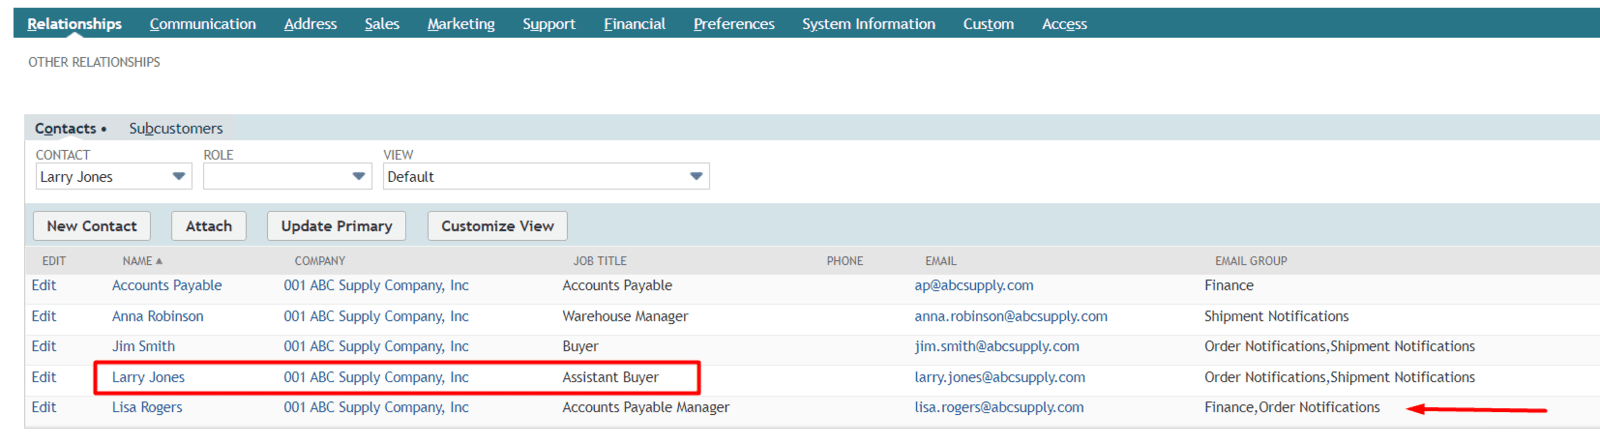
Now we can add our contacts associated with our customer and assign them the proper email group
The next step is to create a saved search of contacts and make it a summary search so we can use it to source the value of the transaction body field. In the criteria we want to exclude Inactive contacts, but include contacts with the Order Notifications email group.
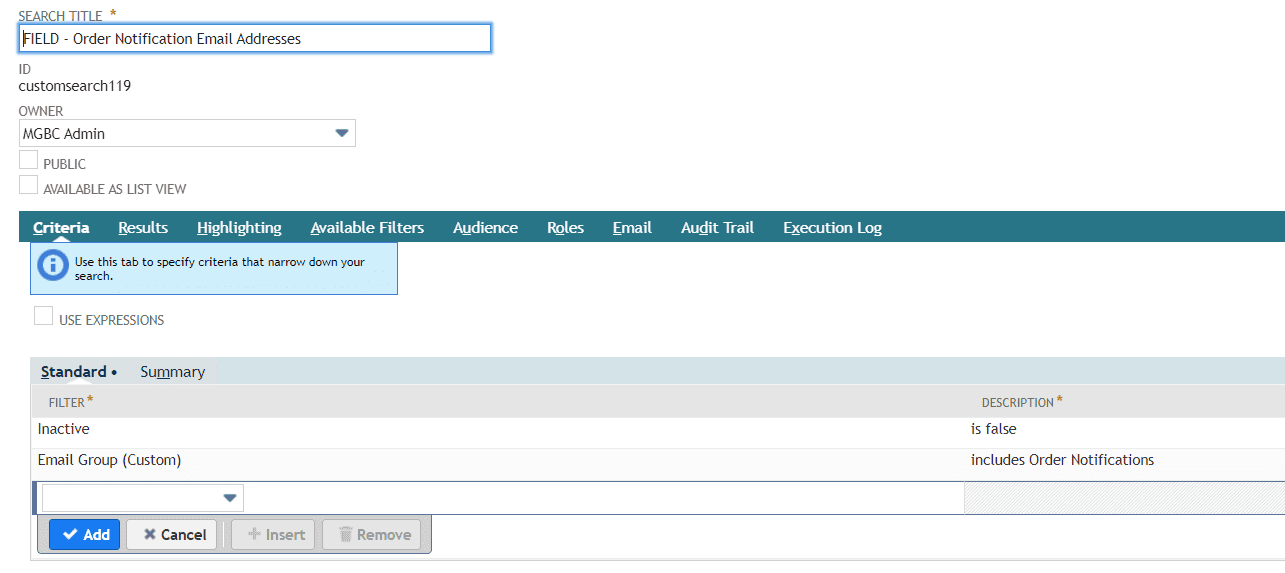
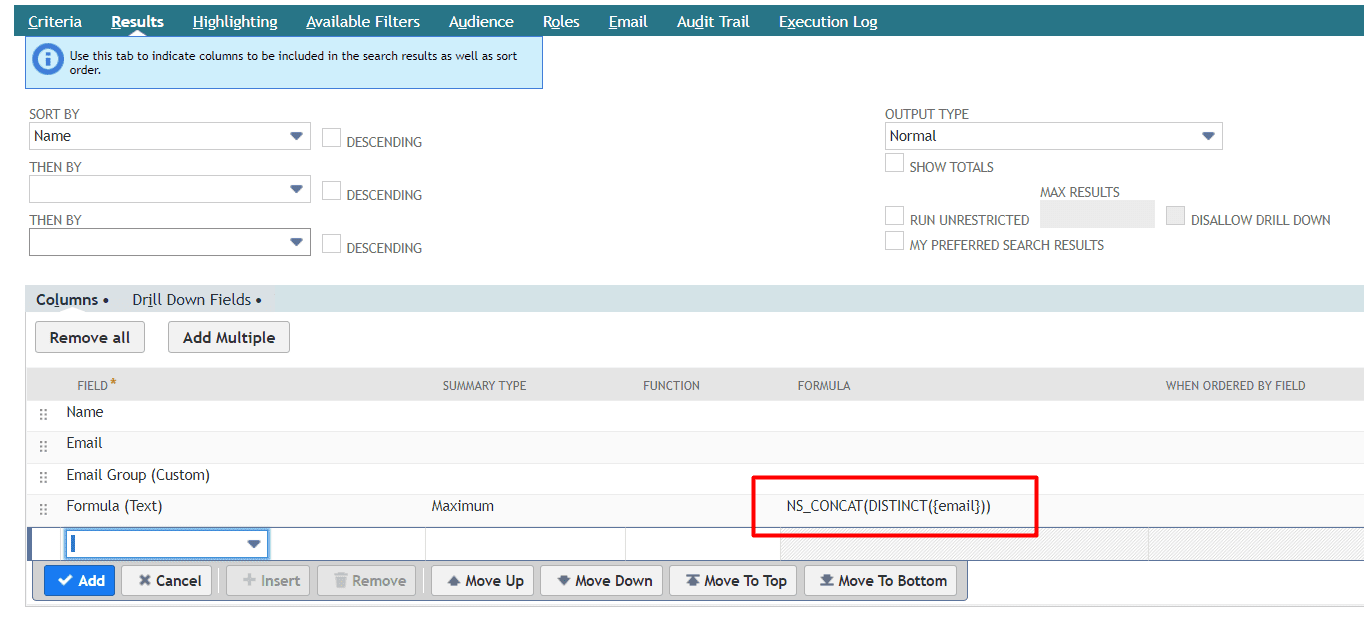
Then our results tab will include one summarized field using the NS_CONCAT function. This will concatenate all the results of the search into a single comma separated field value.
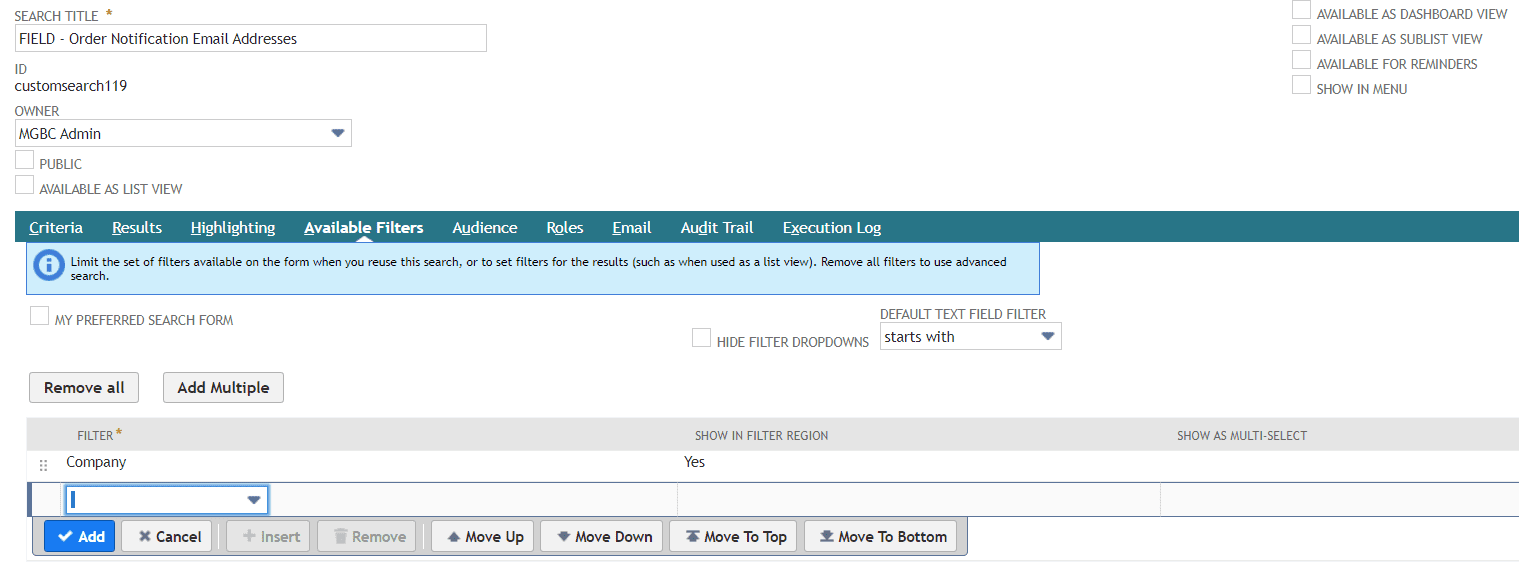
Lastly, don't forget to give your saved search a filter so the system knows how to filter the results to get only the contacts applied to the correct company/customer.
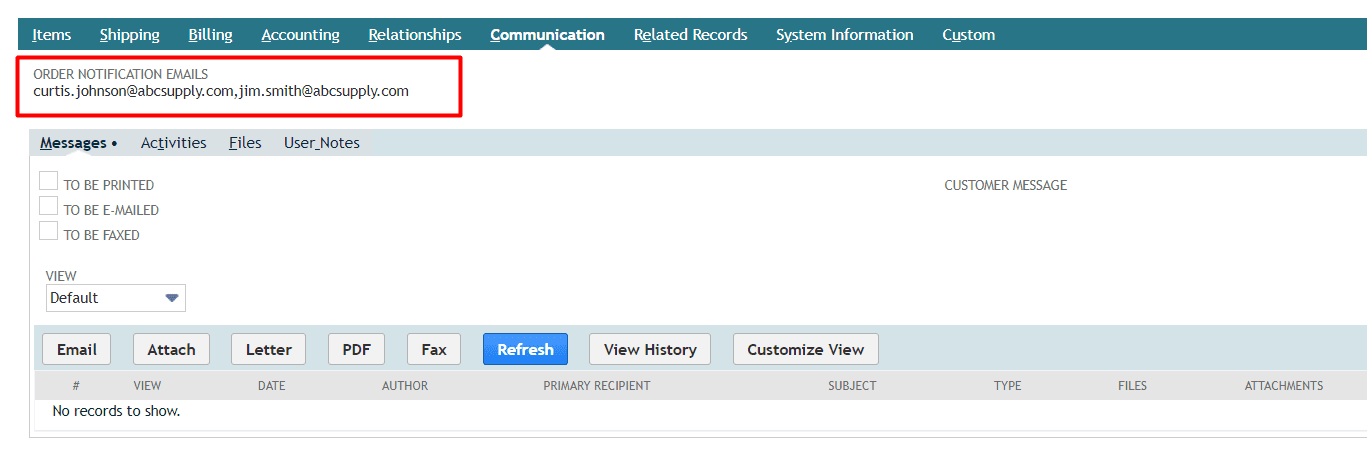
Now let's create a custom Transaction Body field that will hold the results of our saved search. Make sure to UNCHECK the store value checkbox so the value is dynamically sourced whenever the record is loaded. We used a Long Text field type just in case there were a lot of unique email addresses to be notified.
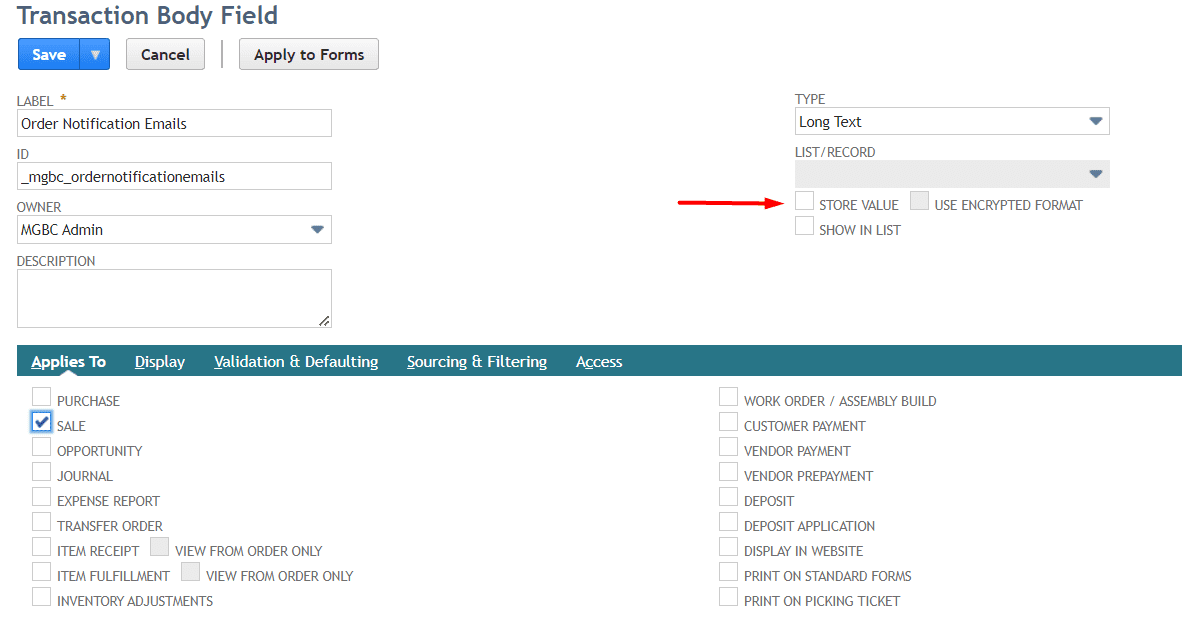
Also we need to define the saved search we created in the Validation & Defaulting subtab. Remember to choose what field on the transaction should be used to filter your results. Since the Available Filter in your saved search was based on the Customer field, we should choose the same field in our custom field configuration

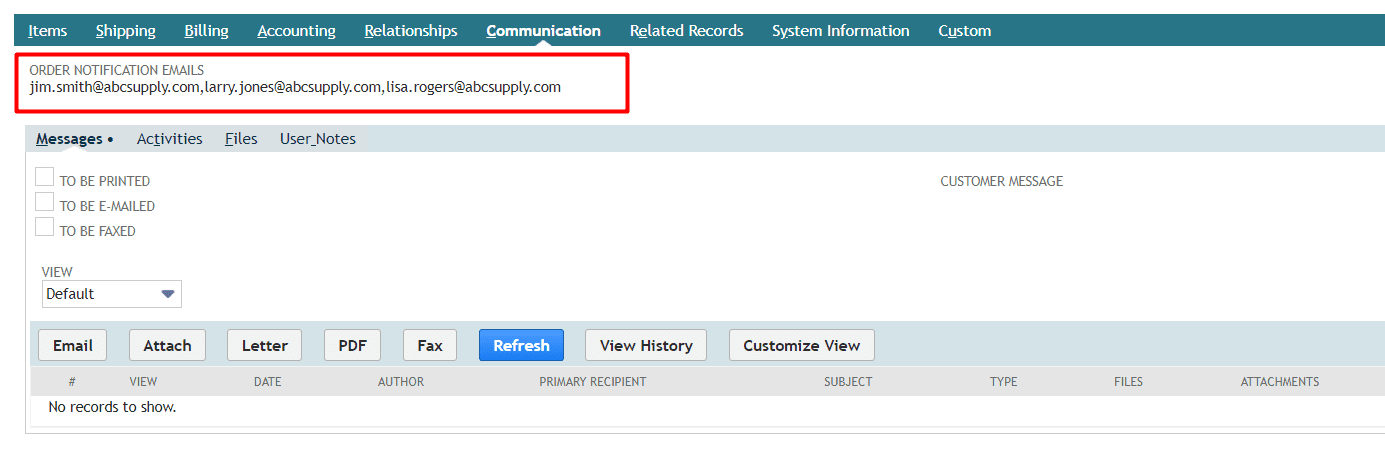
Now our Sales Order form will dynamically source ALL email addresses that are tagged with the "Order Notifications" email group. And these addresses will automatically be filtered to only the contacts associated with the Customer defined on the transaction.
Then in your workflow you can add a Send Email action and assign the new transaction body field as part of the recipients. Note how we are using the CC Address parameter within the action and using the field ID of our new transaction body field to define the addresses to be copied. This is a great way to circumvent the restrictions placed on trying to select a field from the list in the From Field parameter. We have tested using this method in the Free Form Address field and the workflow will return an error. However, using the field ID in either the CC or BCC fields seems to work just fine.
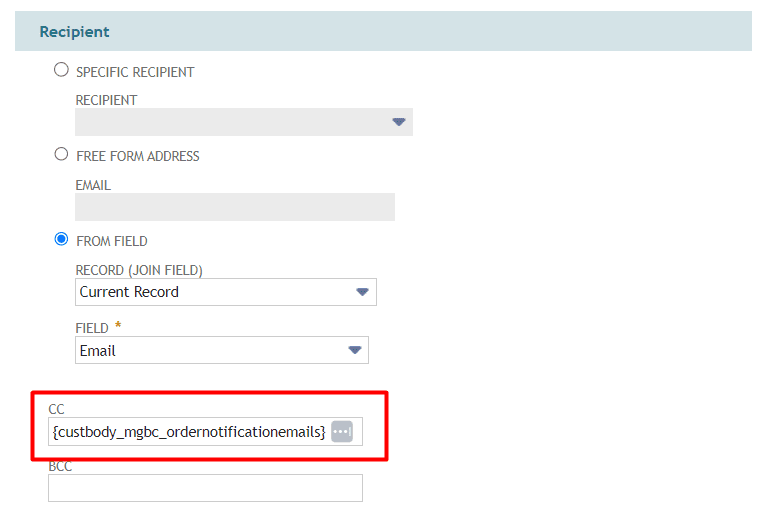
Since an email does require a Primary Recipient you do need to define a recipient in one of the fields other than the CC or BCC. You can use a native field as pictured above OR you can put in a static address of purchaseorders@mycompany.com. This way all communication emailed out of NetSuite is stored in a shared inbox for your company to review if needed.
The power of this functionality comes with the ease of maintenance for our users. For instance if Curtis Johnson were to leave the company and we need to add a new contact, it is as simple as managing the native Contact list on our Customer record. Curtis Johnson can be inactived and a new contact created with the same email group. Or if the accounting team wants to be made aware of new orders place, then they can easily receive the "Order Notifications" tag.
Now when the next order is placed they will all be notified via email.