
As another entry in our Workflow Beginners series we are going to discuss the Remove Button action. This action does not have a lot of configuration or parameters available to it, however, it does provide a some very useful functionality to make sure that users are performing the correct actions at the correct times.

The remove button action is referring to the removal of "standard" or native buttons already found on transactions or other records. This Remove Button does not need to be used in conjunction with the Add Button action to make sure custom buttons are added and removed successfully throughout your workflow. These two actions work independently and do not effect each other.
Some examples of the native buttons you can remove are the Fulfill button on a Sales Order so users cannot fulfill a sales order without specific conditions being met. Or the Close button on a Purchase Order. We find that many users still learning how to use NetSuite interpret the Close button as synonymous to the closing of a browser window. However, in essence the Close button is more like cancelling the transaction and is not quick or easy to "un-close". With the Remove Button action you can remove the Close button for all users except Administrators so general users cannot accidentally close a transaction.
Similar to the Add Button action you can remove a button using only the Before Record Load, Entry or Exit triggers. The Before Record Load trigger is defaulted as that is the most common way to trigger this action. When using Before Record Load the conditions of the action will be evaluated as the record is being called from the database (ie. server) and if the conditions are met then the button will be removed before the record is presented to the user to see or interact with.
We recommend strongly that you always use this remove button action with the default trigger of Before Record Load. Also just as we discussed in the Add Button action it is best to not restrict this action too much by using specific Event Types or Contexts unless you are absolutely sure those event types or contexts are something you do not want to effect this removal of the button.
(For more information on Event Types, Contexts and Triggers checkout our other blog post dedicated specifically to this topic.)
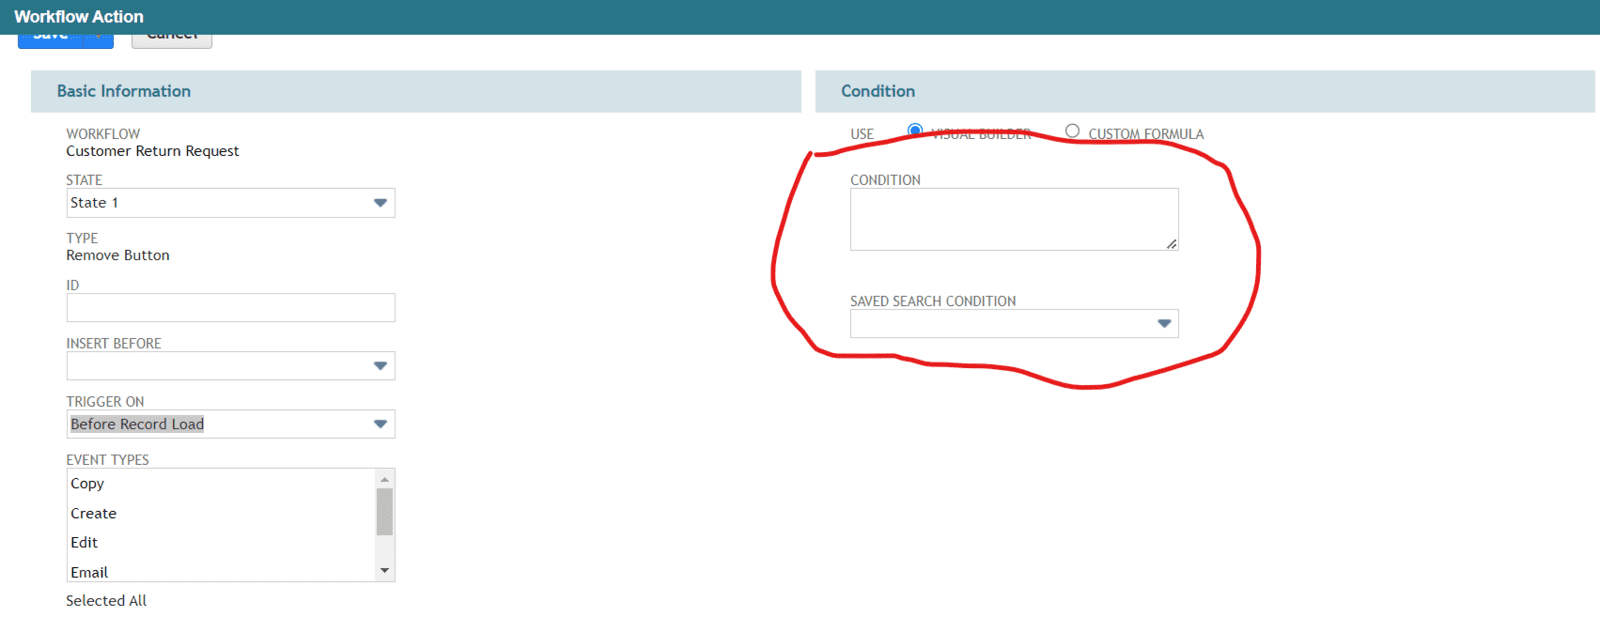
The next step is to setup the condition for when this action should take place. Here you can define specific criteria to be met, in order to have the button removed from your record. You can setup conditions based off the Current User, their Role or other data entered onto the record itself. You can also setup a saved search that will act as your condition and if the current record meets the criteria of your saved search then the button will be removed.
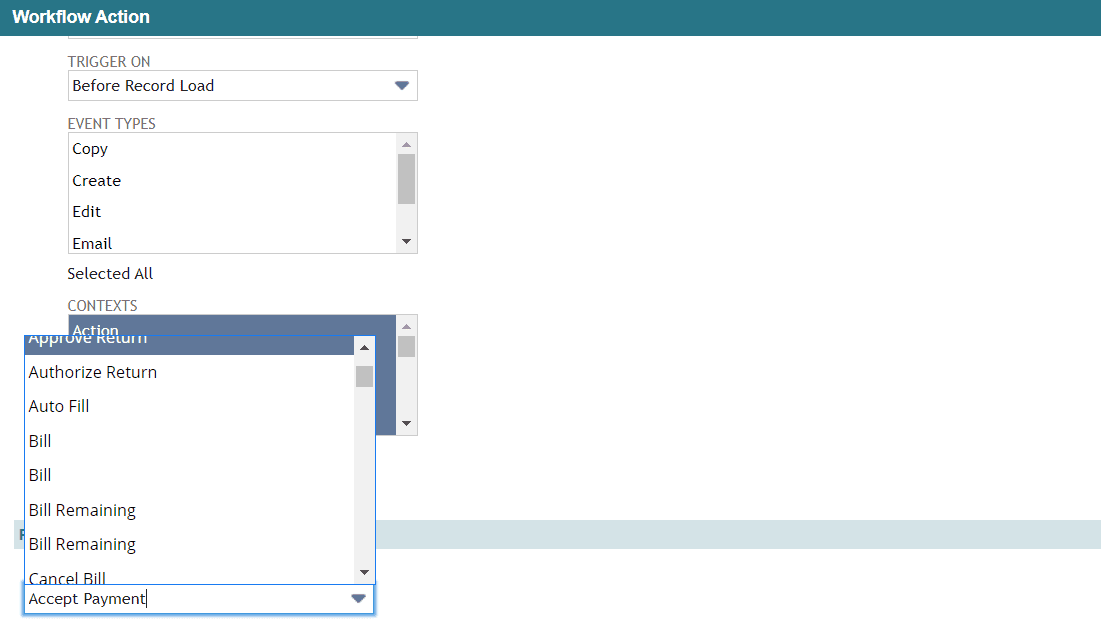
Lastly, you select the button that you would like removed from the transaction. This can take a little trial and error as there are some buttons with the same name that appear on different transactions or records. For example, there are 2 Bill buttons that can be removed, but only one effects the Bill button on a Purchase Order. This is where it will take some testing to know which Bill to select in which scenario.
(This is just a part of NetSuite's naming convention and cannot be changed. Just something to learn to live with for now).
Now this action seems fairly easy to configure and utilize but even the simplest actions can have powerful results when you consider the impact of someone clicking a button unnecessarily or inadvertently. Make sure you utilize this Remove Button action wisely and in the right contexts so you don't end up frustrating your users but only help them in utilizing the system the right way at the right times.
Be sure to check back often as we continue through our Beginners series on workflows and we take a deep dive into each workflow action and the best ways to use each one.