
As another installment of our Workflow Beginners Series we will cover the Lock Record Action. This action has a similar limited configuration to the Add Button and Remove Button actions; in that it can only be used with a few limited triggers, however, it is still a very powerful tool when used correctly. The Lock Record Action gives the ability to lock a record from being edited or changed. Users can still View the record and view it's contents via reporting or saved search, however, they are unable to make any changes to it.
Locking a record comes in handy in many scenarios such as:
- At the end of an approval workflow to prevent any changes to an already approved transaction
- To mimic the behavior of closing a period for transactions that are non-posting
- Provide advanced "permissions" for specific users or Roles in specific instances
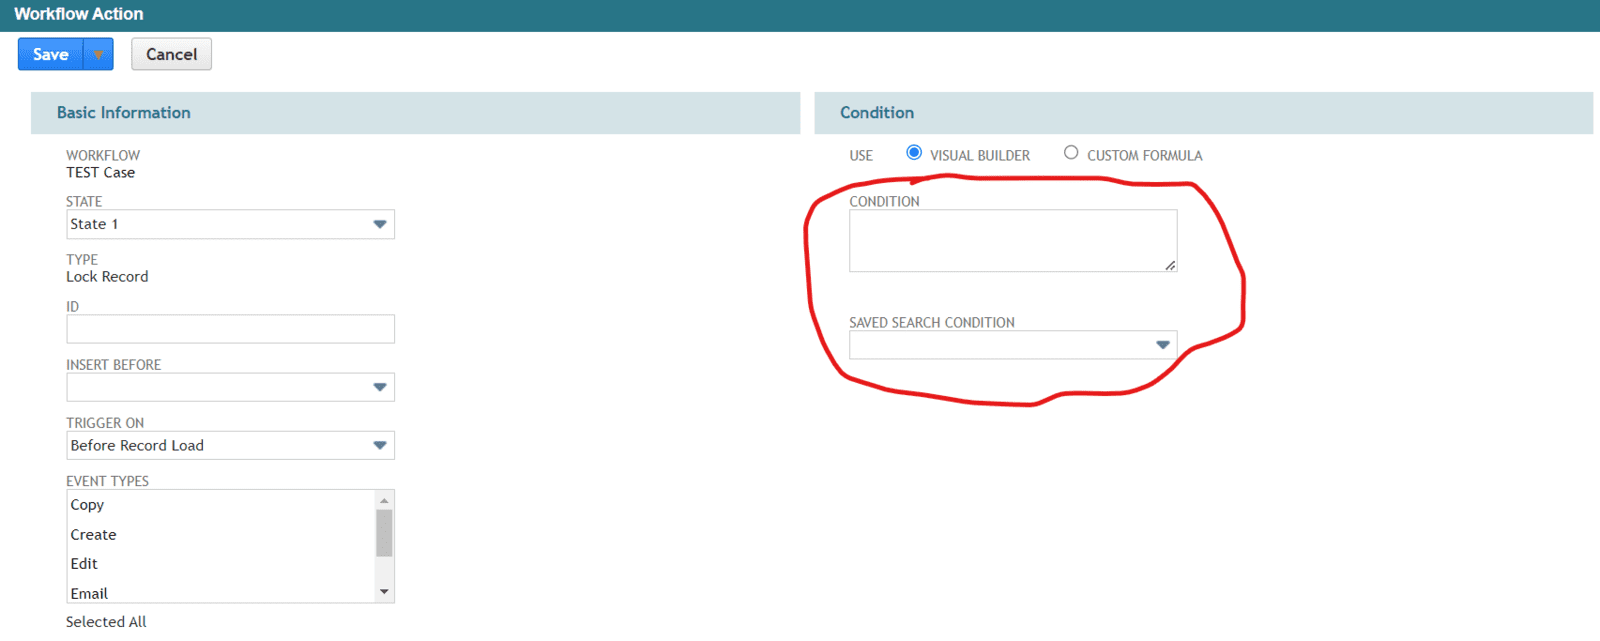
To configure the Lock Record Action you first need to define the trigger to be used. Just like the Add Button and Remove Button action the only triggers available are Entry, Exit and Before Record Load. The default selection here is Before Record Load so that as the record is being loaded from the server (or back end database) the condition is evaluated and it is locked before the user can interact with it.
You can also perform locking of a record upon Entry into a new state and as long as that record remains in that state it will remain locked. We recommend that you always use the Before Record Load trigger as that is the best practice for this action and what NetSuite also recommends. We also recommend that you leave the Event Types and Contexts set to the default configuration unless you know for sure you do not want the record to be locked for specific scenarios. For example, you may want to lock the record when a user is interacting with it in the normal User Interface, but you do not want it locked when an integration is trying to update it via Web Services. In cases like this you can change the Context of the action so it only triggers in the User Interface and not any other context. For more information about how to use Triggers, Event Types and Contexts in your workflows read our blog post on these configuration options.
The next step is to add a condition. Here is where you can define exactly WHEN the record should be locked. Maybe you only want it to be locked for a specific user, or maybe users assigned to a specific department, or maybe lock the record indefinitely when it reaches a certain status. All of these are possible with the condition builder for a formula. Alternatively, if you are more comfortable with saved searches then build a saved search with the correct criteria and as long as the record is listed as one of the results of the saved search it will trigger the action and lock the record.
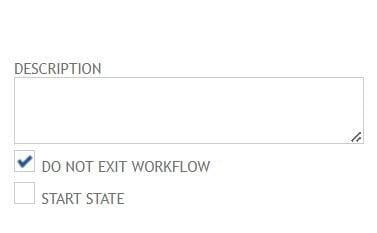
One more thing to remember is that this Lock Record action will only be triggered if the record remains in the state of the workflow containing the Lock Record action. Therefore, if you put this Lock Record Action in the final state of your workflow the record could exit the workflow entirely meaning it will no longer be locked.
To overcome this you can use the Do Not Exit Workflow setting in your state. This setting means that the record will remain in that workflow state indefinitely. You can always change this setting at a later time OR create a transition to another state at a later time if your business requirements change in the future. However, if using this Lock Record Action in your final state of your workflow we recommend using the Do Not Exit Workflow setting to make sure your record remains locked.
Keeping records locked from users can have real benefits to help maintain data consistency and accuracy. We have worked with customers where Purchase Order cannot be changed after they are received and billed for compliance purposes. Also, to keep bookings reports consistent month to month Sales Order can not be updated after a month has closed. These are all real world examples of how the Lock Record Action can assist in supporting your business needs and processes on a daily basis.
If you would like to learn more about how to use workflows in your organization then be sure to read through all our blog posts and check back often for the newest tips and tricks.
Also feel free to reach out to us anytime with questions and we will be happy to help in anyway we can.