
Natively, when working with workflows you can send an email at almost any point within the workflow. You can also define if you would like to include a copy of the current record as a PDF attachment. Unfortunately, you cannot define a specific PDF template to be used, NetSuite will only use the "preferred" form to designate which version of the PDF template to use when generating your PDF. This can lead to a lot of confusion and frustration as you have to make many different custom forms then try to switch you record between custom forms throughout your workflow to ensure the correct PDF is being generated for your email.
With the MGBC Create and Attach PDF custom action you can define ANY PDF template to use when generating a PDF file (even if it's not the preferred template). Then generate and store the PDF in a field of your choice. Now you can use the native Send Email action to send that newly created PDF as an attachment in your email.
To start, decide where in your workflow you would like to email out a custom PDF. In this example, we want to email one of our outsourced suppliers a custom version of a Quote so they can review the order with us. We would like to approve the Quote internally first then email a copy of it to the supplier.
(If you need help setting up your workflow or you are new to workflows take a look at our Build your First Workflow blog post.)
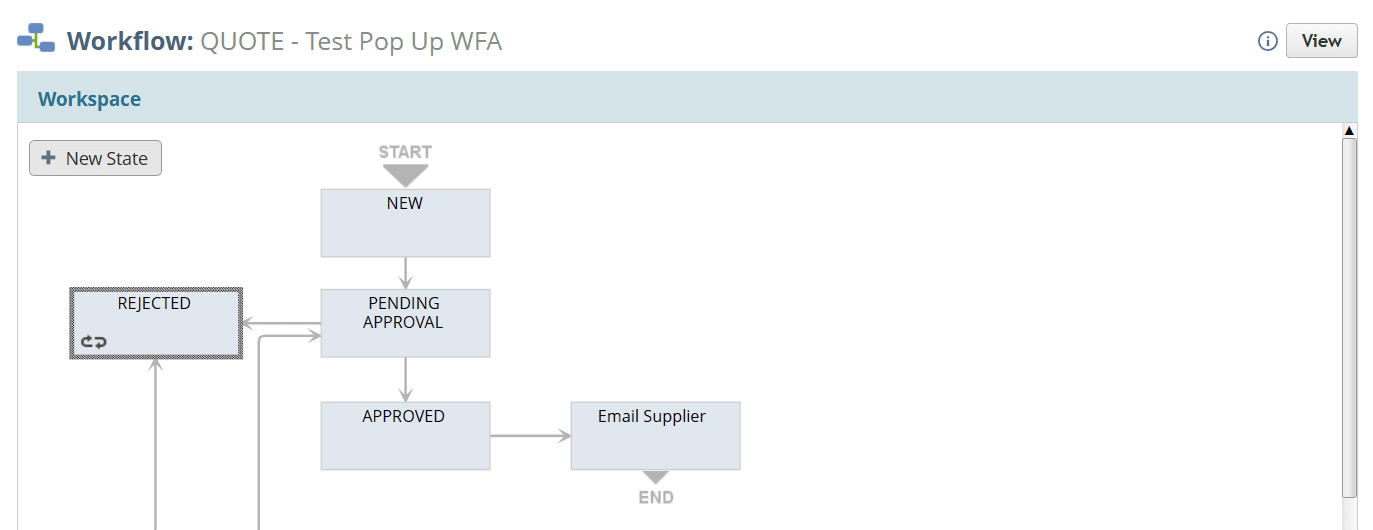
- Now open the approved state and add the MGBC Create and Attach PDF custom action
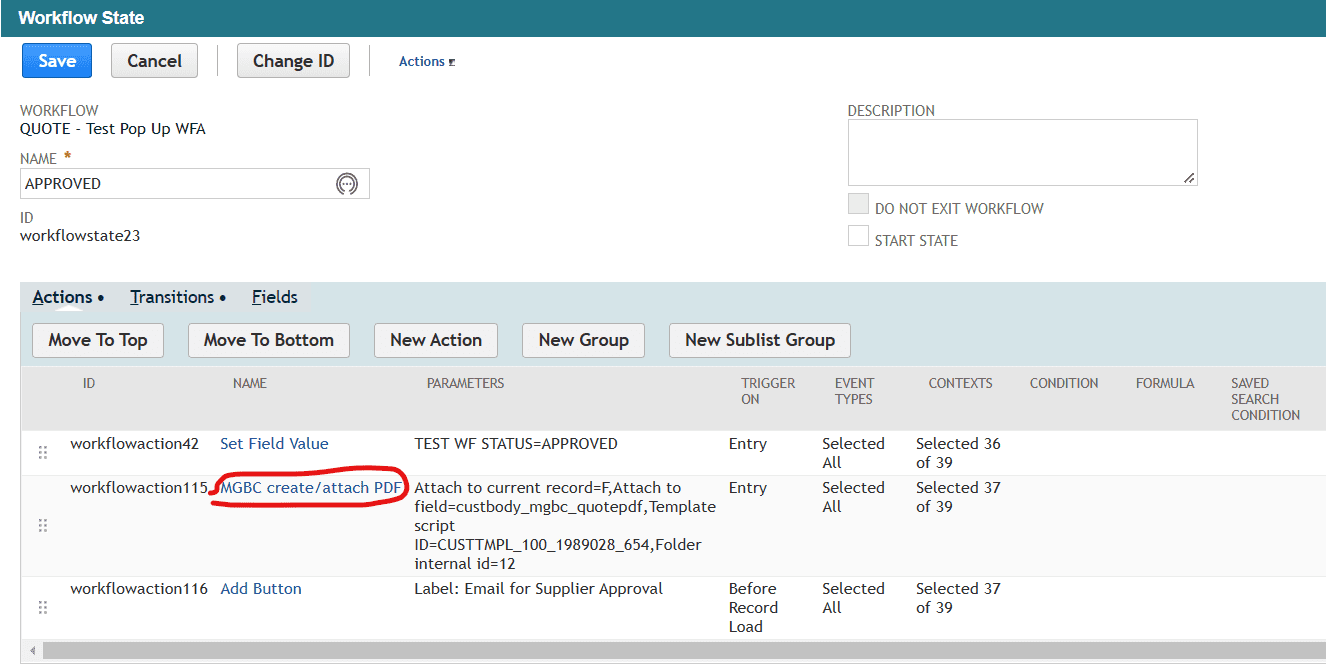
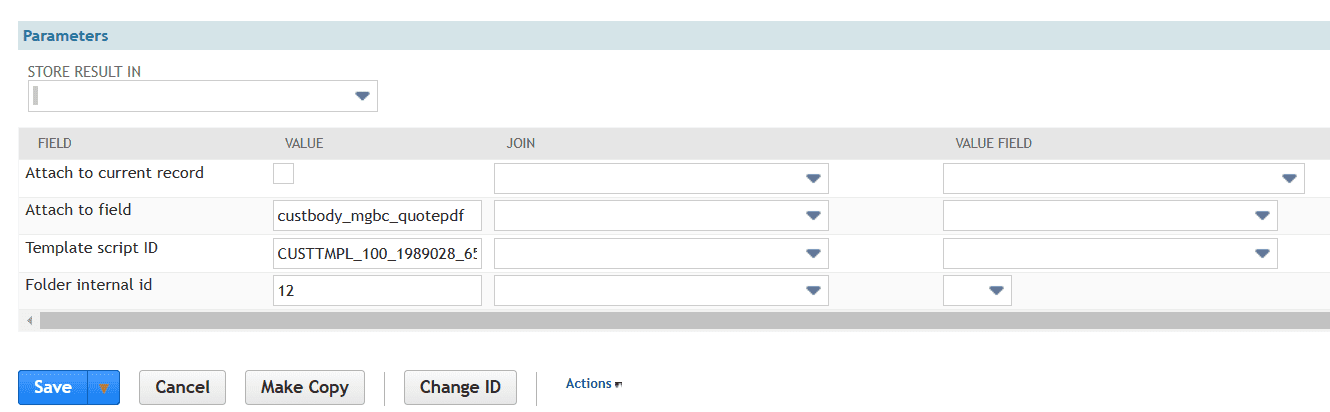
- In the custom action we can define the parameters to make sure we get the correct template
- In the Attach to field parameter set the internal ID of the field on your Quote where you would like the resulting PDF stored. (This should be a Document type field)
- In the Template script ID field copy and paste the script ID from the Advanced PDF/HTML Templates page. (Make sure that the template you are trying to use matches the Record Type you are working with in your workflow.

- Lastly, define what File Cabinet folder you want the generated PDF to be stored in. (If you do not define a folder the default one will be used).
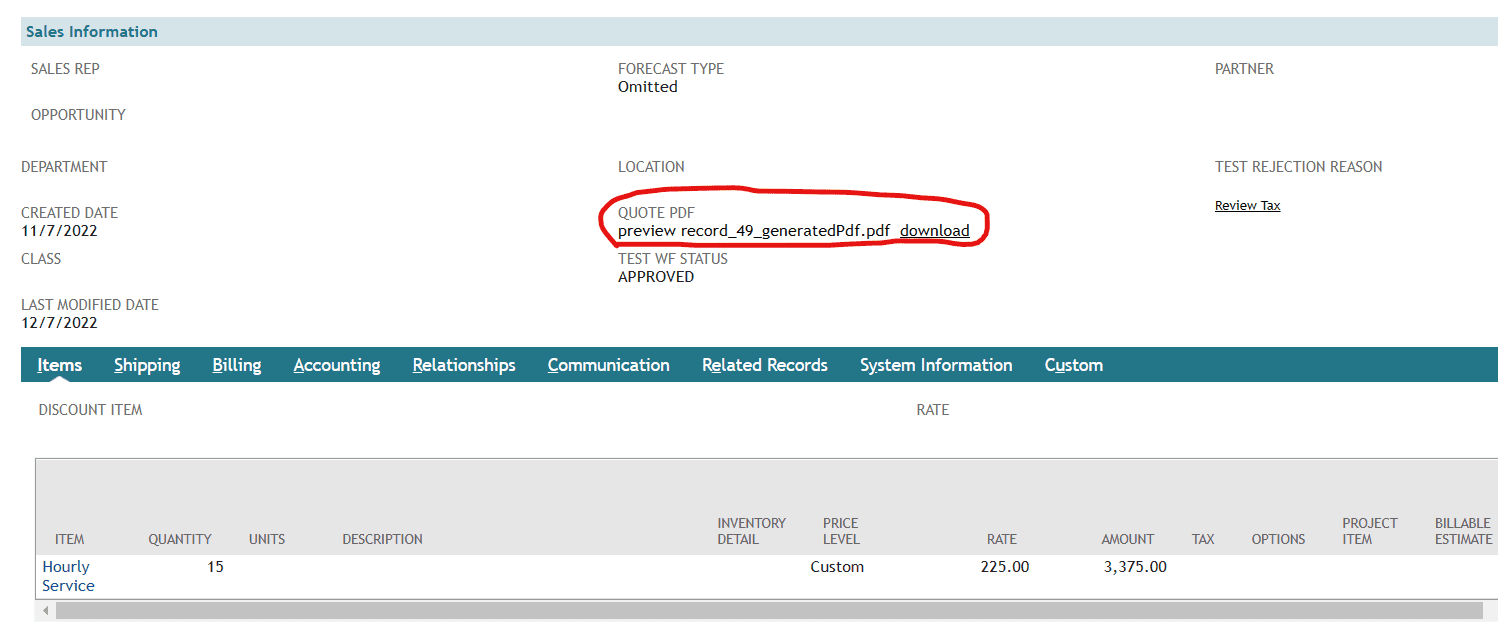
- Now when our Quote enters the Approved state of our workflow you can see that a PDF is generated and stored in the correct custom field.
(Note you can hide this field or store it on the Custom subtab if you do not want it prominently displayed on your transactions)
- The last step is to now use this file in the native Send Email action. To do so configure your Send Email action as you normally would, however, be sure to UNCHECK the Include Transaction box and use your custom Document field in the Attachment section of the Send Email action.

There are endless possibilities opened up with this solution that allow you to minimize the maintenance and management of tiresome PDF templates and custom forms. With this option you can make one preferred form for all standard functions but now just create a new standalone PDF template and use it whenever needed. However, this new PDF template will NOT interfere with your standard forms and documents as it can be controlled directly from within your workflow and you don't have to worry about which templates are default and which ones are assigned to which transaction form.
Take a moment to comment below on how you have used this awesome feature and ideas of applying it in your environment.