
There are many great 3rd party applications that you can purchase to help you manage your service and maintenance business for your customers. Many of them provide an amazing range of functionality to can really help to make service dispatch and management much easier. However, there are times where these 3rd part apps are just too much and they can become overwhelming. Also, they may not fit into your current budget. This is where workflows can help you make a DIY service request/dispatch system for your customers.
In this example we are going to build a request form for your customers to use to request service. Then we will use workflows to schedule a service call. Your service tech can use the Netsuite mobile app to complete the service call and log necessary information like diagnosis, root cause, solutions and even their hours worked. Then we will use workflows to automatically Invoice the customer for the work performed.
To start we will use a Custom Record to create a Service Request form that our customers can fill out online. The native NetSuite online forms are not the most aesthetically pleasing, but they get the job done. Plus if you have experience with HTML you can update your online form to look however you want.
- Create a new Custom Record type and name it "Service Request". Then add whatever fields you want so you collect the correct information from you customer.
The nice thing here is that this is completely customizable to your organizations' needs, so make sure to add as much detail here as you can without overwhelming your customer with questions.

- Next go to the Online Forms subtab of your custom record and create a new Online form. Map the Online form fields to your existing custom record fields. Make sure that you put in help information and mark mandatory fields as needed so your customer can quickly and easily request a service call.
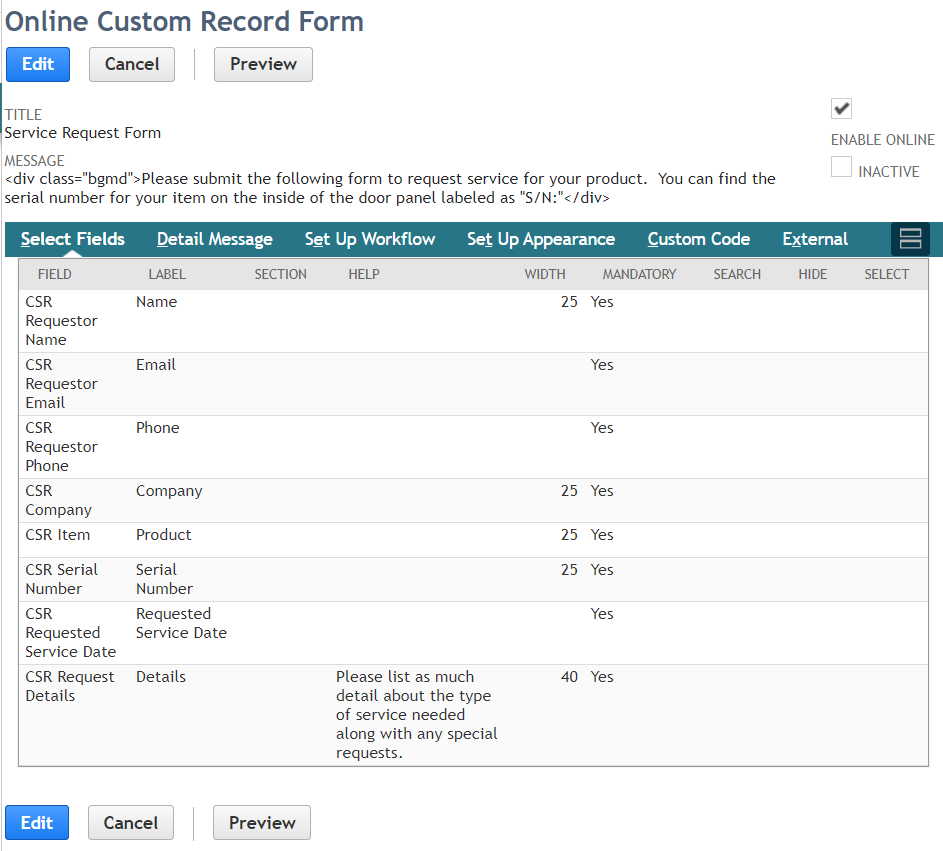
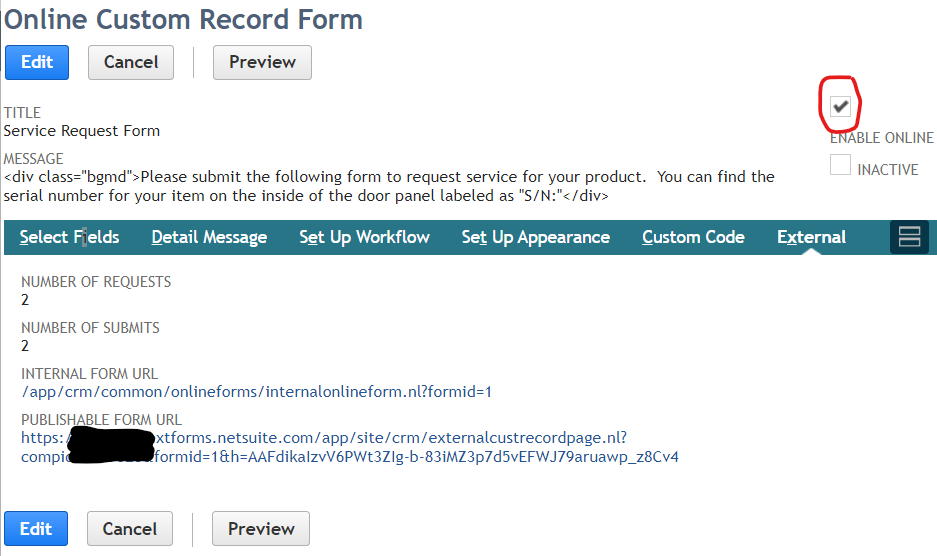
- You can use the Setup Appearance tab to do some basic formatting of you online form like colors and logos. Optionally, use the Custom Code subtab to upload a script file for more enhanced functionality. Lastly, be sure to check the "Enable Online" checkbox and copy the Publishable Form URL so you can embed it on your website or share it with your customers.
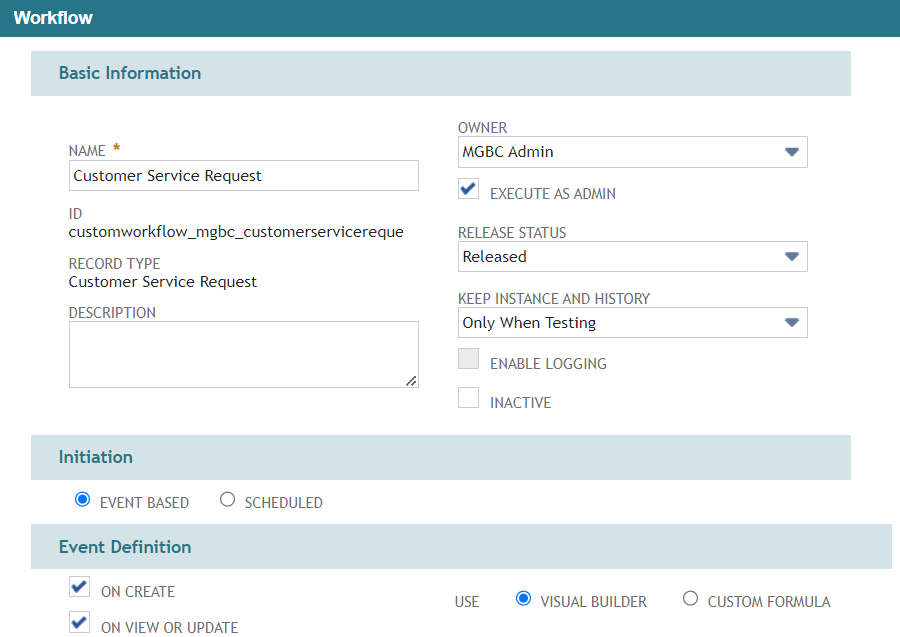
- Now it's time to setup your first workflow. This one will be running on the Service Request custom record we built. This way you can use the Service Request record almost like a Case that you will "walk through" the process of performing the service call. This will be an Event Based workflow as we want the service rep to interact with it.
(Alternatively, if you would like to use Cases for this instead of a custom record you can do that as well. The cases have their own logic and automation behind them that you would have to contend with, but if that fits your business needs better it totally works with this whole concept.)
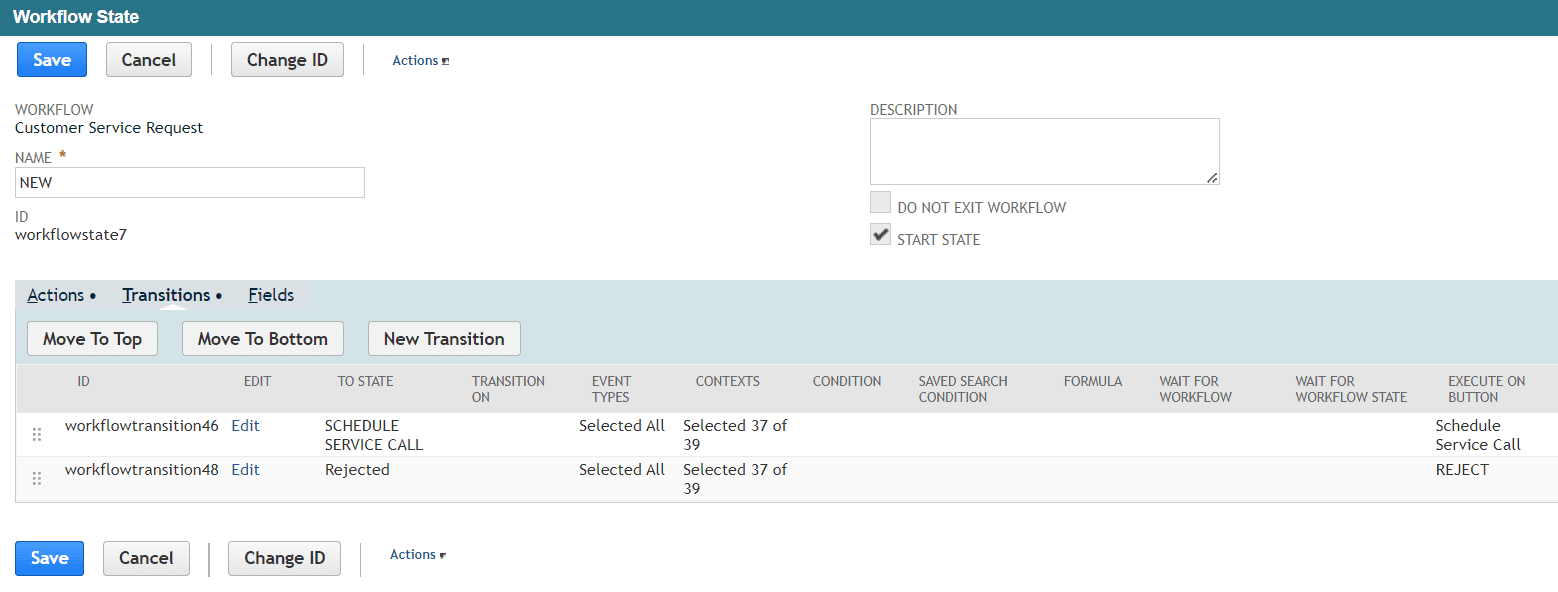
- Next we will use State 1 as our Entry state that will hold the Service Request until a service rep can validate the request and also reach out to the customer for more information. Here we have added a few buttons to help the Customer Service rep walk this request through the workflow properly. The intent here is that they would reach out to the customer and confirm the information entered, assign this request to the correct Customer Record and then click Schedule to move to the next state.
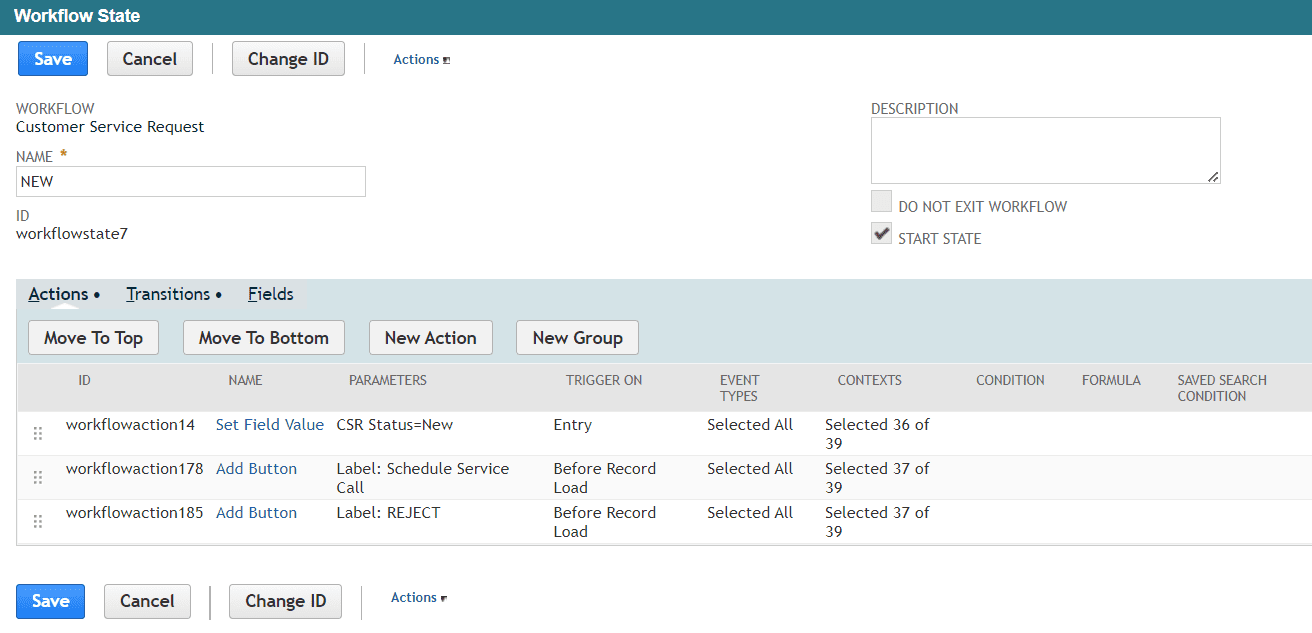
- Note that we have added two transitions here, one for each button. This way the customer service rep can choose to move onto the next step and schedule a call OR reject this request if it is not valid. Either choice is just a simple click of a button for the service rep.
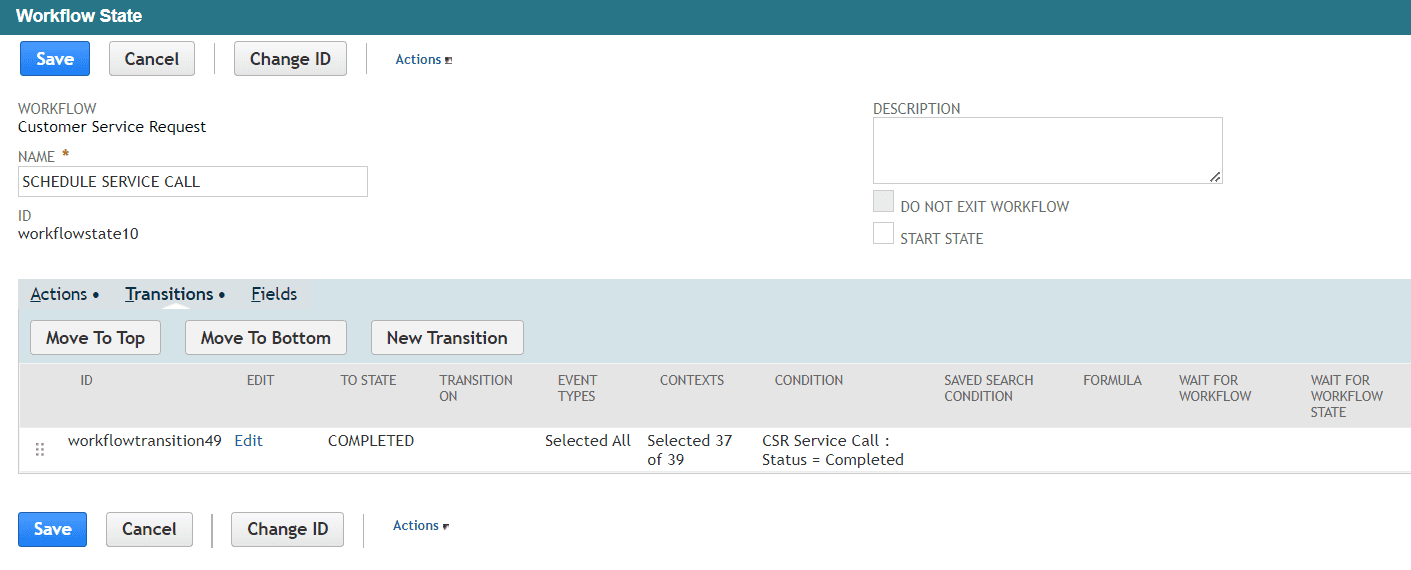
- Next in our Schedule call state, we will leverage the native Event record to help us effectively schedule this service while still managing our Service Techs schedule.
Here we have used a few native functions to help the user quickly and easily complete the scheduling task. The first step is to create an Event record where you can store the created record into a custom field on your Service Request record. Within the create record action we are setting many required fields like the date, customer, reminder type and other fields to help the service rep avoid data entry errors. Then we are using the Subscribe to Record action so that this workflow subscribes to the created Event and we can use changes to that Event record to process transitions in our current Customer Service Request workflow. Last we are using the Go to Record action to navigate to the Event record we created so the customer service rep can add more information to the Event.


Within the NetSuitedocumentationregarding the Subscribe to Record action it states that this action is intended to be used in conjunction with the Create Record action. The two must be added to the WF state one after the other to make sure it functions properly. We have successfully testing using the Subscribe to Record action in other capacities and sequences, however, the functionality is not consistent. It is best to follow NetSuite's prescribed best practice and use the Create Record and Subscribe to Record one after the other, then follow with the Go to Record if you would like to redirect the user to the new record you created. Furthermore, the record you create using the Create Record action should be stored in a Workflow or State field to then be referenced in your Subscribe to Record action. We recommend using a Workflow field here to ensure it is available throughout the workflow
- Now that we have subscribed to the Event we can transition our Service Request record to the next state when an update to the Event occurs. For example, if the Service Tech marks the Event as "Completed" then we can use that action to trigger our Service Request to transition to the Completed state.
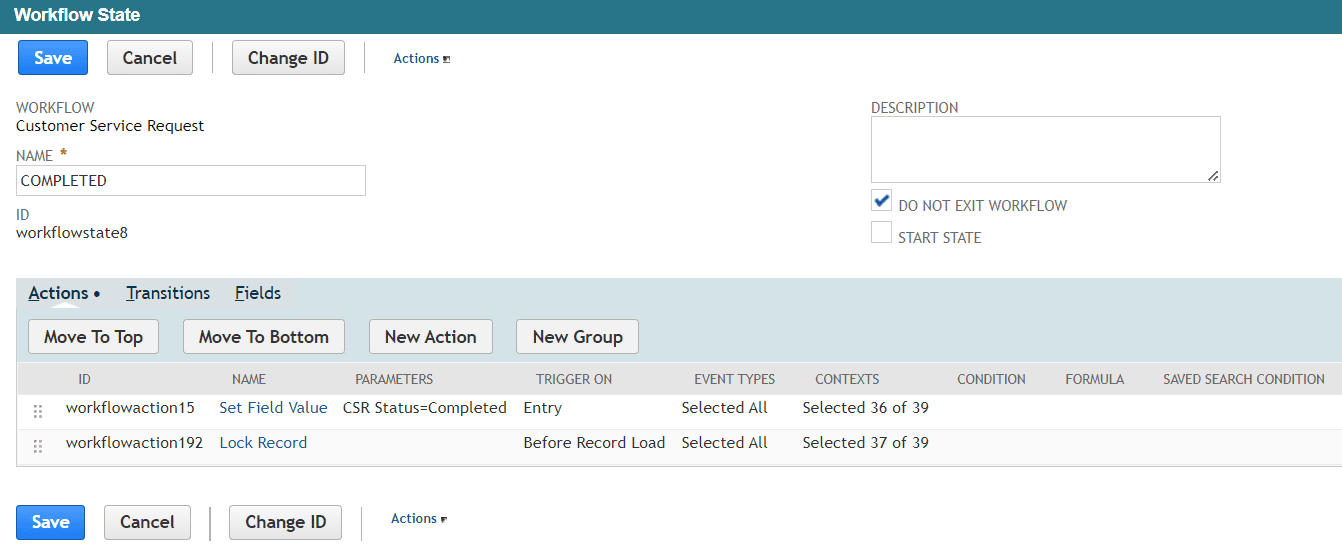
- Now in the Completed state we can lock the Service Request record (or perform any other actions) that are necessary.
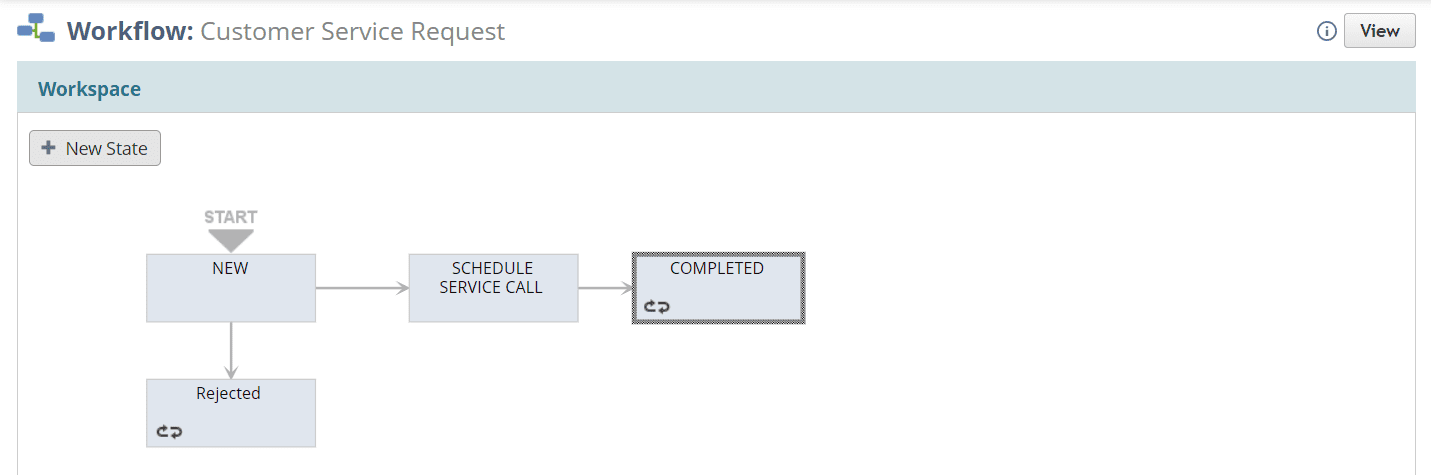
- Overall the workflow ends up looking like this and really helps drive a consistent process for your customer service reps.
- Create another workflow based on your Event record. Use a Go to Record action to redirect the service rep to a Sales Order transaction so they can create a Sales Order to manage the billing of this service call.
- Tie your Sales Order(s) and Invoice(s) to your Customer Service Request Record with a custom transaction body field so you can get a complete picture of the Service Request from schedule to billing
- As mentioned above you can use Cases instead of a custom record for your Service Request, then you can leverage native Case functionality AND your customer can review the Case in the native Customer Portal.
One more thing we'd like to mention is the additional features you can unlock by using Tasks or Events in NetSuite for your Service Techs. Not only does this help you manage schedule and calendars easier because it has NetSuite native calendar and availability functionality, but it also works with the Employee Center AND the NetSuite Mobile App. Any workflow and button you deploy to a record in the native UI will also be available in the NetSuite Mobile App as a button/action item.
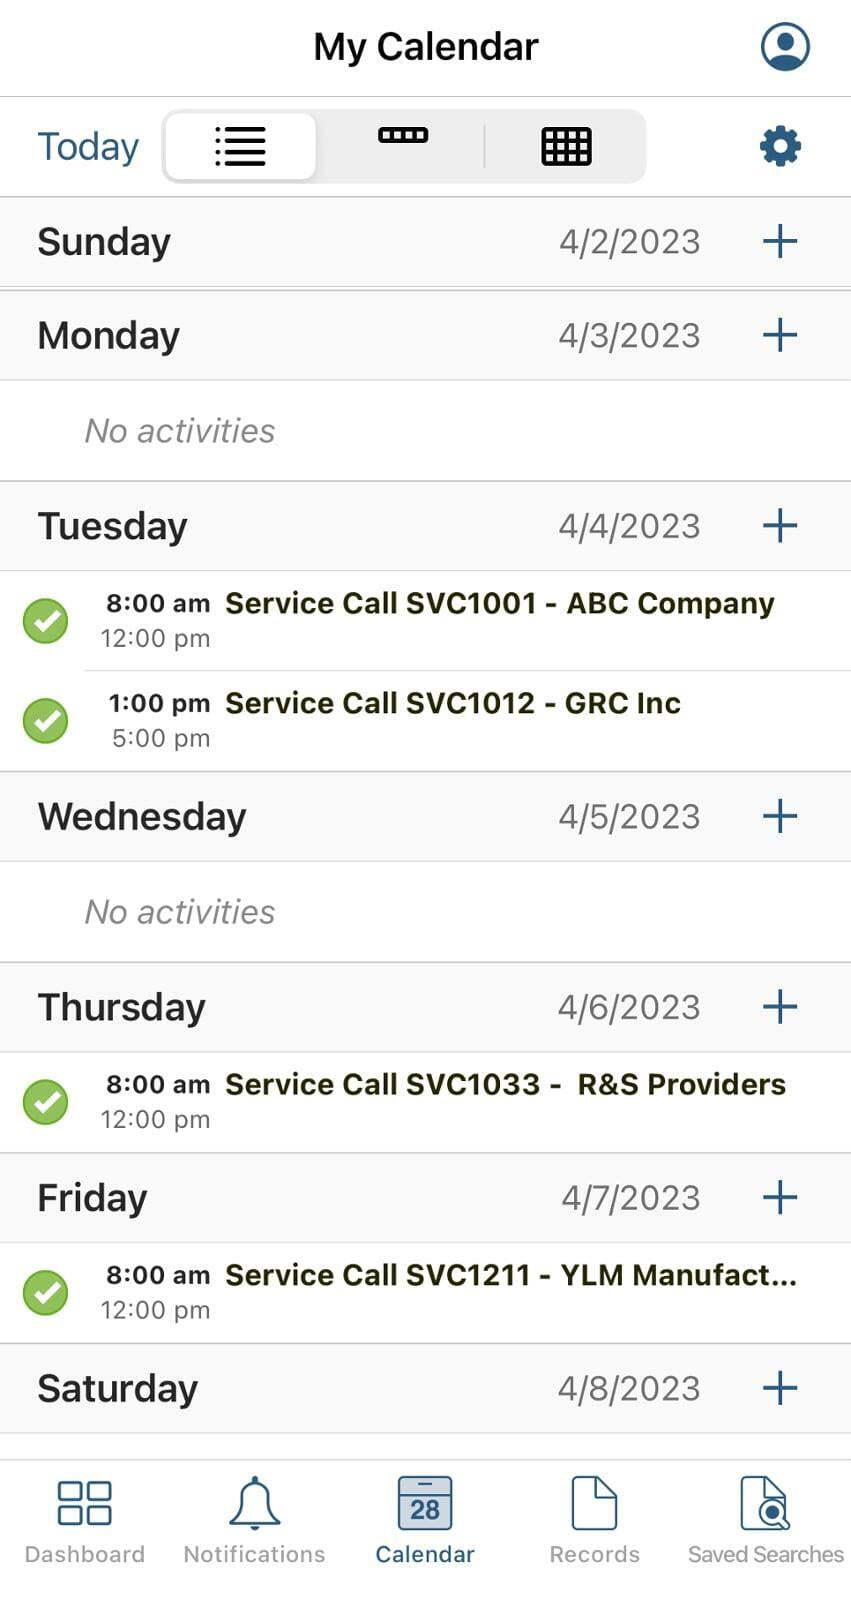
This way you can save on license cost and your Service Techs can utilize mobile devices while on-site to perform many functions throughout the Service Call such as:
- Provide detailed notes and or diagnosis codes
- Enter time worked or hours needed to complete the job
- Add follow up details or flag an event as for a Customer Service Rep to follow up
- Also the ability to add parts used on a service call if necessary.