Workflows in NetSuite can be an extremely powerful tool to help your business manage business processes and maintain data integrity. Users at almost any level can leverage workflows to perform simple automation tasks, complex approval matrices or even larger data updates. With just a little "playing around" and reading NetSuite's documentation, building your first workflow is not as daunting as it seems. Here we will walk through the steps we take to put together a basic approval workflow. However, these basics are a great foundation to build upon to step into larger more complex workflows.

One of the nice things about workflows is you can still "play around" with them even if you don't have a SANDBOX account. With the Testing status your workflow will only be triggered for you, so any other user will not be effected by a workflow that you are still working on. It is highly recommended that you use a SANDBOX account whenever possible, but if you don't have one available the Testing status is a very nice second option. The other options for statuses are Released, Not Initiating and Suspended. While Not Initiating and Suspended may seem like duplicate options, there are intricacies that are useful and important to understand. The Released status probably goes without explanation, but that will make your workflow effective for ALL users and ALL records that meet the criteria in your configuration. The Not Initiating status will stop the workflow from initiating for any NEW records created, however, existing records will continue through the workflow as it is setup. Suspended means that all records will stay in the current state they are in and not initiate new records OR transition existing records to new states in the workflow.
Now that we understand how to test and deploy workflows let start setting up an approval workflow for Expense Reports. Another nice feature NetSuite provides is you can leverage native fields and G/L impacting settings, while still building a completely customized workflow. Under Setup > Accounting > Accounting Preferences go to the Approval Routing tab.
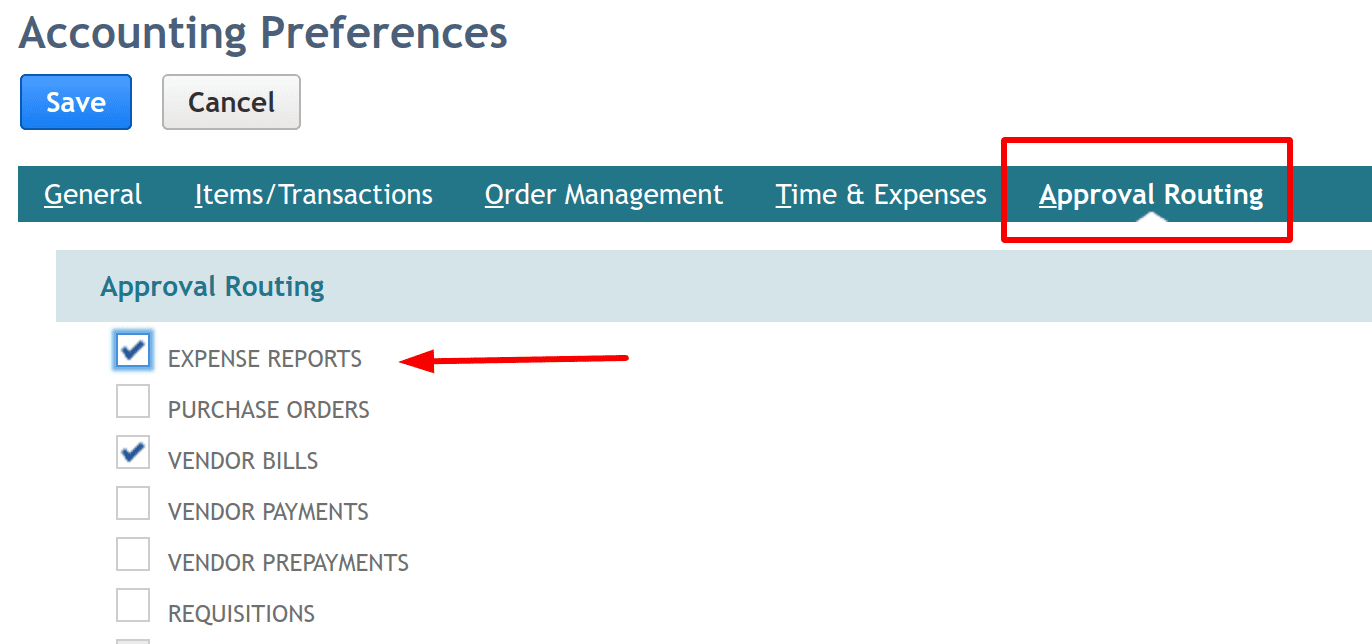
Then enable the Approval Routing feature for the transaction(s) of your choice. Once enabled we can begin to build our workflow.
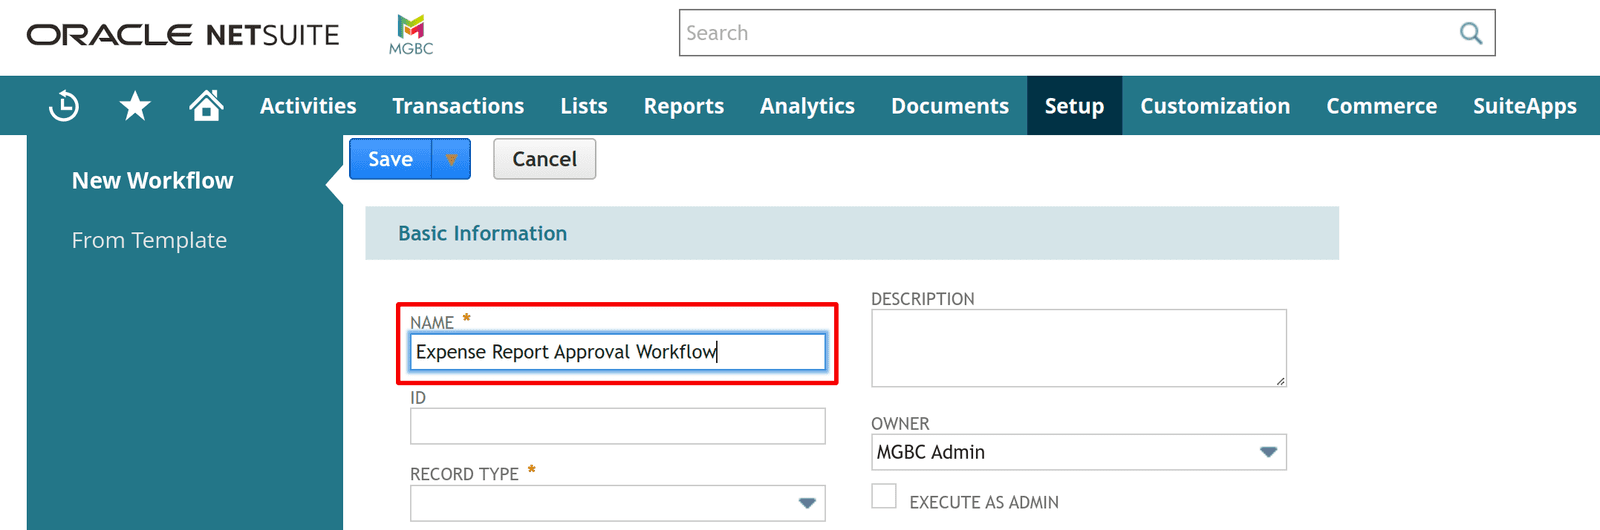
- Start by navigating to Customization > Workflows > Workflow > New and give your Workflow a name.
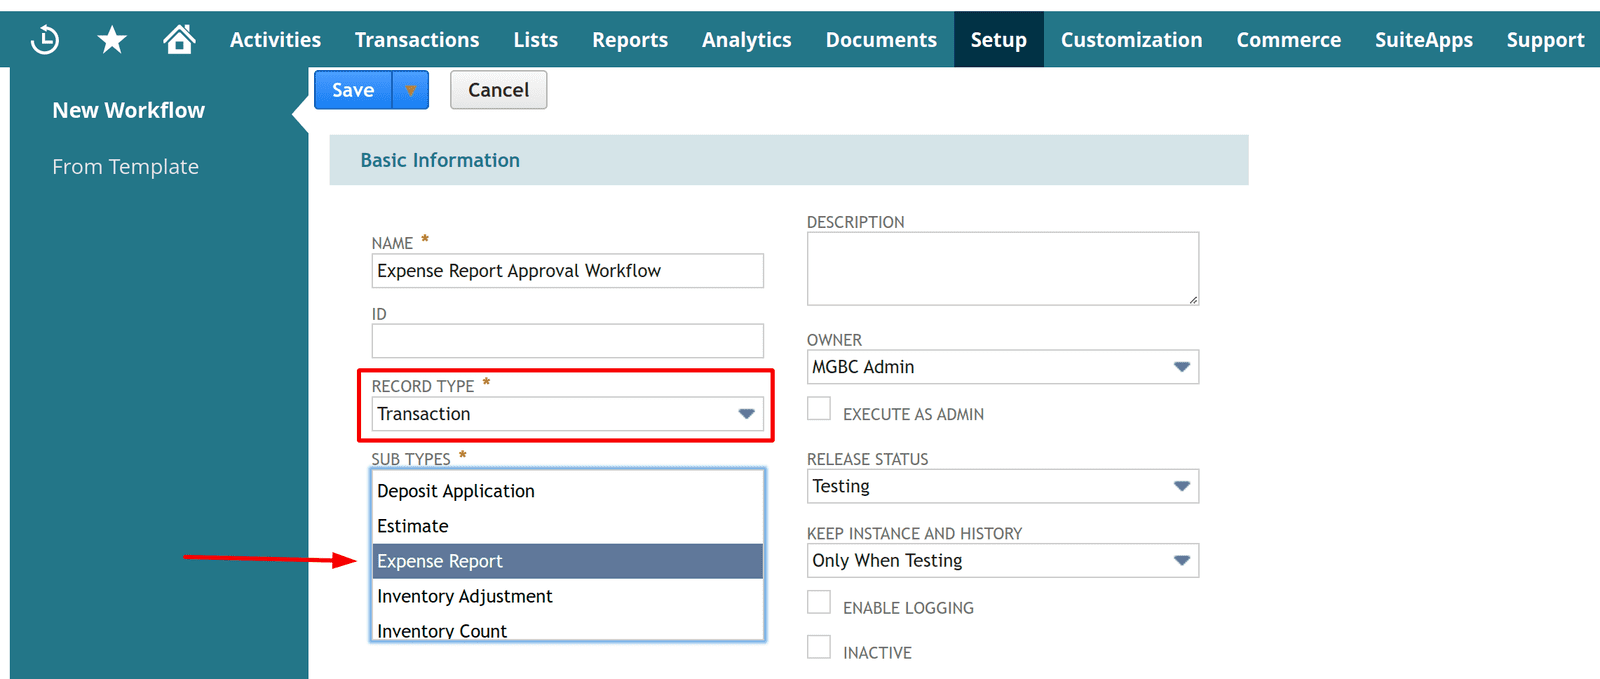
- Then in your workflow configuration select the Type as Transaction and the Sub Type as Expense Report.
- Next we want to choose Event Based as the initiation type and mark the Create and View/Edit checkboxes. This means the workflow will initiate when a new Expense Report is created OR when it is Viewed and/or Edited.
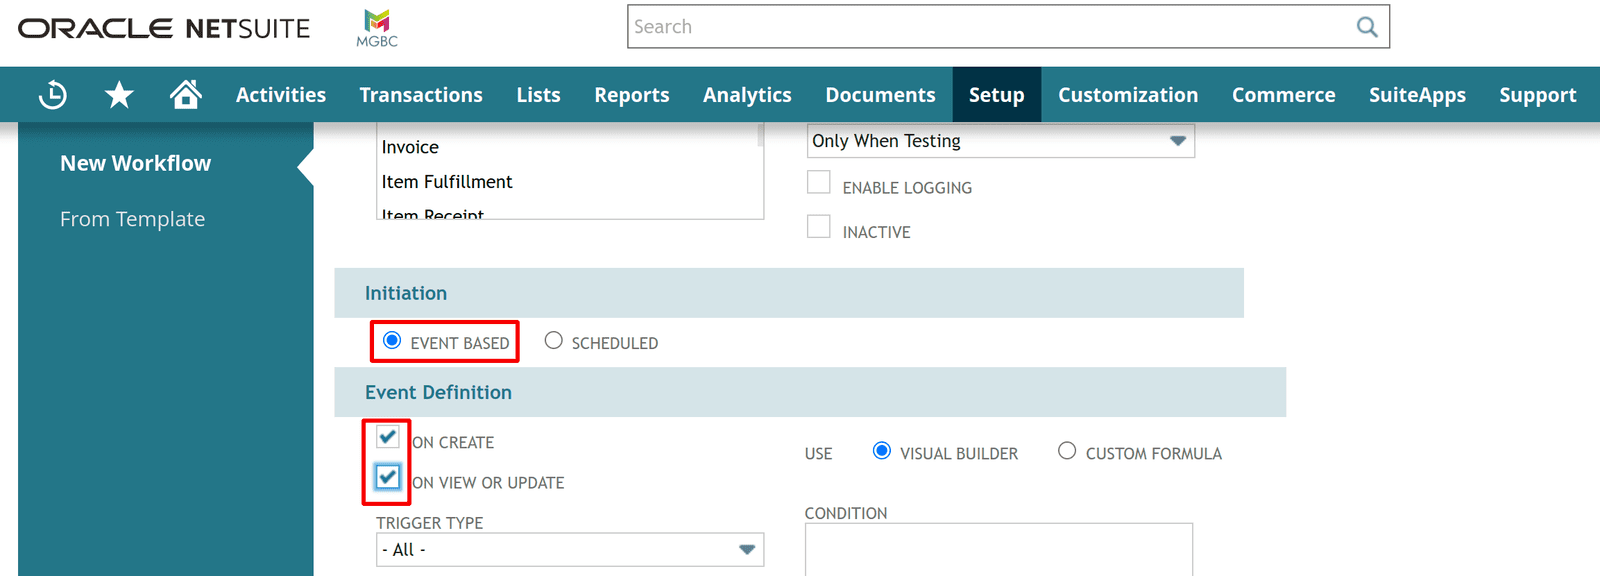
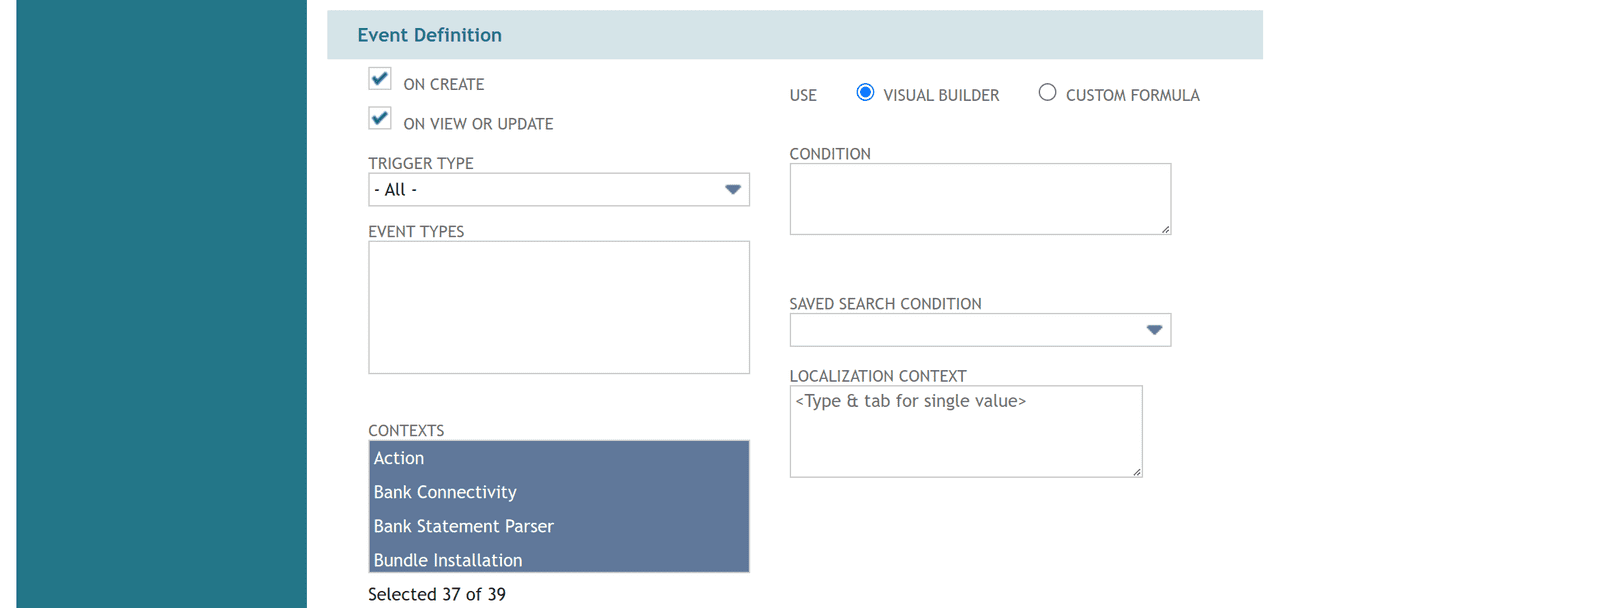
- Here you can also set specific criteria (either condition based or by creating a Saved Search with the criteria you want) on the Expense Reports that should trigger the workflow. For example if you only want approval for Expense Reports created in a specific subsidiary, then set that subsidiary in the Condition field. You can also define a Trigger Type that will define when in the process of creating a storing a record the workflow will trigger. These additional options can get complex so I usually try to leave these as "open" as possible. These types of restrictions on the overall workflow can conflict with conditions within the workflow on specific actions. I try to leave the overall workflow configuration as unrestricted as possible and then use conditions within the actions, transitions and states to manage these specific scenarios.
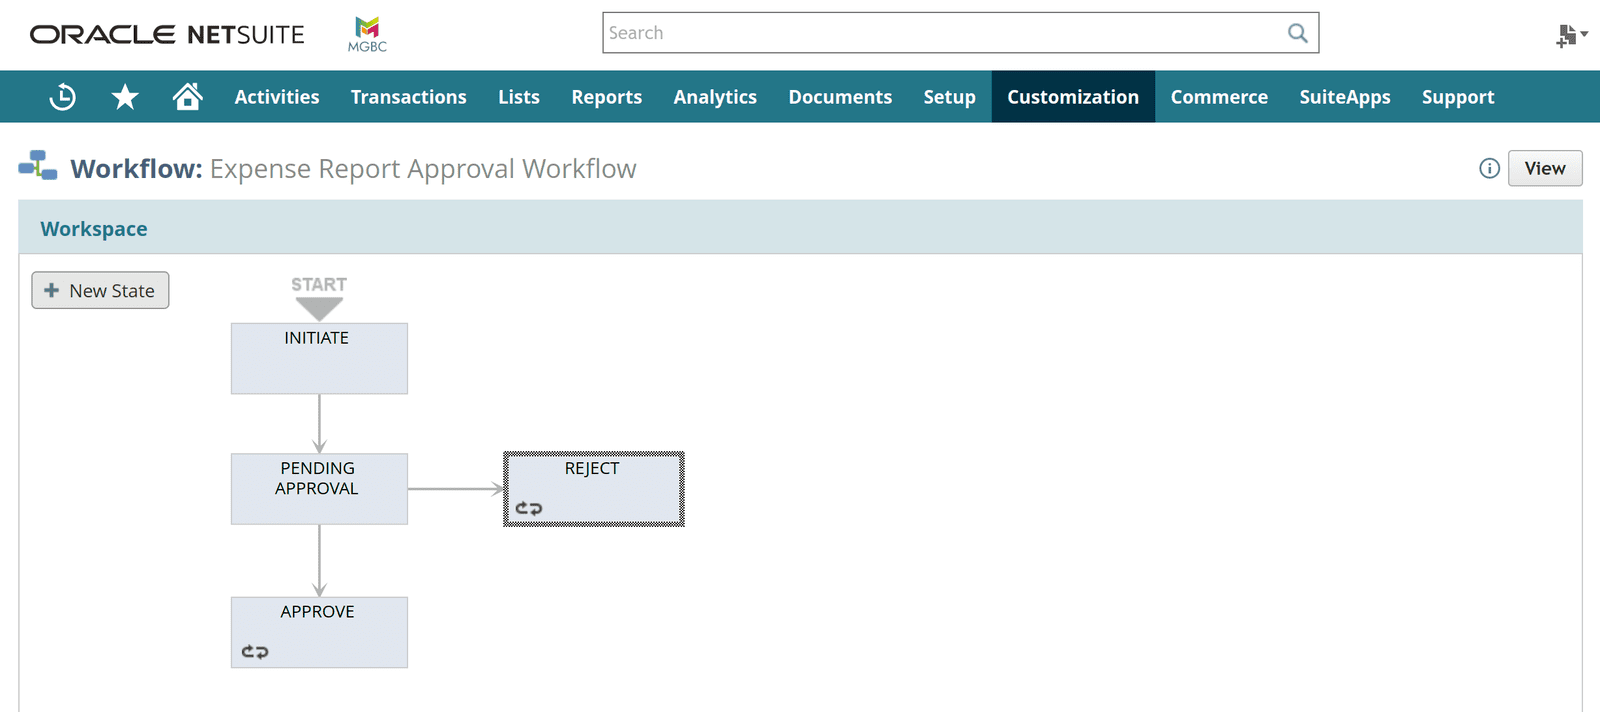
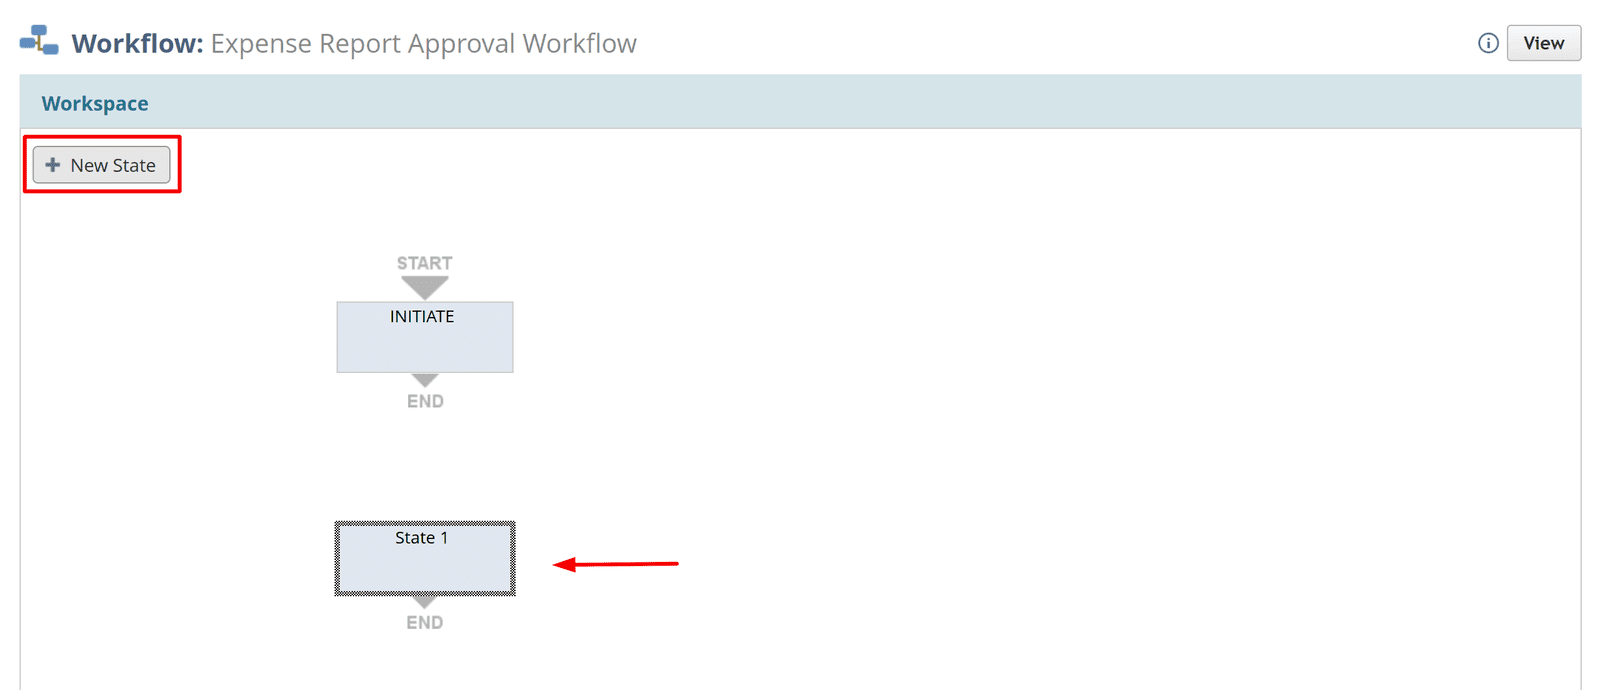
- Now click the Save button and your workflow will be saved and the workspace will be opened with one Initial State pre-populated.
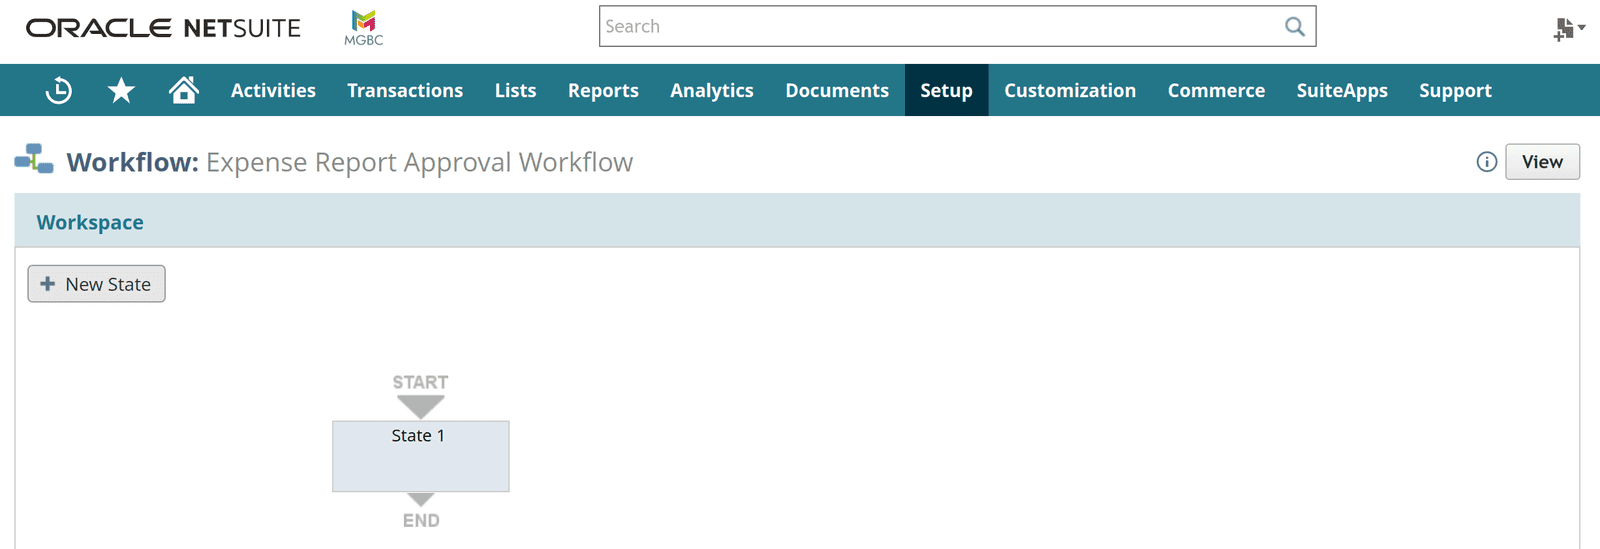
- Your first state will be the Initiate state, which will be like an intake state for new Expense Reports and here you can start to perform initial actions and filter all Expense Reports into the correct subsequent states. Double click on State 1 and then Click the New Action button.
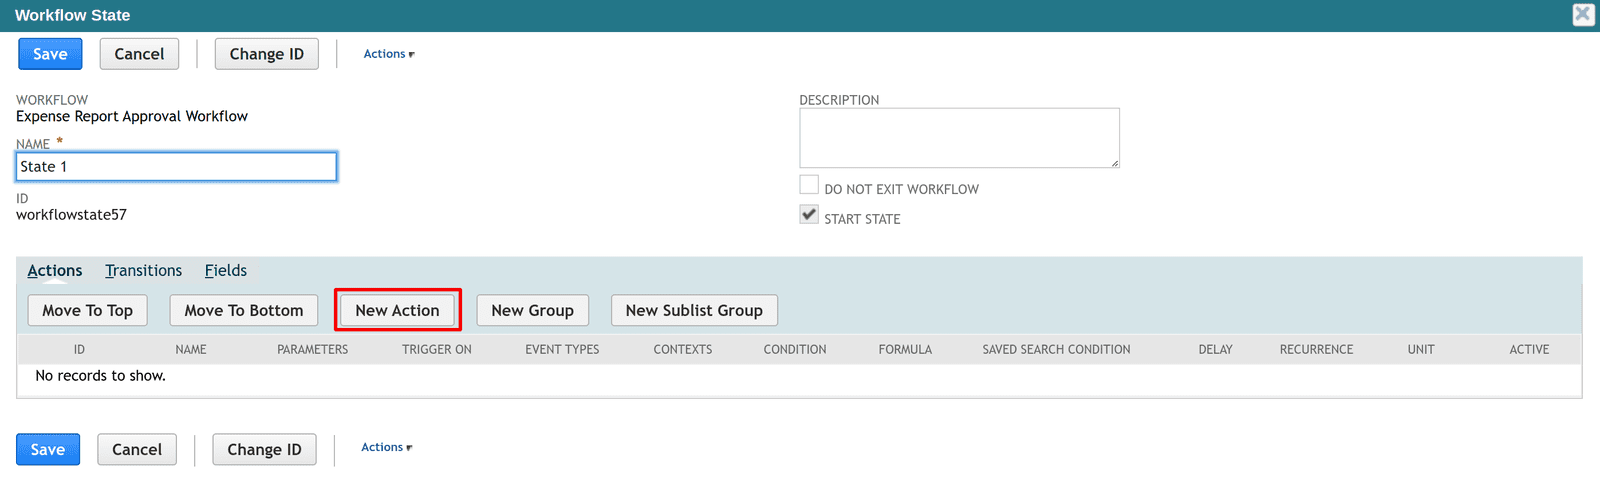
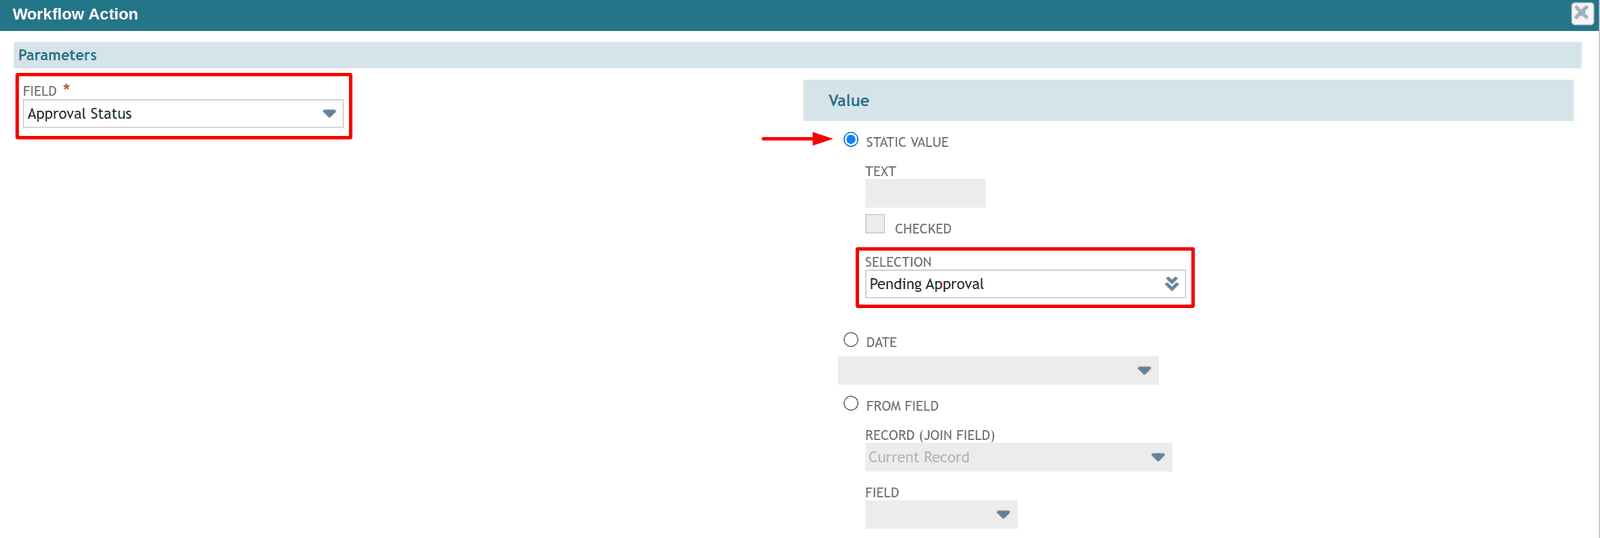
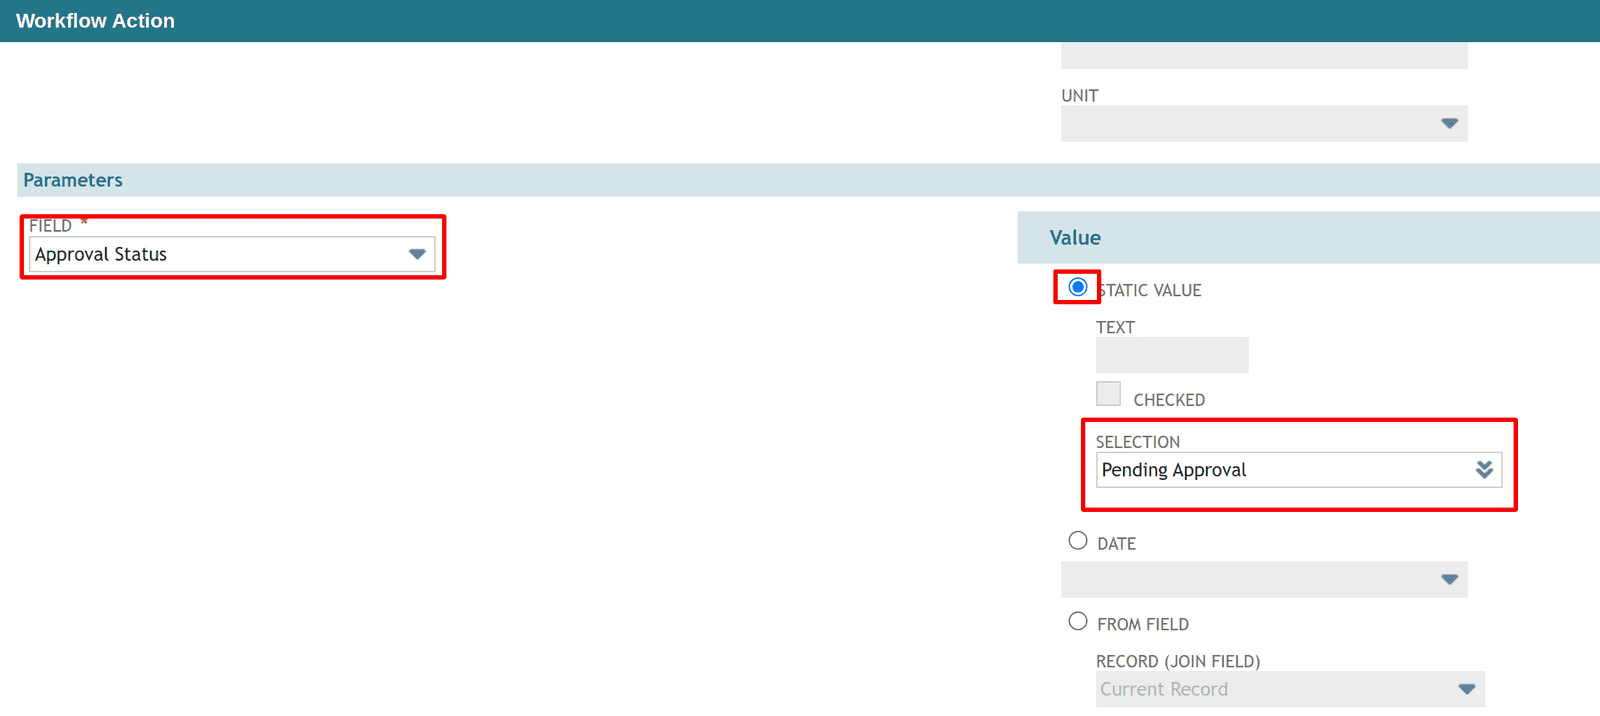
- In the Actions list select the Set Field Value action. Then choose the Approval Status field as the field to set the value of. And set a static value of Pending Approval.
- Next we will choose the Entry selection for Trigger On as we only want the status to be set when the record first enters the state, NOT every time it is Viewed or Edited. Here is where you can add conditions for each action that gives you more control over how your workflow interacts with Expense Reports, rather than putting overall conditions on the workflow itself.
For more information on Workflow Triggers, Event Types and Contexts read our post about how to use these parameters most effectively.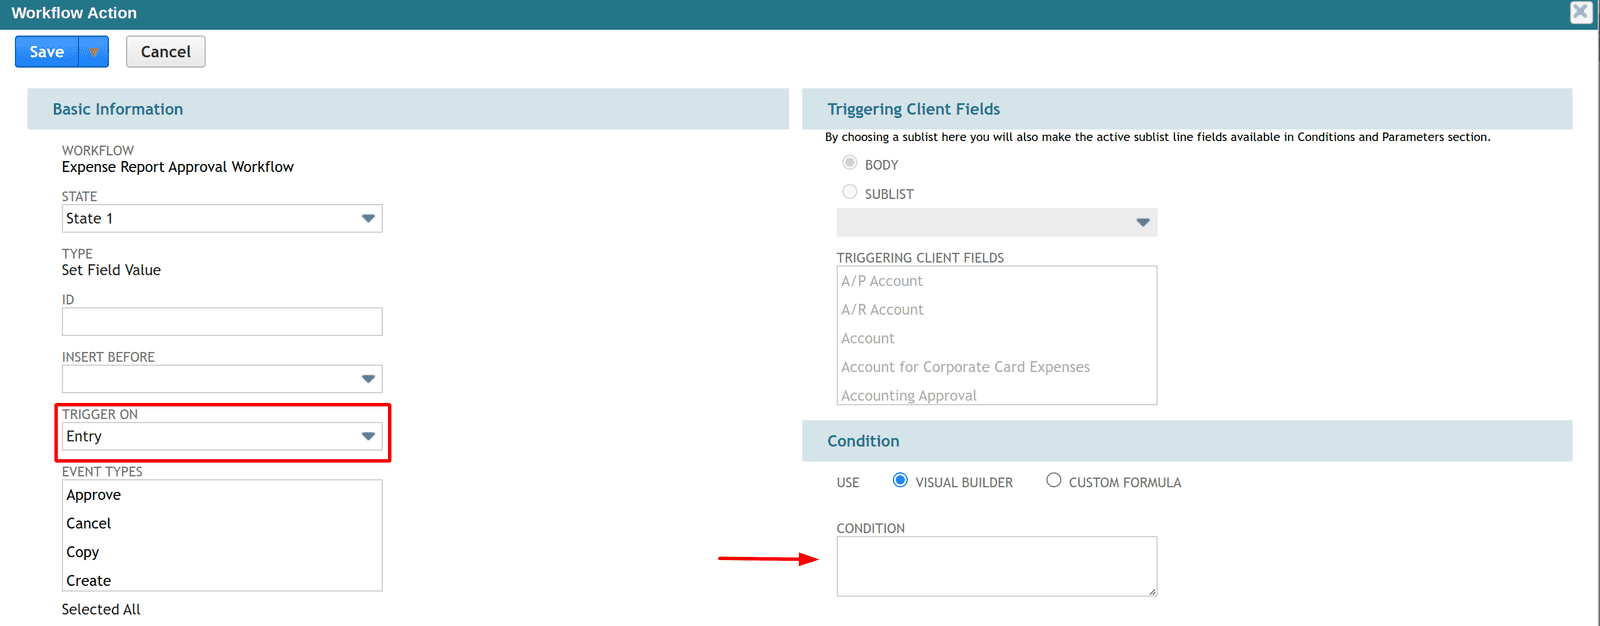
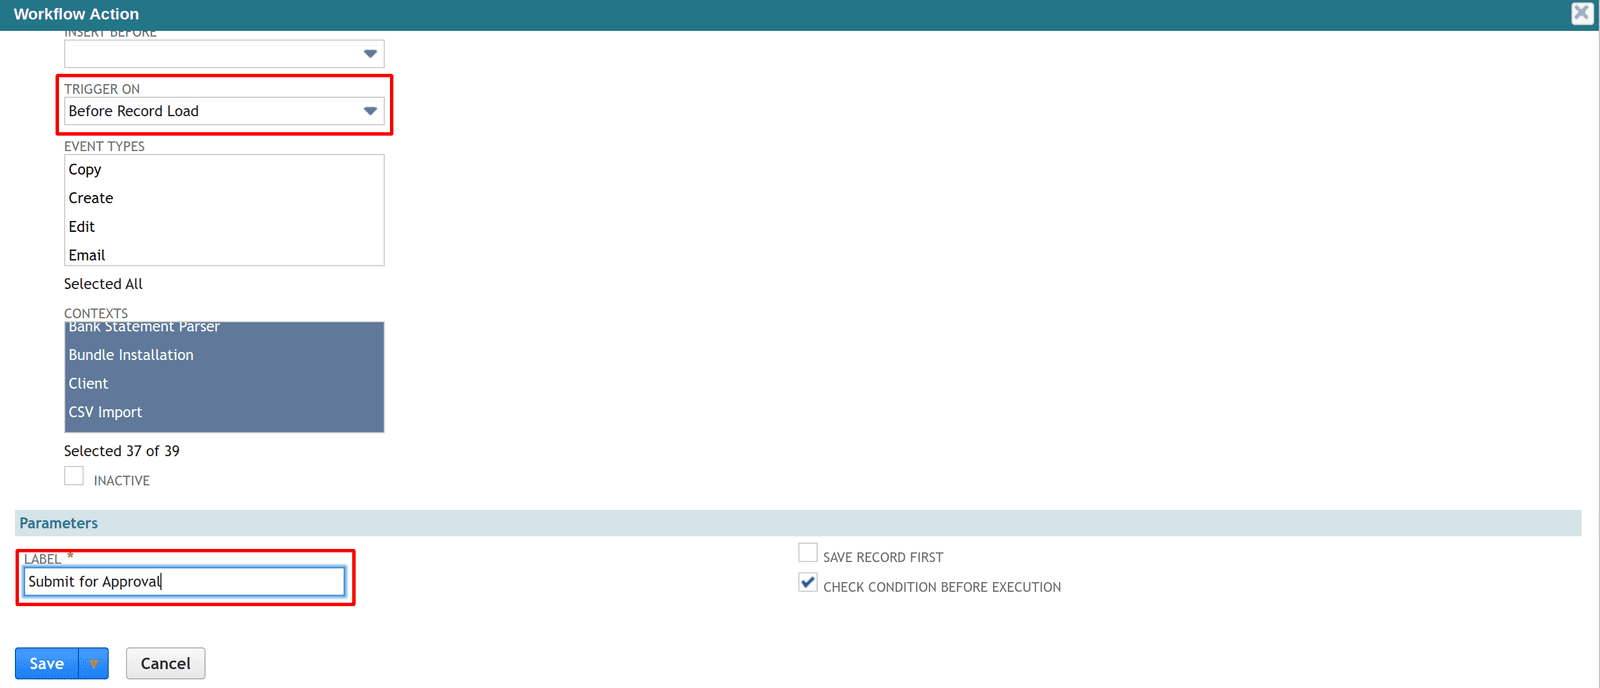
- Click Save on this action. Then select New Action and select the Add Button Action. In the parameters set the Button Label as "Submit for Approval". We will also use the Before Record Load trigger so the button is added while the record is loaded from the database.
- The Save Record First checkbox can provide nice functionality for the users. If you check this box the "Submit for Approval" option will be added to the Save & menu at the top of the Record. (For example there is Save, Save & Print, etc. If you check the Save Record First button, there will now be an option for Save & Submit for Approval)
Give this state a name and Save it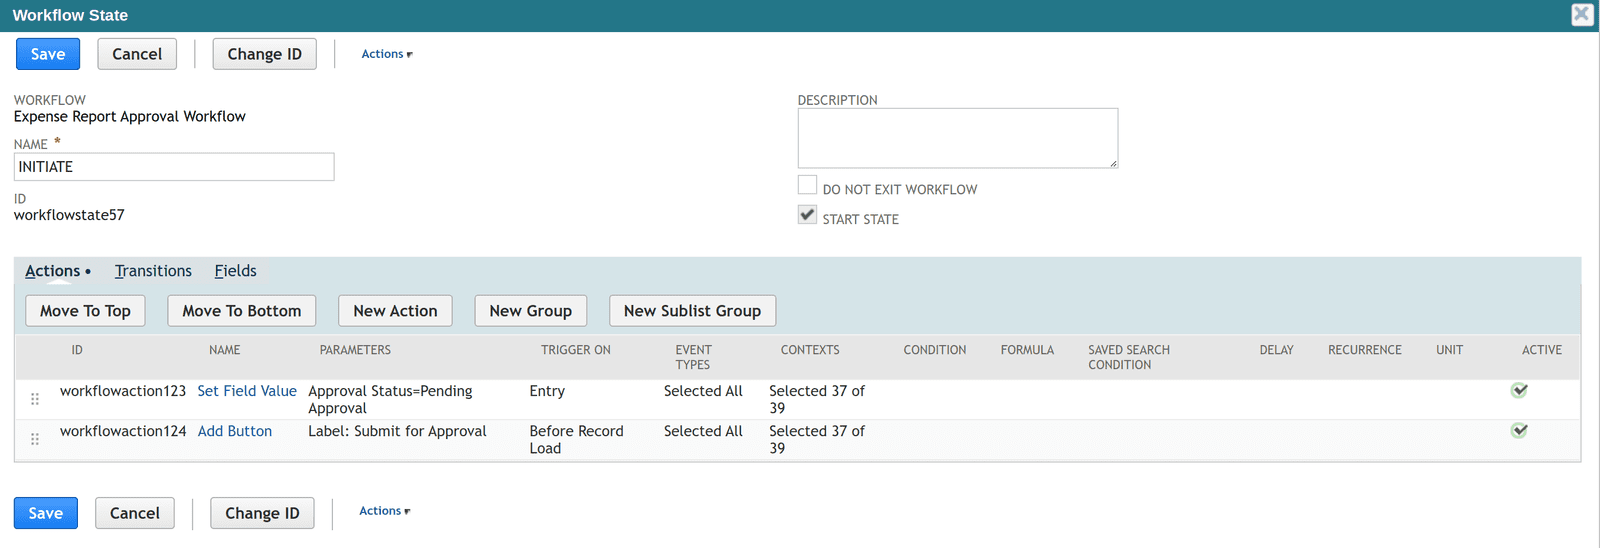
- Now let's add another state into the workflow so we can make a transition to it, by clicking the New State button.
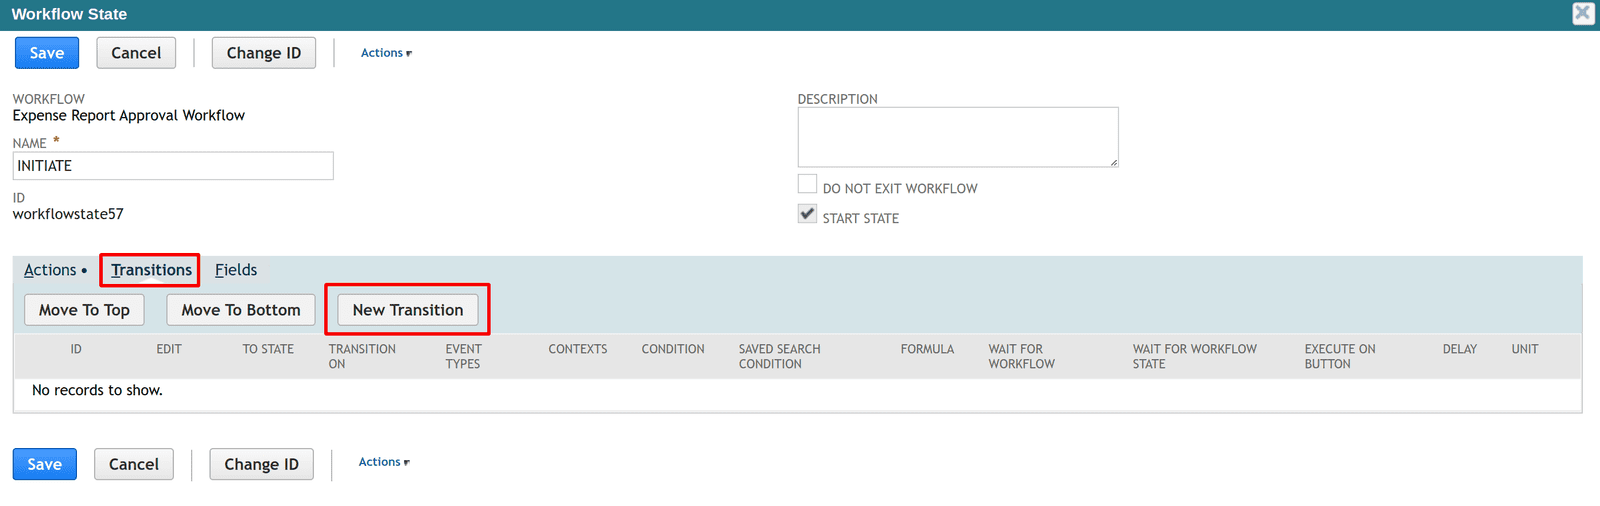
- Double click on the initiate state and then click on the New Transition button
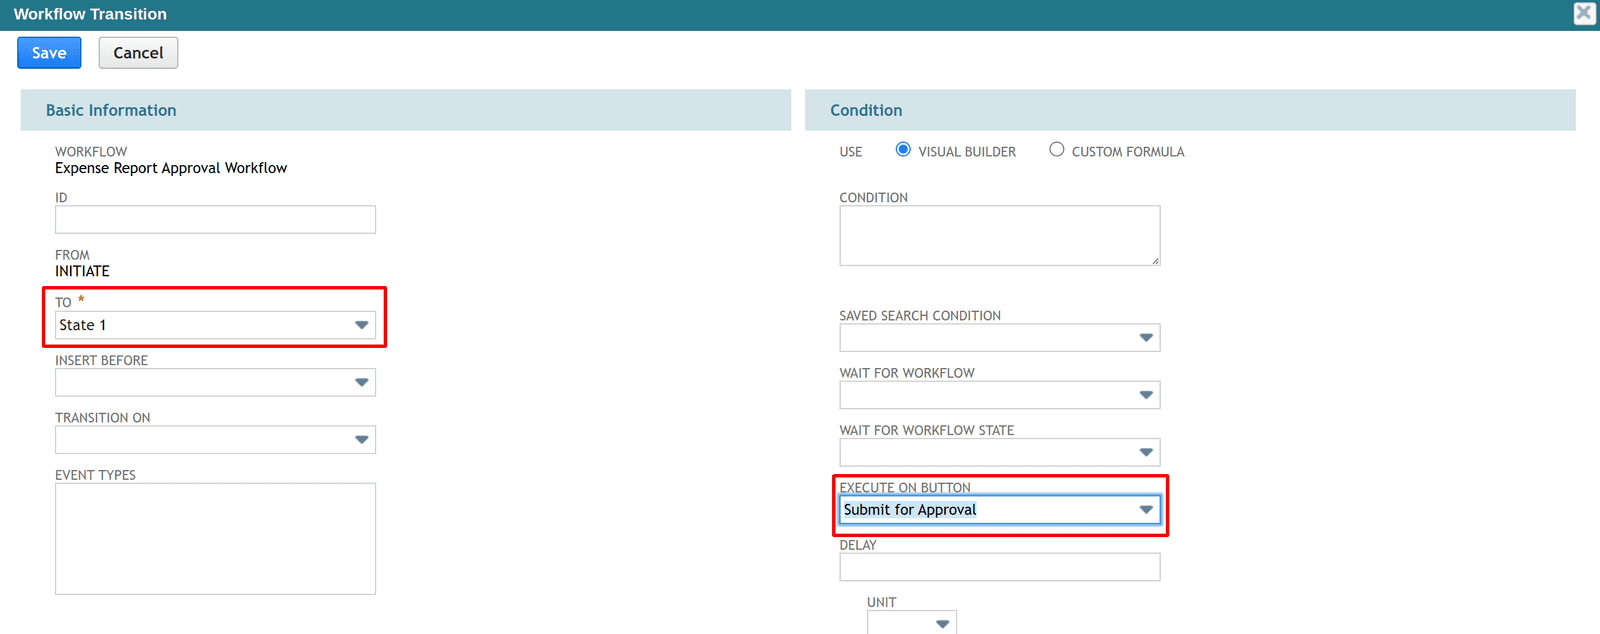
- Select State 1 as the state to transition to the select the Submit for Approval button under the Execute on Button drop down. Now your Expense Report will remain in the INITIATE state until someone clicks the submit button, upon which it will transition to the next state.
- Now double click on your State 1 and lets add 2 set field value actions just like we did before.
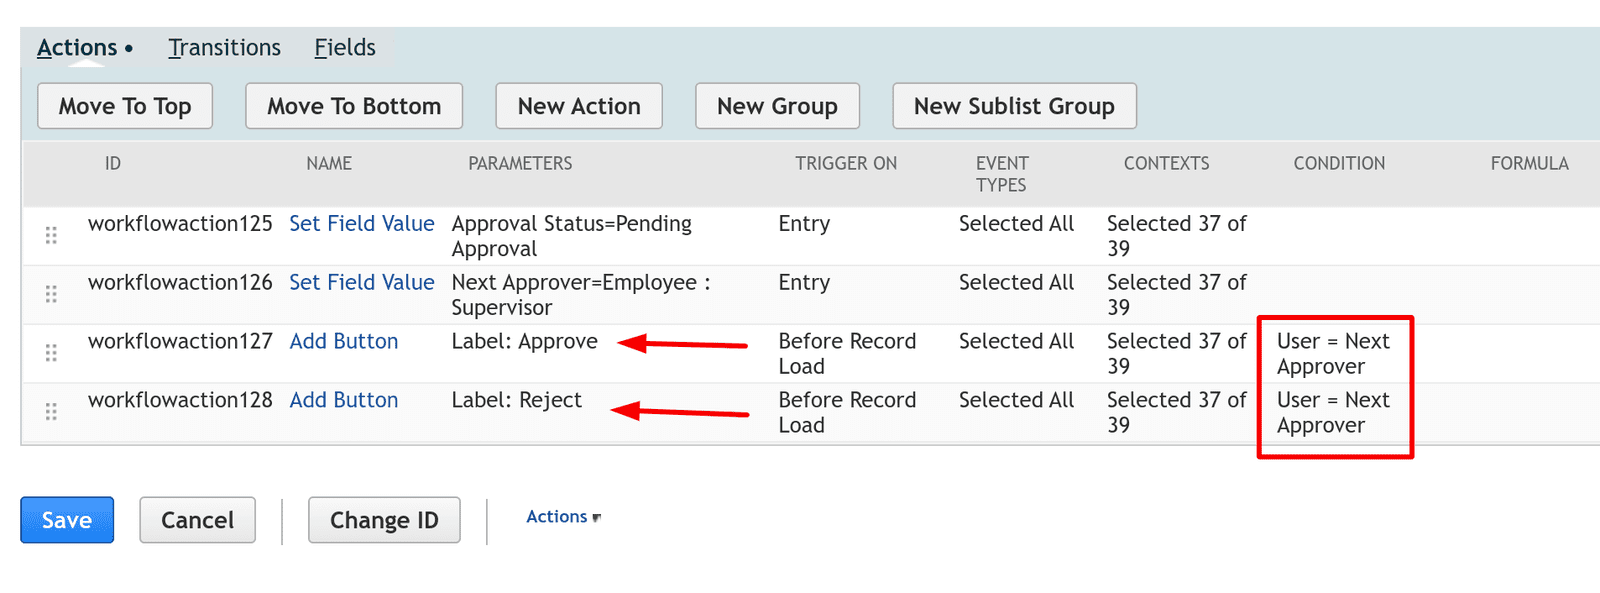
- The first is to set the Approval Status field to Pending Approval on Entry
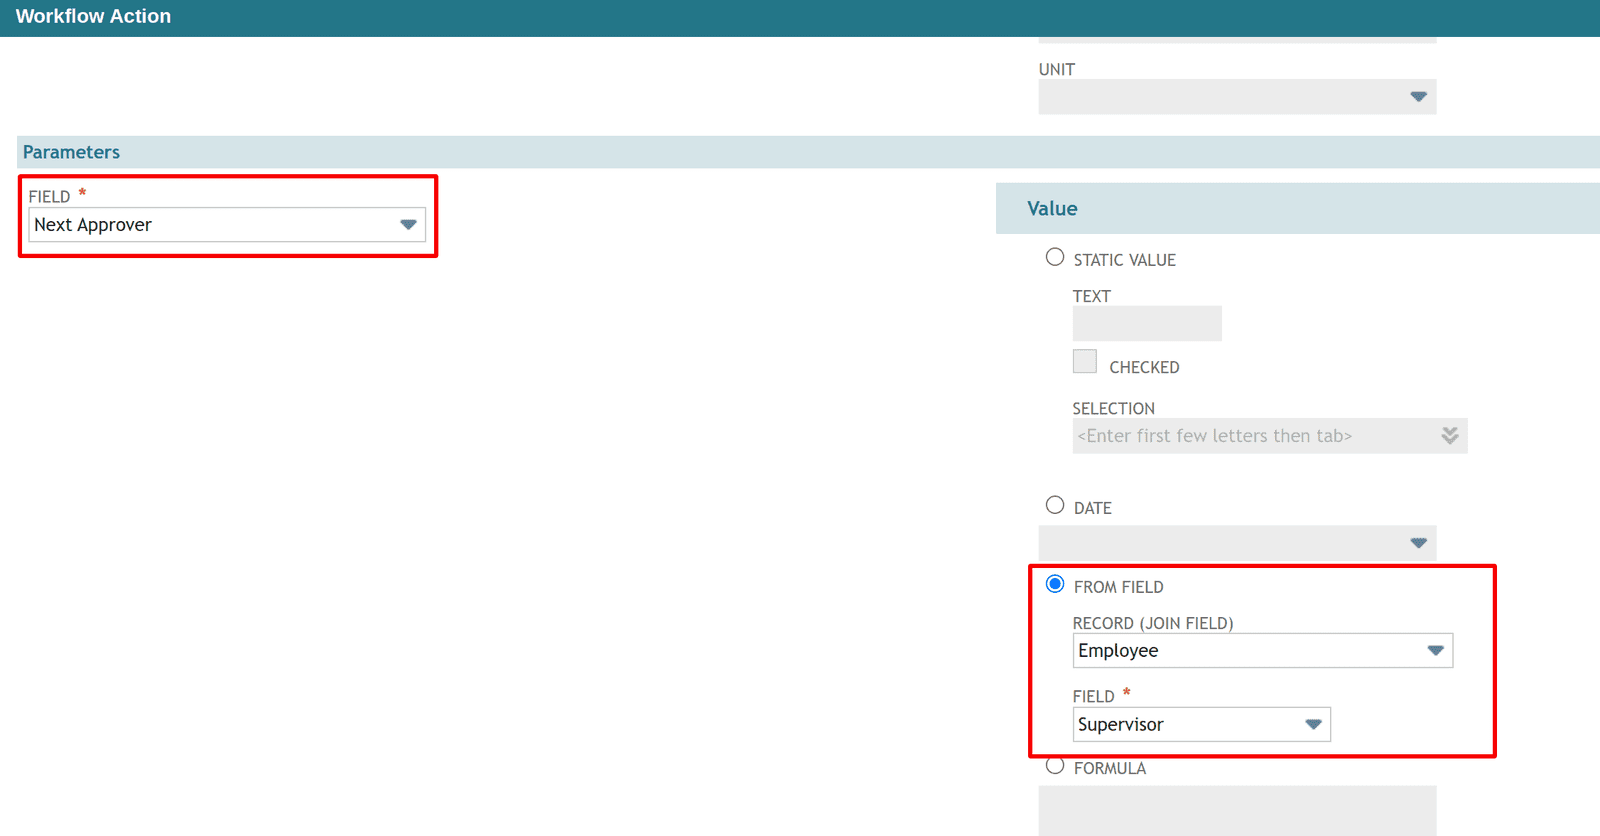
- The second is to set the Next Approver field to the Employee's supervisor on Entry. To get the Employee's supervisor use the Field Join section in the parameters to get to the Employee record and grab their supervisor.
- Next we will add 2 buttons. (1 for Approve and 1 for Reject). Also remember to add a condition to your Add Button actions so they only appear of the current user is the Next Approver. This way only the employee assigned to the Next Approver field can see the Approve or Reject buttons.
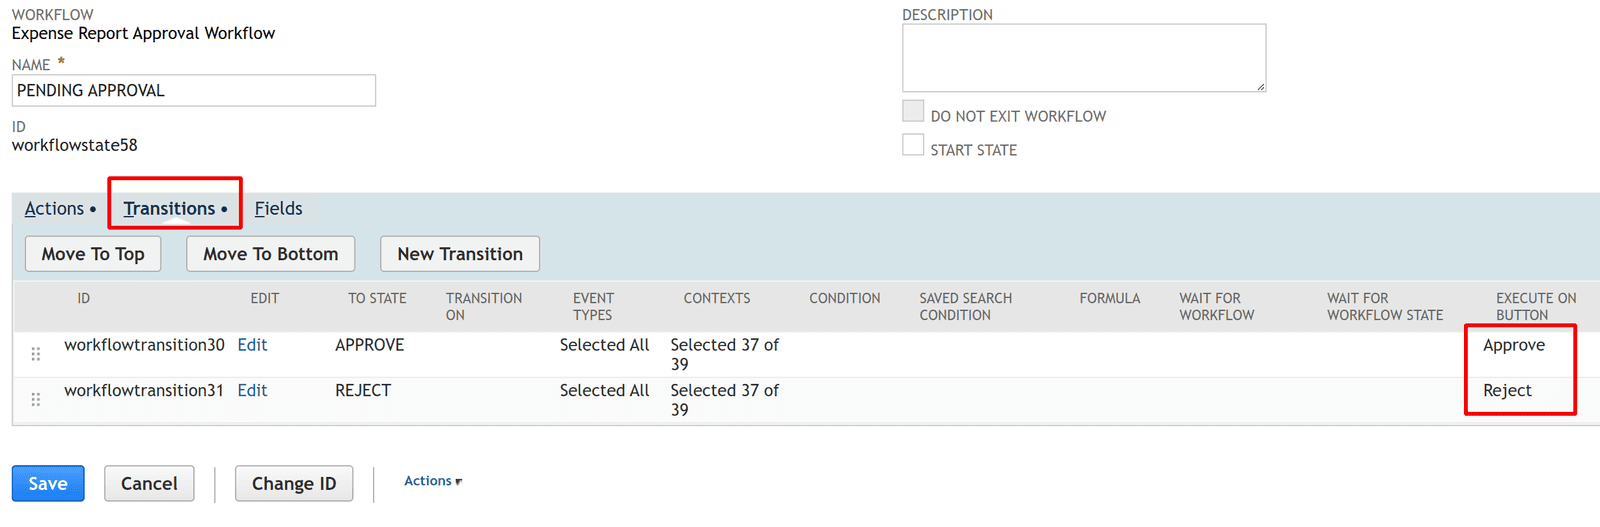
- The next step is to add 2 new States (1 for Approve and 1 for Reject) to the workflow and 2 new transitions to the appropriate state.
Here is a great place to insert the MGBC Pop Up with Input Prompt custom action so collect a rejection reason. See our relatedBlog Post about capturing rejection reasons.
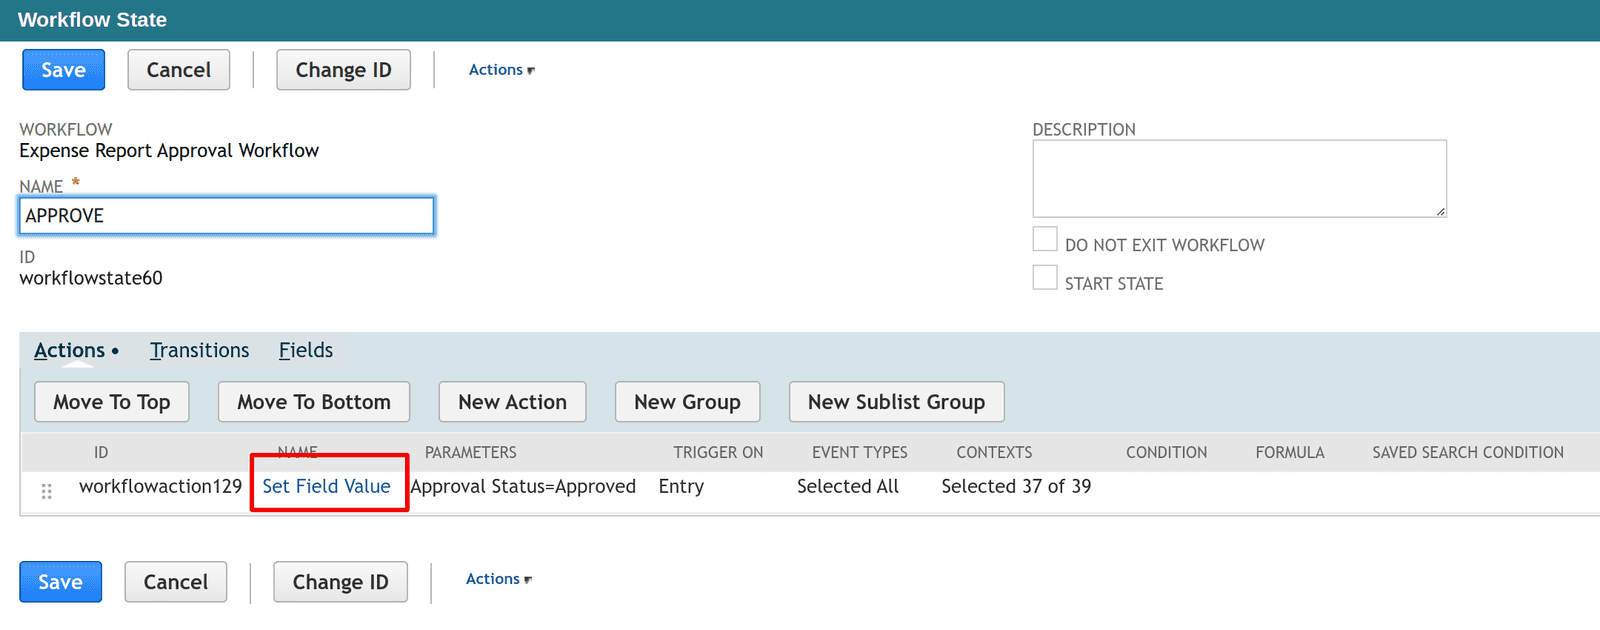
- Open your APPROVED state and add a Set Field Value Action to set the Approval Status to "Approved"
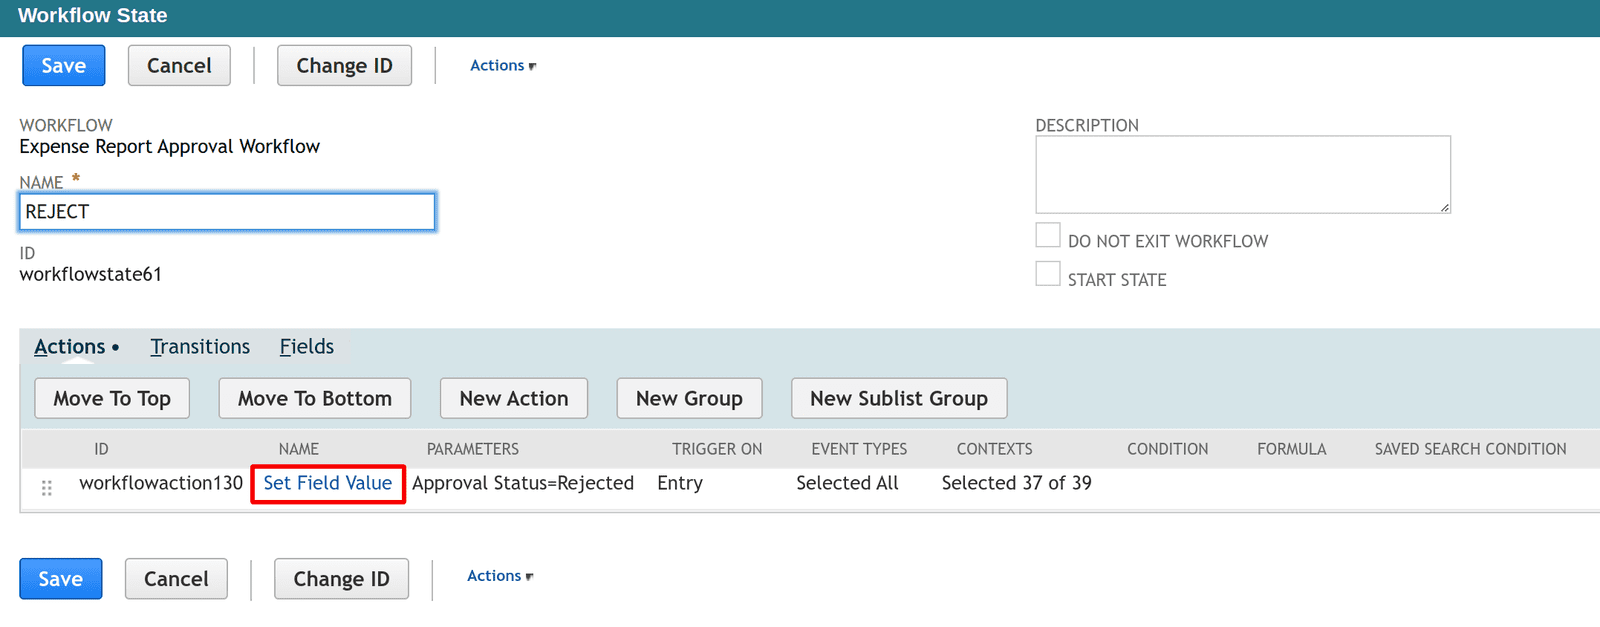
- Also open your REJECTED state and add a Set Field Value Action to set the Approval Status to "Rejected"
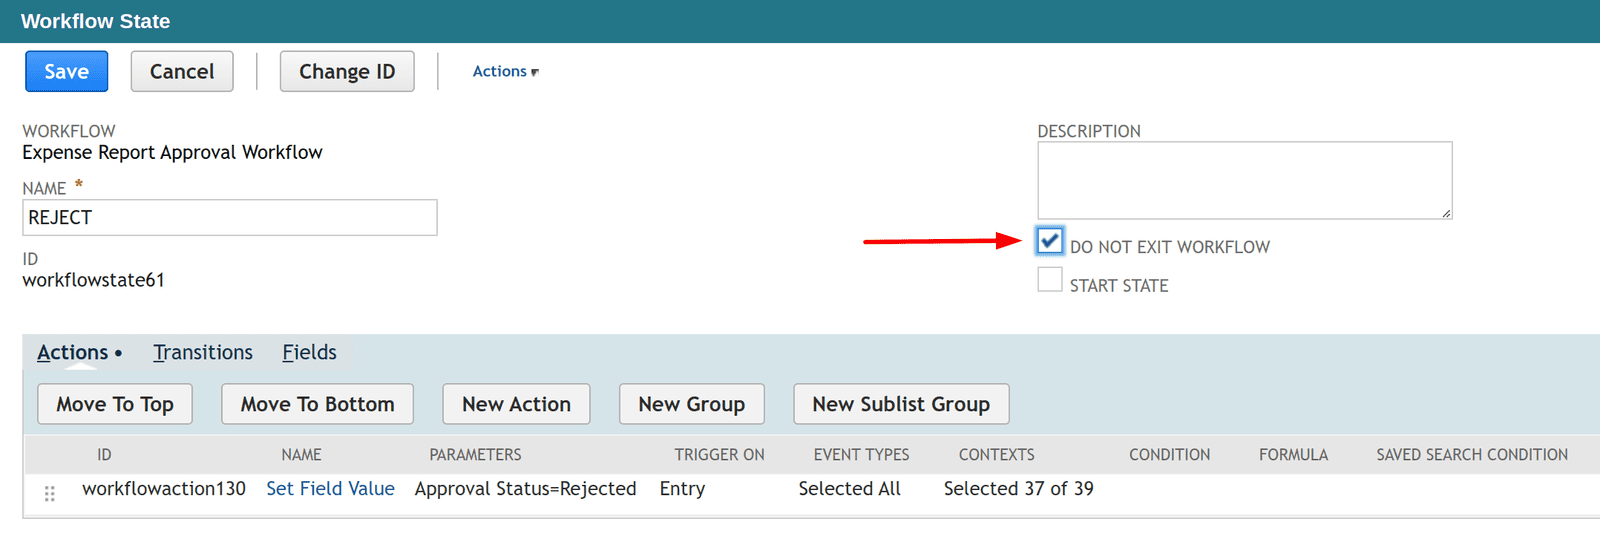
- Lastly, it is recommended that you use the Do Not Exit Workflow checkbox on both Approved and Rejected states so the transaction does NOT re-enter the workflow after approved and show up with a new "Submit for Approval" button. This was the transaction will always remain in the Approved (or Rejected) state until you make a new Transition to move it into a different state.
- Now we have finished the basic structure of the workflow and can move it to Released status when testing is completed.