
Approval workflows can be a great way to add much needed processes and regulations into your organization. They can provide a level of oversight that is not only critical for maintaining a lean operation but also to make sure that all levels of the business are aware of the right things happening throughout. The beauty of SuiteFlow and Approval Routing within NetSuite is you can customize your approval workflows to provide as much or as little regulatory oversight as your business needs to operate efficiently and effectively. Not only can you leverage native approval Suitelets in cases where you have enabled approval routing for certain records, but you can also define exactly what actions need to be taken at what point in time; and who should be taking said action. This all works wonderfully in NetSuite until you get to the REJECTION. Here is where native functionality can start to fall apart with native functionality.

Rejection reasons and response text are some of the most requested functions for effective approval workflows within NetSuite. There are many other workarounds you could perform to accomplish a similar result, but all can be clunky and/or tedious for the users. Many rely on a "mandatory" field that must be filled in prior to displaying the Approve or Reject button. This does have the intended effect but can leave the approver scratching their heads as to what they can do for the next step. Without clear instructions, it can be hard to understand what is holding them up from completing their approval.
It is also common to use a custom record for the approver to enter a rejection reason. However, this too can be a clunky experience as they are redirected away from the current transaction and could quite easily just close the window without providing a reason or any additional input. Furthermore, once the response text is entered it can be difficult to find their way back to the original transaction to confirm their decision was processed correctly.
Using our Enhanced Workflow Action bundle you can quickly create that much needed functionality to collect a reason for whatever decision is being made. Actually, this custom action can be used within ANY workflow deployed to ANY record type within your environment. The beauty of our Enhanced Workflow Action bundle is that you are only limited by your imagination. You can provide rich, engaging workflows on custom record types, custom transactions, native transactions, entity records or even items.
Configuration
To begin collecting responses to decisions within your workflows you can follow these simple steps:
- In the Pending Approval state of your workflow remove the native Add Button action and replace it with the MGBC Button with Input Prompt custom action.
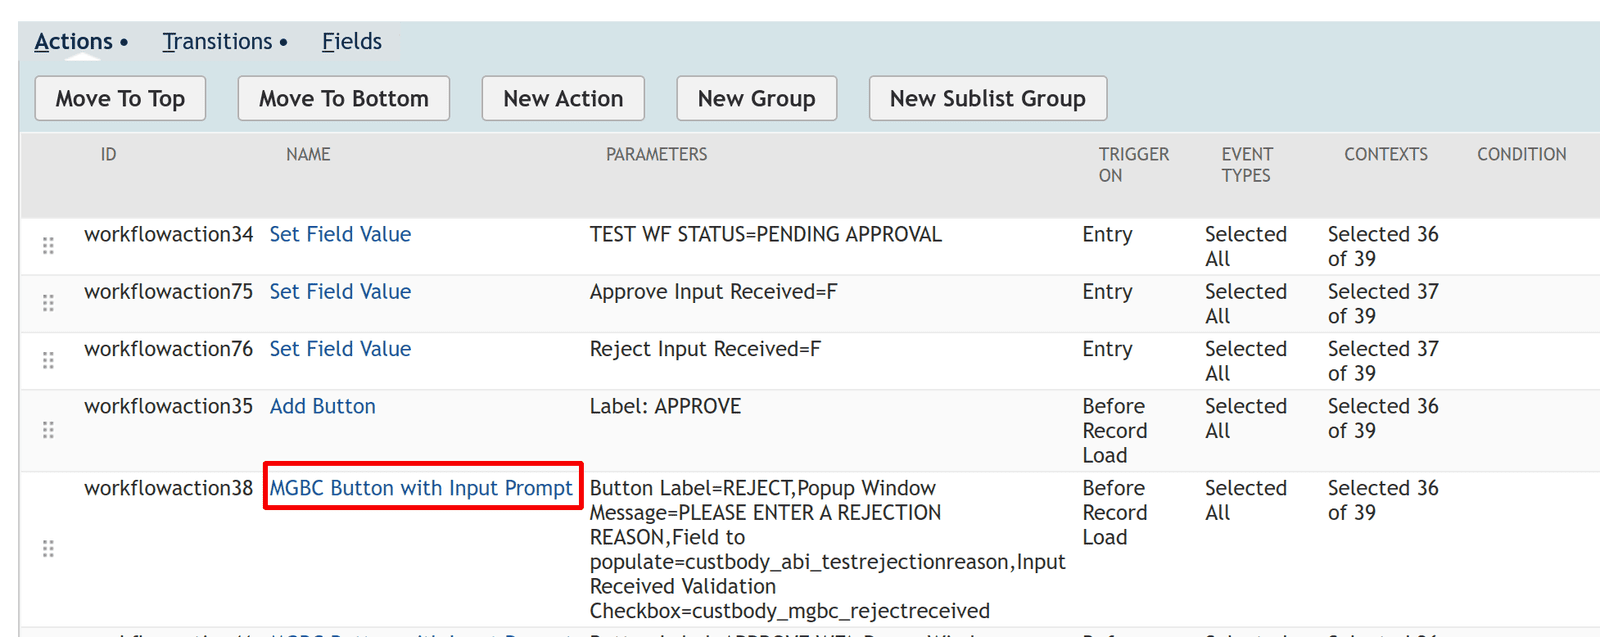
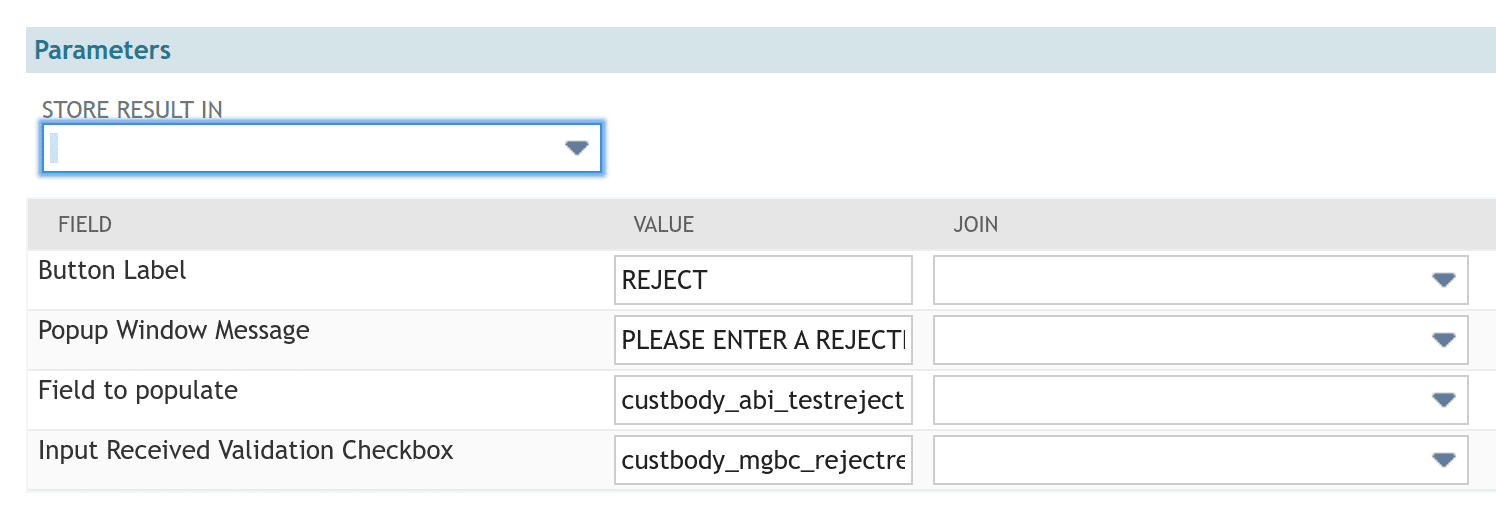
- In the parameters section of the custom action define the following parameters
- Button Label - This is the label displayed on the "Reject" button on your transaction
- Popup Window Message - This is the text you want displayed in the pop up window. This will direct the user as to what input is being requested.
- Field to populate - this is any field on your current transaction where you would like to store the response text that the user inputs into the pop up window. (just enter the field ID of the field you want populated)
- Input Received Validation Checkbox - this is a way for you to confirm that the user actually entered a response and didn't just click Cancel or close the window. You can use a custom field or a workflow field to capture this value. (just enter the field ID of a checkbox field)
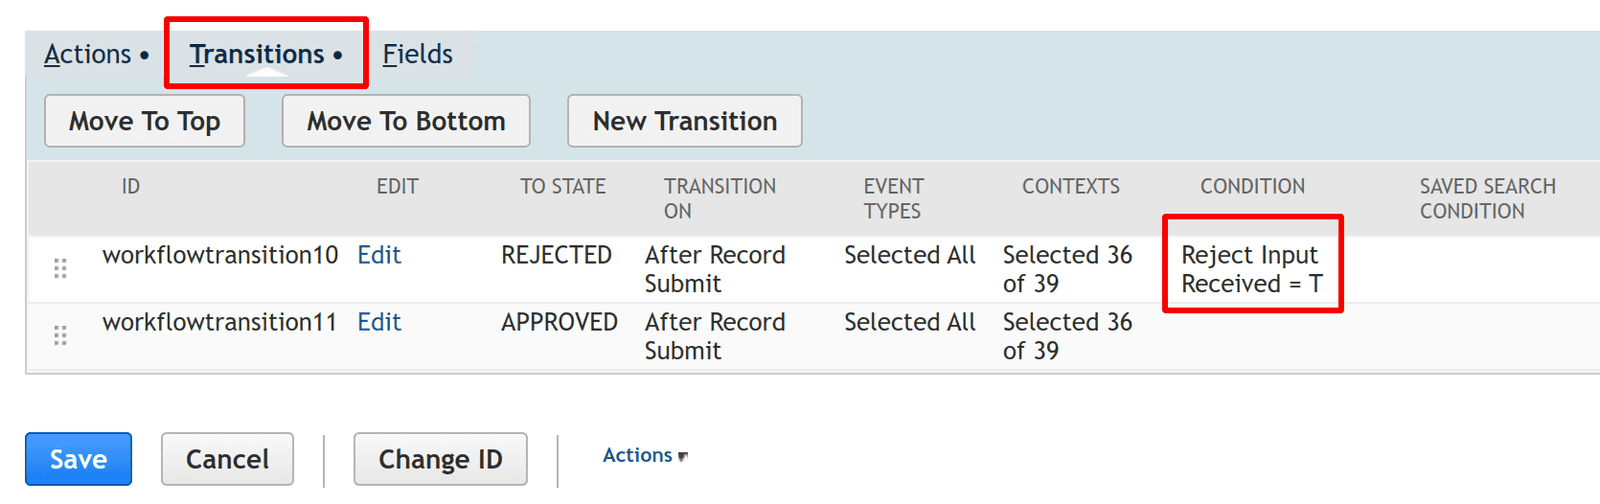
- Lastly, now that we are capturing a "validation" that input text was properly entered using our Input Received Validation Checkbox you can use that value to trigger other actions OR a transition to the correct state. On the Transitions tab create a transition to the Rejected State when your Input Received Validation Checkbox = T. Then your transaction will only be marked approved when you are sure the user has entered a rejection reason.
Review
You can see how easy it can be to setup these types of prompts throughout your system to make sure that you are capturing all the correct data at the correct time. Furthermore, because we are storing the rejection reason on each transaction record as they are moving through the workflow you can use these messages in other areas of SuiteFlow! For example, why not capture the rejection reason using the MGBC Button with Input Prompt action and then use that reason in a native Send Email action so the requestor knows why their request was rejected?
As you can see the sky is the limit, when it comes to what can be done with this fully configurable action that not only solves a long-standing need within approvals, but can provide much needed enhancements to ALL your workflows throughout ALL your processes in the business.
Let us know how you are using the MGBC Button with Input Prompt custom action in your environment OR ideas you have to leverage this in other workflows and areas throughout your organization. Lastly, click the button below to find out more on our Enhanced Workflow Actions and how you can leverage all 10 custom actions in your account to automate even the most complex business processes.