
Welcome to our "beginners" series on workflows. In this series we will take a deep dive into all the actions available natively to workflows individually. To start, we will take a look at the Add Button action. Overall, this action is pretty self-explanatory but there are some parameters in this action that commonly go unused or not fully understood.

The NetSuite documentation on the Add Button action states that it can be used for the following 3 scenarios:
- Transition a workflow to another state - you can use a button to execute a transition between workflow states
- Navigate the user to another page or record - you can use a button to execute a transition between workflow states, then upon entering the new state use a Go to Record or Go to Page action to redirect the user to a new page.
- Initiate mass processing for a specific base record type - buttons added to workflows can be used in Mass Updates to tell the mass update what action to perform during the update process.
The Add Button action has limited Triggers available to set in it's parameters. Most actions have a full range of Triggers for you to select for when the action should be performed during the record load and save process. If you'd like more information on just how triggers work and how to use them more effectively try checking out our blog post on workflow event types, contexts and triggers. The triggers available here are limited to just:
- Entry
- Exit
- Before Record Load
We usually recommend leaving all actions as "wide open" as possible when it comes to Event Types and Contexts because we've found that trying to limit them can end up causing unforeseen limitations and problems with future enhancements or functions you would like to add elsewhere in the system. Unless, you are sure you want to limit a specific event or context for performance or functional reasons then it's best to just leave them as the default settings.
The next parameter to use is the Condition. This can be very powerful in your workflow as it gives you the ability to "show" the button only under certain conditions. For example, if you have an approval workflow maybe you only want to show the Approve button to the user who is the actual approver. Or maybe you would like to show a custom button ONLY to the finance team and no other user. The condition you set here effects when the Button should be added to your record and can dynamically control who and how users see it.
Remember that since the Before Record Load trigger is a server based trigger the data you use for the condition must be saved to the database. So if you are using criteria in your condition that the user is actively entering onto the record, then it will not be considered in the condition until you Save the record to the database, then view it again.
Lastly, you can also create a saved search with the correct criteria and if the record you are manipulating is listed in the results of that saved search then it will satisfy the condition and the button will be added. A lot of people find creating saved searches easier and more flexible then trying to hardcode specific conditions into an action so this is a very useful tool to those who are more comfortable with saved searches. Moreso, you have more functionality with saved searches as you can use complex formulas and joined records easily within a saved search as both standard criteria OR summary criteria.
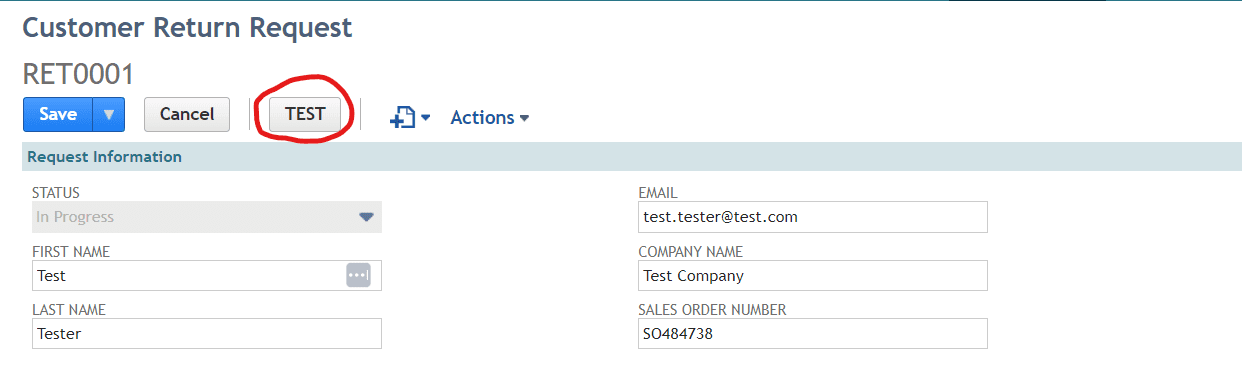
Use the "Label" parameter to give your button a Label that will be displayed to the user. Be sure to keep this label as concise and actionable as possible as you want to "lead" the user to make the correct selection as easily as possible.
The next parameter is the Check Condition Before Execution checkbox. This is enabled by default and would be VERY rare for you to disable it. In essence if you were to disable this checkbox the button would be added to the record anytime the record was loaded regardless of the condition you set for it.
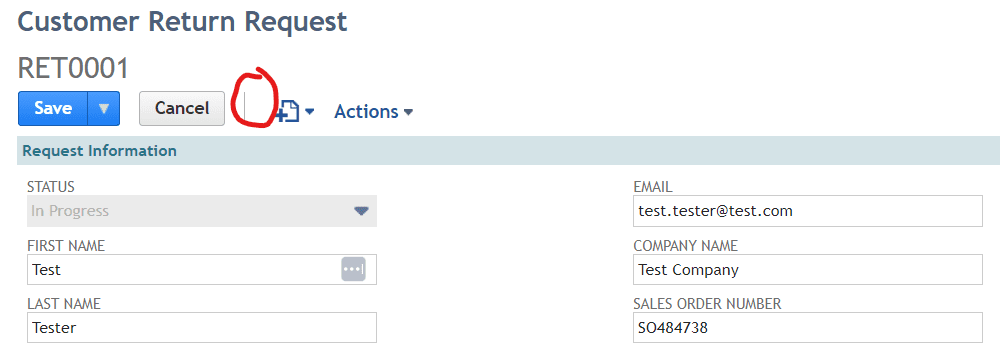
Lastly, you can use the Save Record First checkbox to define whether the record needs to be in View or Edit mode to see the button. If you choose to disable this feature then the button will be added to the record in BOTH view and edit mode.
If you enable the Save Record First feature then the workflow will require the record to be Saved first before the button is added. (ie. you cannot see the button when the record is in edit mode).
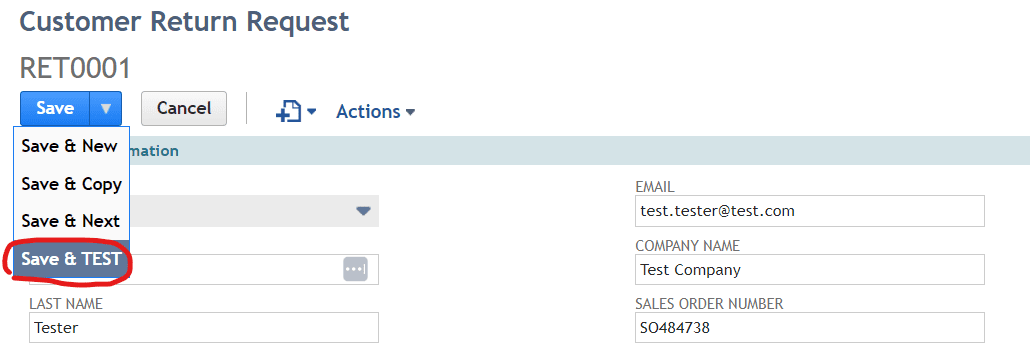
However, there is one cool feature of the Save Record First function and that is that when enabled the button will be added to the Save menu so the user can Save AND perform the action related to the button with one click.
Once your button has been added to the workflow the next question is, "What can I do with it?". The most common is to use it to transition a workflow to another state. To do this go to the Transitions tab and click New Transition.
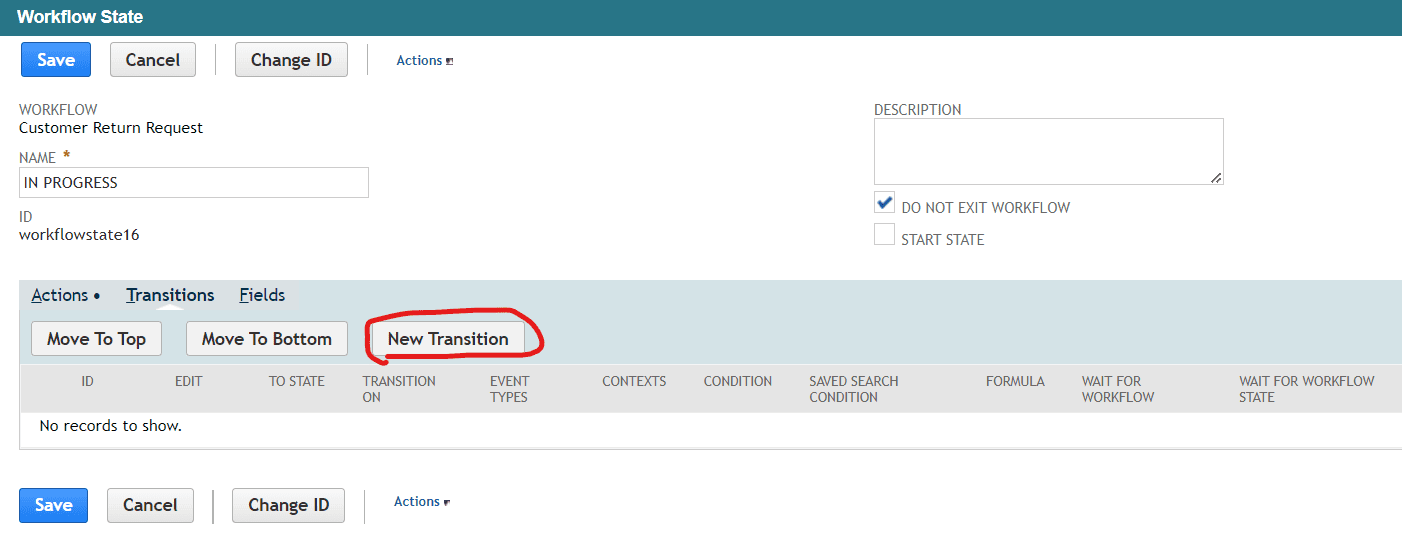
Select the state you want to transition to and then select your button in the Execute on Button field.
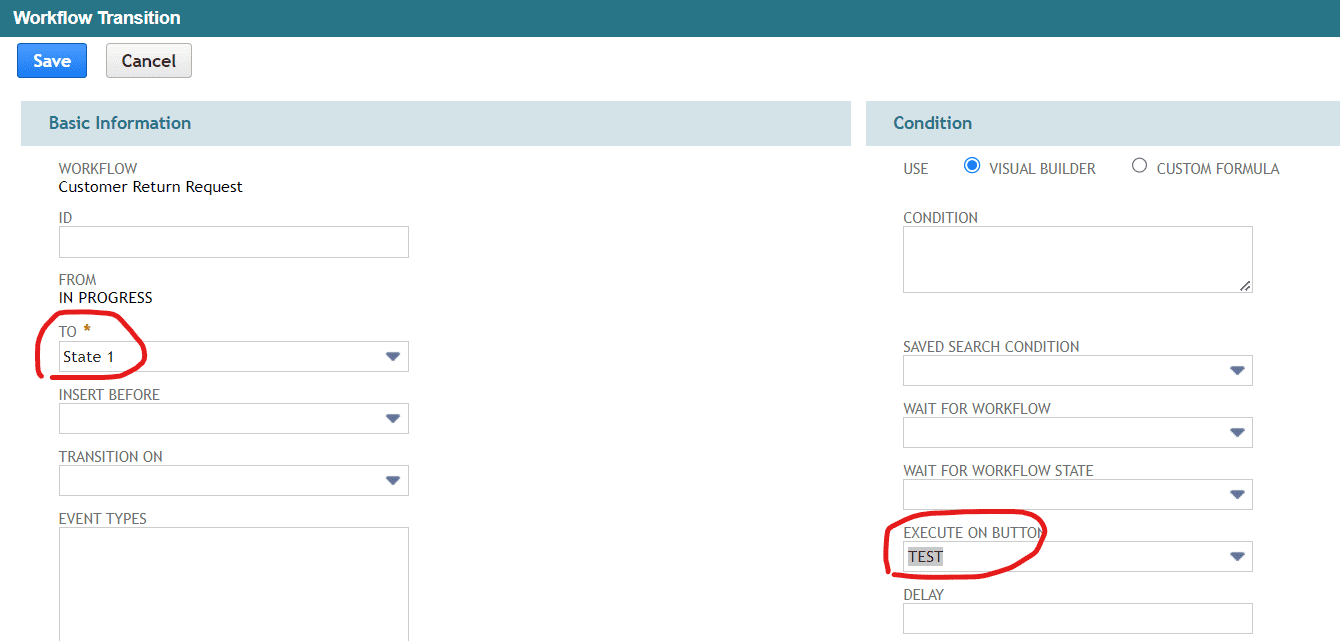
Now when clicked the workflow will transition to State 1. And, upon entry into State 1 any action listed using the Entry trigger will be performed. This is where you can use the Go to Record or Go to Page action to help redirect the user to some other page or record in your environment. A nice example of this is to use the Add Button action to add a button labeled, "Log Phone Call". Then you have a workflow where the Log Phone Call button transitions to a new state. In that new state you use the Go to Record action to go to a Phone Call record. The user experience here is that the user clicks the button from the customer record and they are automatically directed to a new Phone Call record form.
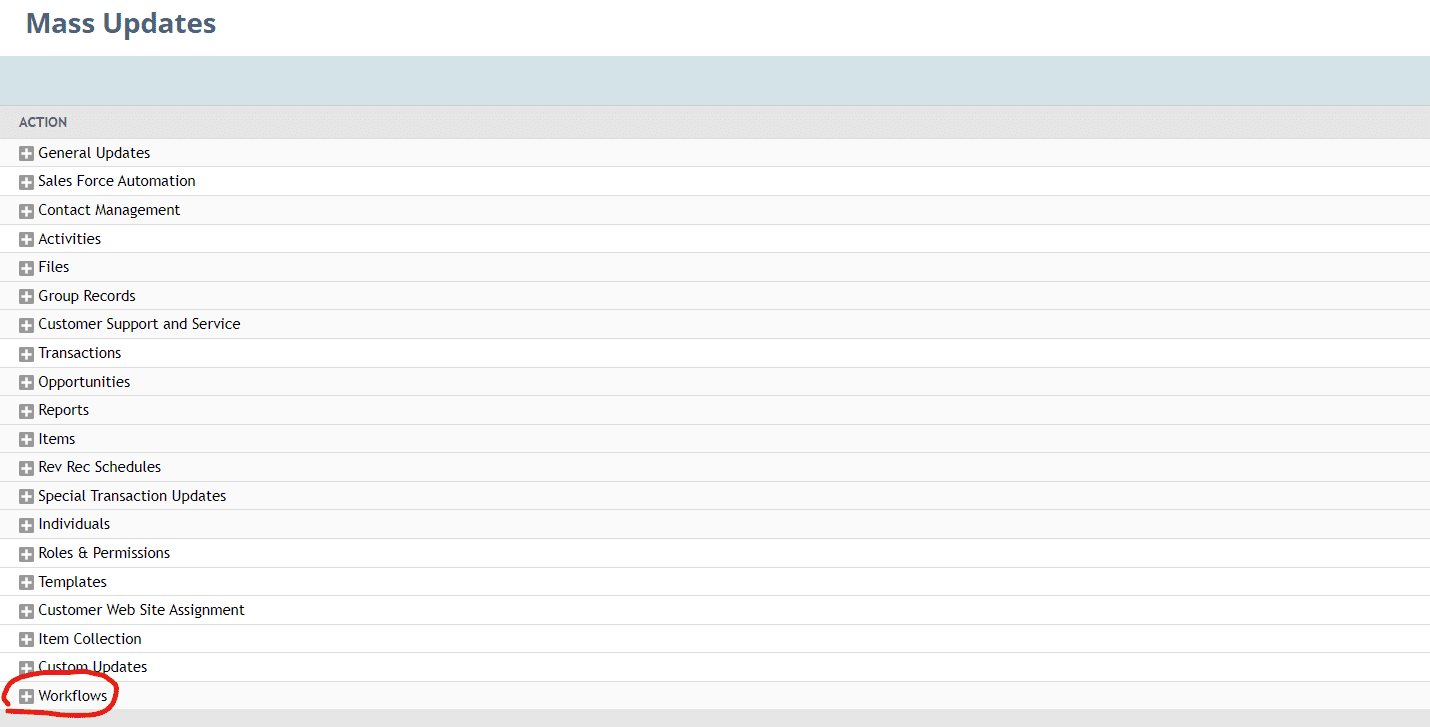
The last thing you can do with buttons is not widely known, but can be very powerful. Most people do not know that you can use a Mass Update to Initiate or Transition a workflow. The buttons you add to your workflow define what actions can be taken while using the Mass Update. For example, if you have an approval workflow and one of your buttons is labeled "Approve". Then you can create a mass update that will perform whatever transition is linked to that Approve button to any record selected in your mass update.
To do this go to Lists > Mass Updates > Mass Updates. Then expand the Workflows Section
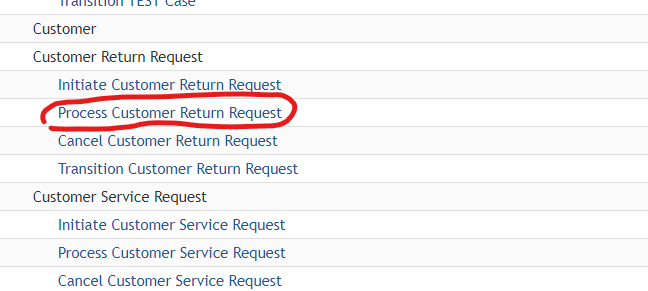
Next find your workflow in the list and select which process you would like to perform:
- Initiate - this will take all the records you have selected in the list and bring them into the Start state of that workflow and perform any actions that are applicable based on your conditions
- Process - this allows you to select a button that you've added in your workflow and execute the transition linked to that button. NOTE: this action will only apply to records where the button is applicable. So the records must be in the same State that your Add Button action is part of.
- Transition - this allows you to "force" a transition of any record into the selected State. This allows you to possibly "skip" states as it will take any record selected and move it directly to the state you select regardless of it's current state.
- Cancel - this will cancel any record from the current workflow essentially removing it from the workflow's control regardless of the current state.
Also remember to select the Button in the button field as this will further define what records can be processed. Remember in my example the TEST button I added is only in the INPROGRESS State, so only records in the IN PROGRESS State will show up as possible options to process. (The current state will automatically be considered with regard to the button you select, as well as any additional criteria you add in the criteria section)
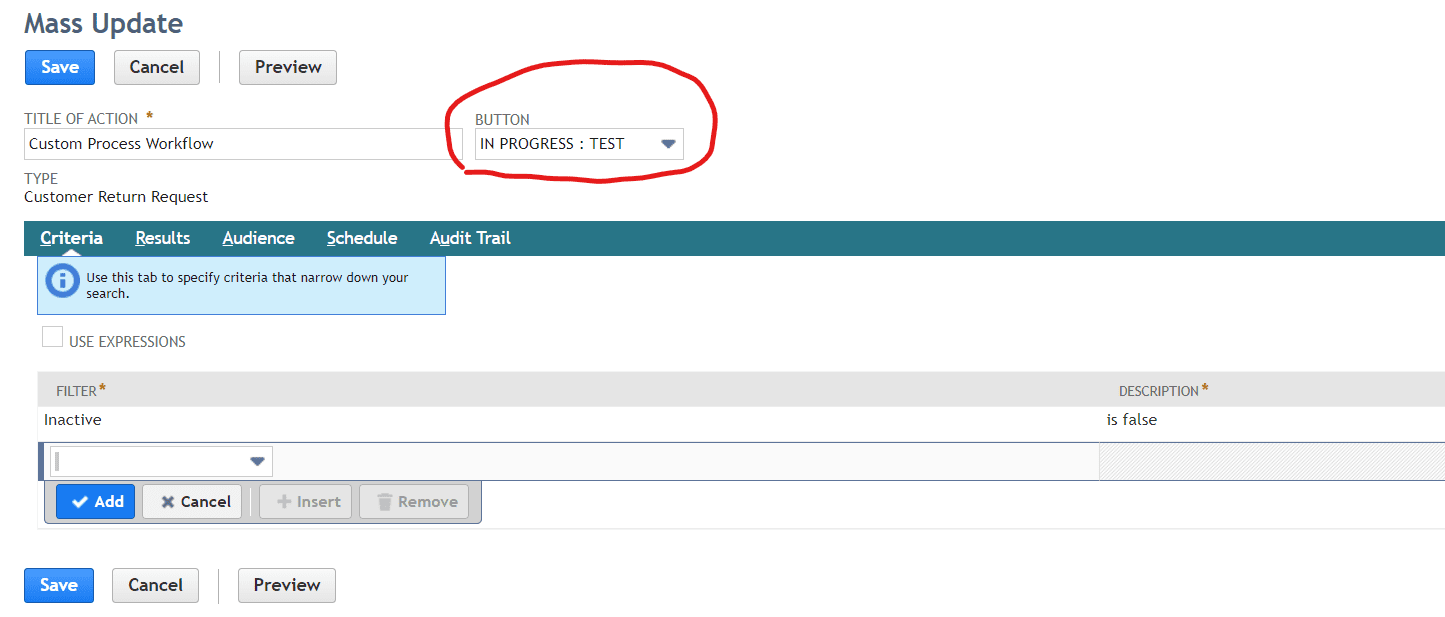
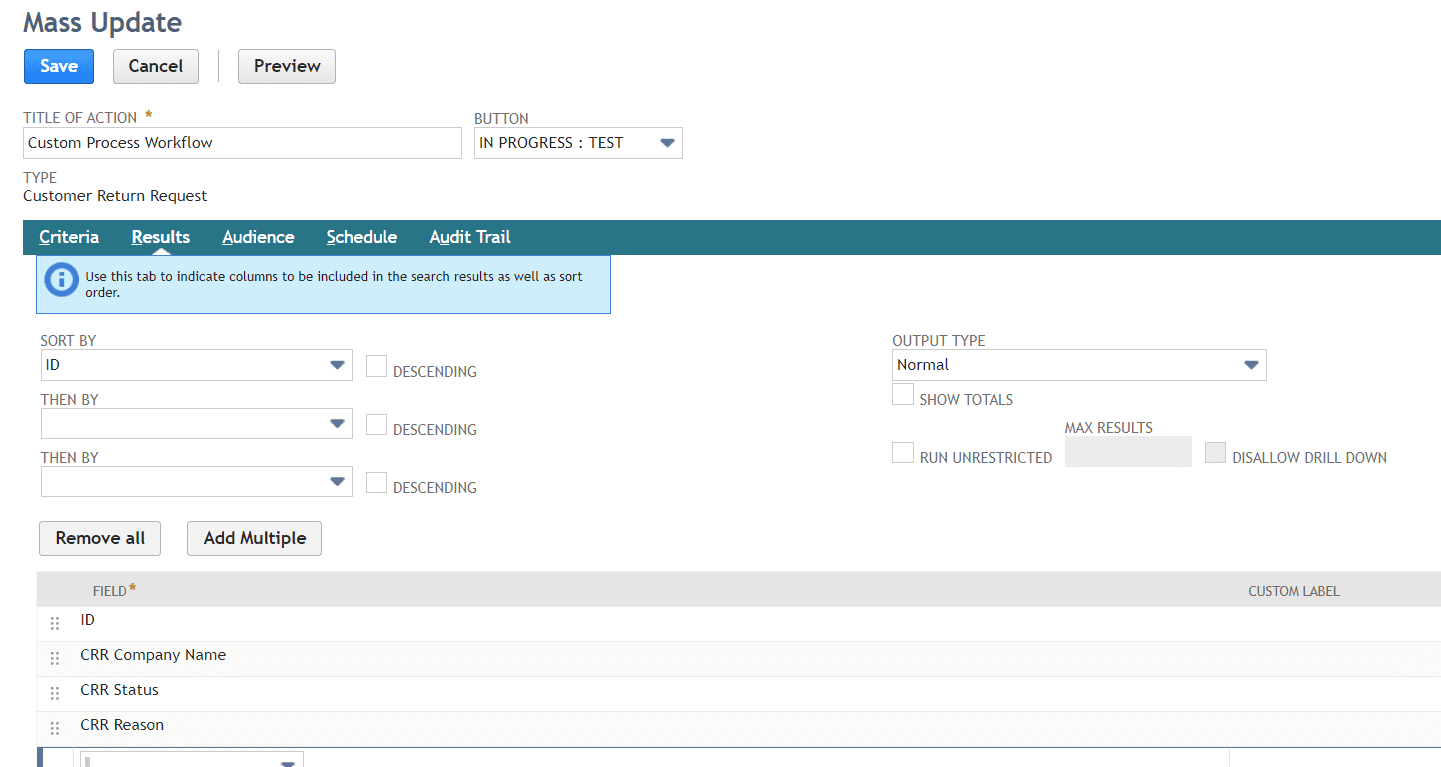
When ready click the Preview button to view the results of your criteria.
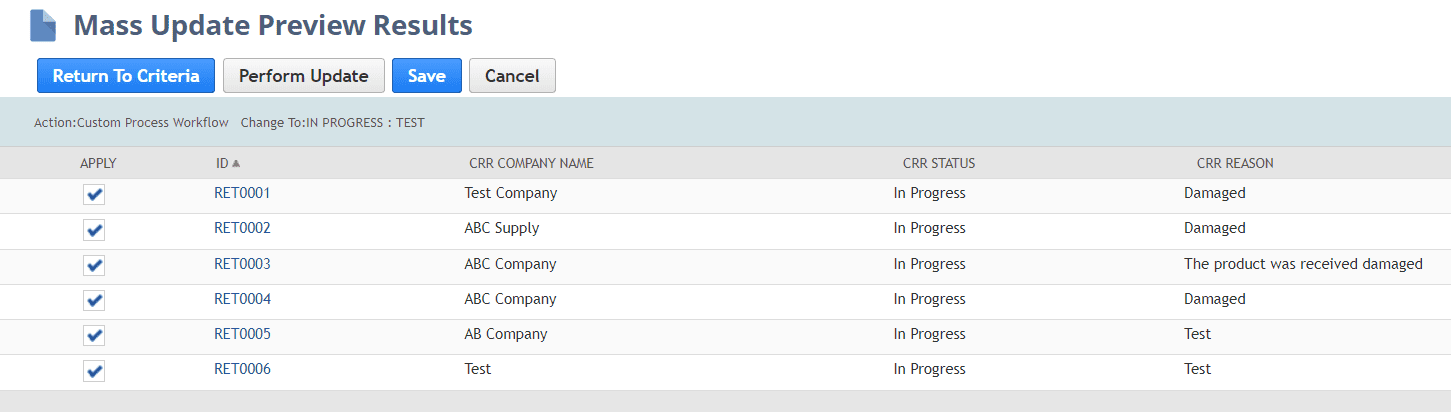
Now you can select all or some of the listed record to be processed by the workflow. This is a really nice feature as it provides users the ability to selectively decide which records should be processed and which ones should not, if that kind of review is required. When ready click the Perform Update button to execute the transition tied to the selected button.

As you can see this one action is packed with cool features and functions that can be leveraged to perform a wide range of functions without any scripting. Let us know in the comments if you have used the Add Button action and some examples of how they have helped your business.
Also if you are interested in hearing more about all the workflow actions available then be sure to subscribe and check back often for the latest updates and explanations of workflows.