
So far we've discussed the Set Field Value Action in great detail as this is probably the most commonly used action in SuiteFlow. It is possibly the easiest action to understand and configure, while simultaneously being the most applicable when it comes to business use cases. Our last two articles on the Set Field Value Action covered both the general configuration and usage of the action as well as it's application within sublist fields on transaction records. This article will extend our discussion on sublist fields by combining it with the use of Client Triggers.
For those that don't know, Client Triggers are actions triggered because of things the user is doing to the record while it is in "edit" mode. If you would like to learn more about workflow Triggers, Event Types and Contexts read through our blog post dedicated to this subject.
For a quick review on Client Triggers they are the following:
- Before User Edit
- Before Field Edit
- After Field Edit
- After Field Sourcing
- Before User Submit
As stated before, the ability to be able to manipulate sublist fields within the Items sublist on transactions was a HUGE leap forward for workflows and their application within your NetSuite environment. This also opened up a whole world of possibilities for Administrators and Functional Consultants working with NetSuite as before they needed to depend on development resources to do anything more than just header level fields. One of the little know features of the Set Field Value action is that Client Triggers can help to manipulate sublist fields while the user is entering lines into the Items sublist.
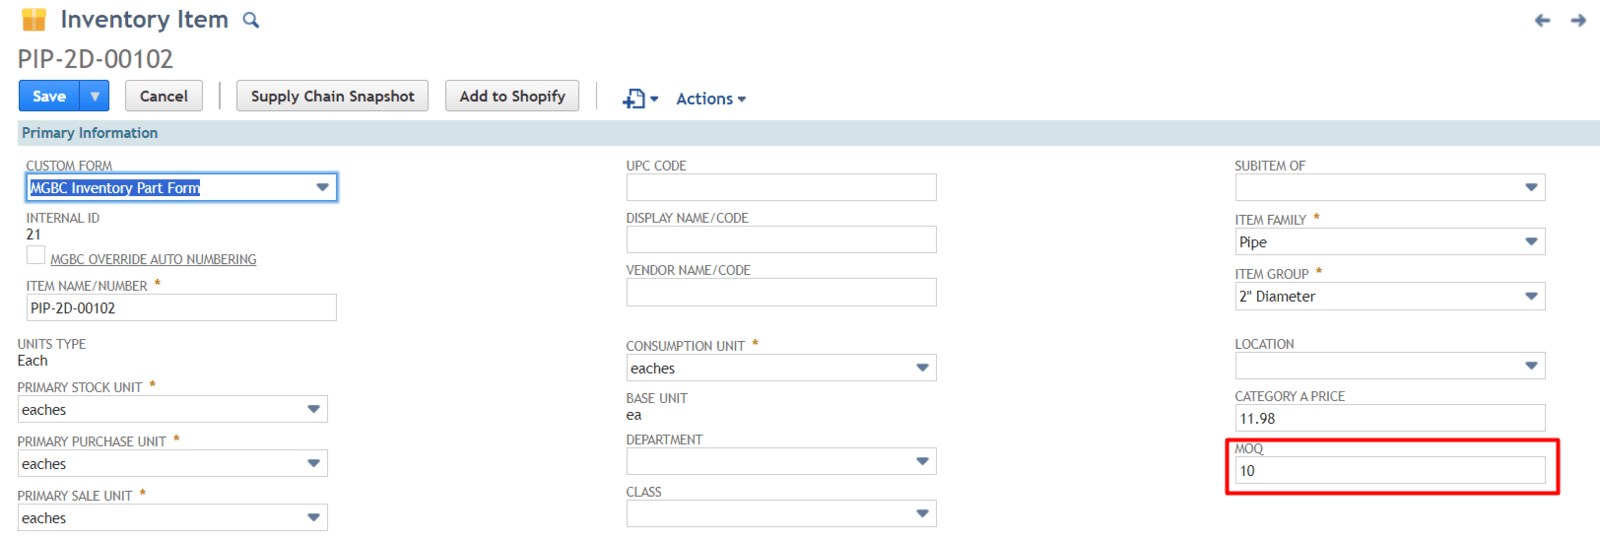
One great example of this is if you have minimum order quantity for an item that needs to be regarded when ordering items. With a workflow we can set the quantity of a line on a purchase order based on a custom field from the Item Record, to make sure our purchasing team is maintaining our vendor relationships properly.
First let's start by adding a custom field to our Item Record called Item MOQ that we will use to capture the minimum quantity to be ordered.
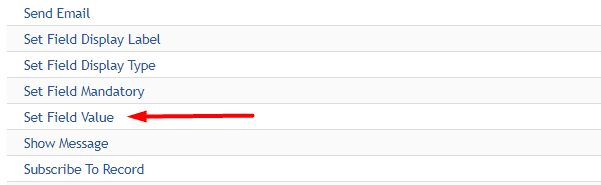
Now create a workflow on the Purchase Order record. In the first state of your workflow add a Set Field Value Action.
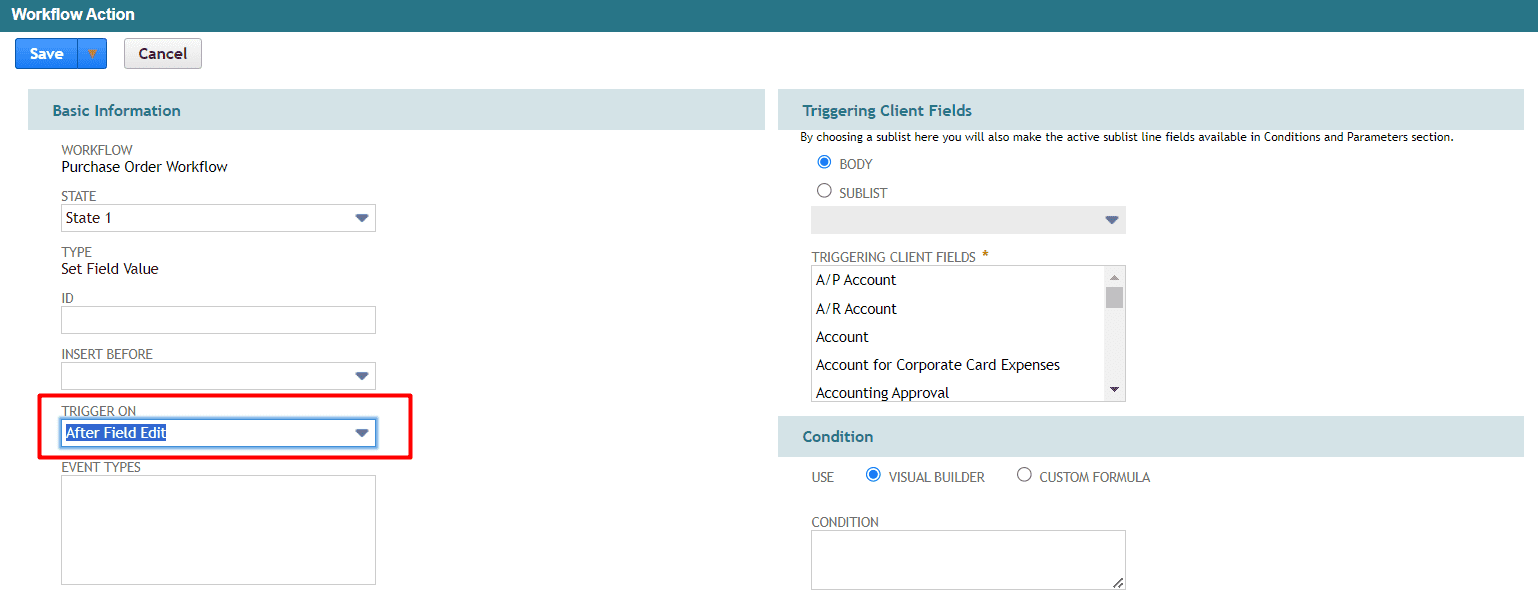
Now set the Trigger to any After Field Edit as we want to update the Quantity field after a user sets the Item field.
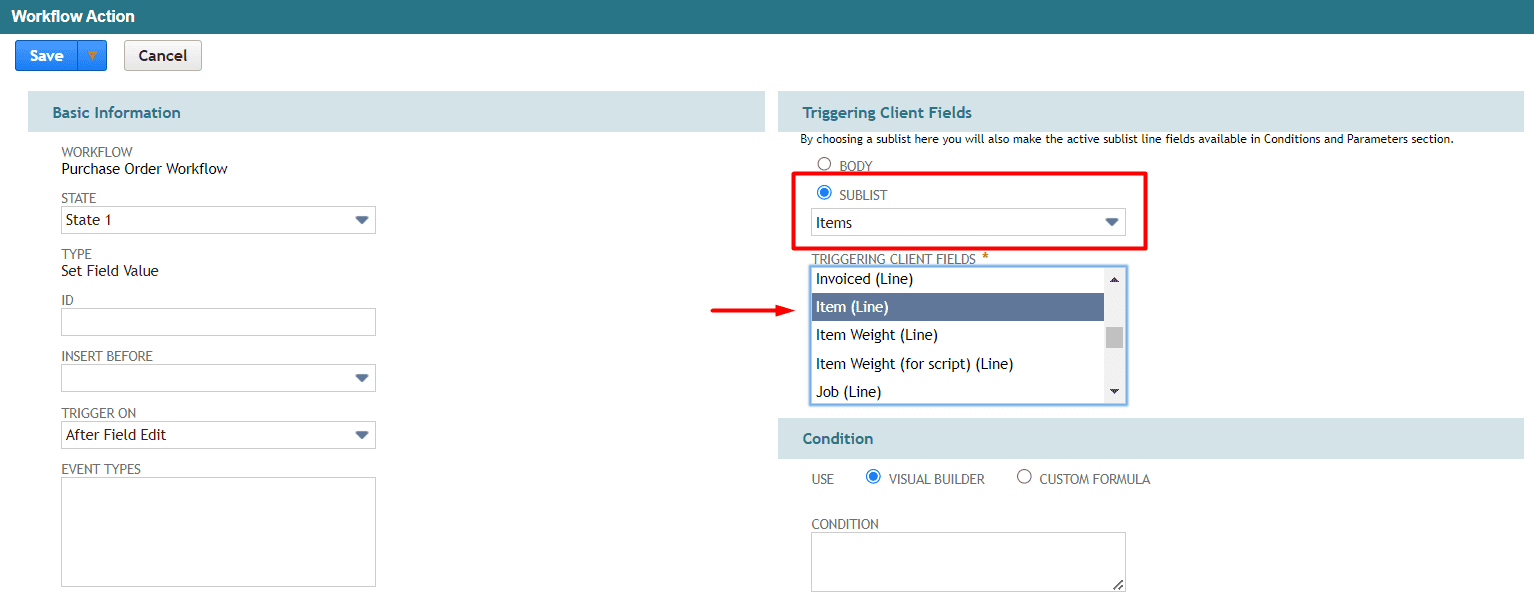
Now here's where the trick is. Most people miss this little step in Workflow setups, but under the Triggering Client Fields you can select either a Body or a Sublist field as the trigger. That means when the field selected is Edited it will trigger the action to execute as long as the Condition is met. Without this Trigger Client Field set the workflow does not know which field to "watch" to know when to fire the action. In our example, we will choose the Item (Line) field because we want the Quantity on the line item to be updated after the Item is selected.
NOTE - When you change the Triggering Client Fields to Sublist you must select which sublist and this will reset your conditions.
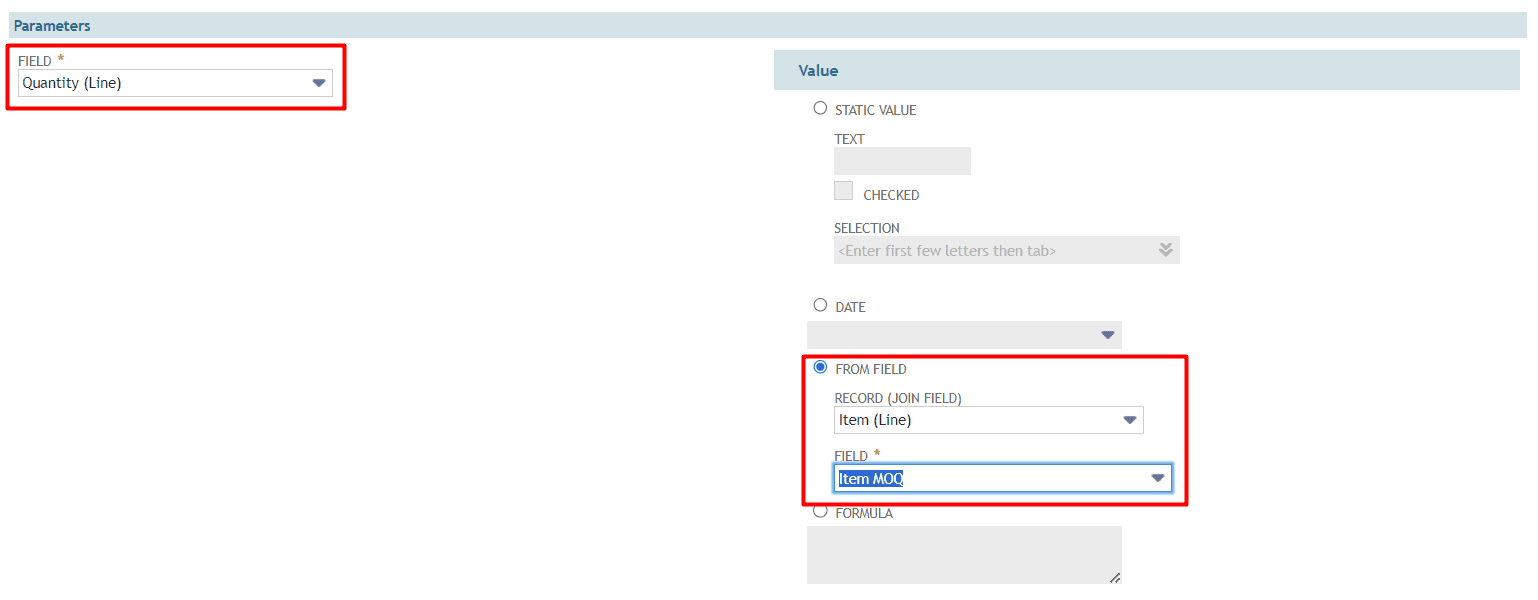
Now that we have our general configuration complete, let's setup our parameters. First select the Quantity (Line) field which is going to be the field we want set by our workflow. Then using the Item (Line) Join we can get our new Item MOQ from the Item Record.
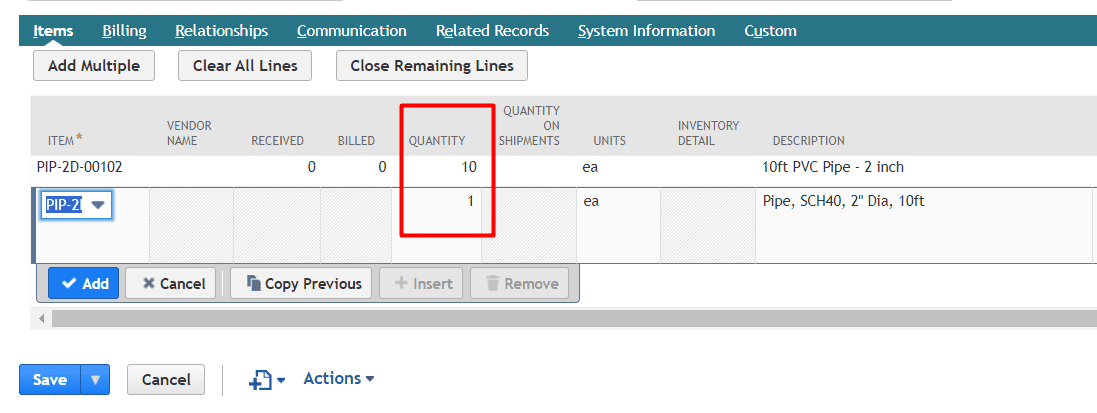
Now we can save our workflow and test out the functionality. Remember to turn on workflow logging for your testing period to review any errors or skipped actions for troubleshooting. If you have any questions about workflow logging, learn how to properly manage workflow instance and history logs in our blog post. We can see that when entering a purchase order for our item the quantity field is updated to match the MOQ when the new item is selected on the line. However, for other items the quantity is NOT changed.
If you have any questions about workflows or need help implementing these features in your NetSuite environment please reach out and we would be happy to help you through any obstacle or provide advice on how workflows can transform your business.