
One of the more common use cases for a workflow is to make a workflow that sends an email. The Send Email action is VERY powerful and incredibly useful within any environment. Many NetSuite Admins and Super Users have gotten used to sending email notifications through Saved Searches, but the Send Email workflow action takes that to the next level. This action gives users more control over the content of the email and even the context of how and when it is sent.
The Send Email action is only available to a few select triggers and ONLY available to be used with server-side triggers. You cannot send an email with a client trigger as the user is interacting with the record. The triggers available are:
- On Entry - when the record first enters a state within the workflow
- On Exit - when the record is exiting a state within the workflow
- After Record Submit - after the record is saved it is loaded from the database again and the email is sent.
- Scheduled - NetSuite has a backend schedule that runs every 30 min and will check the condition of all scheduled actions. If the condition is met then the Email will be sent.
The use case for this action is pretty straight forward and concise. When the condition is met -> send an email. And the trigger used is also fairly straight forward as well, either send the email as soon as the record is saved, when the record transitions to a new state OR on a schedule.
In this example we will look at using the Send Email action within an Event Based workflow and a Scheduled workflow.
Event Based Workflow
An event based workflow can be initiated by someone either creating a record or viewing/updating an existing record. In this case we want to include both events in our workflow initiation as this example will be sending an email to a Vendor when a Purchase Order is saved.

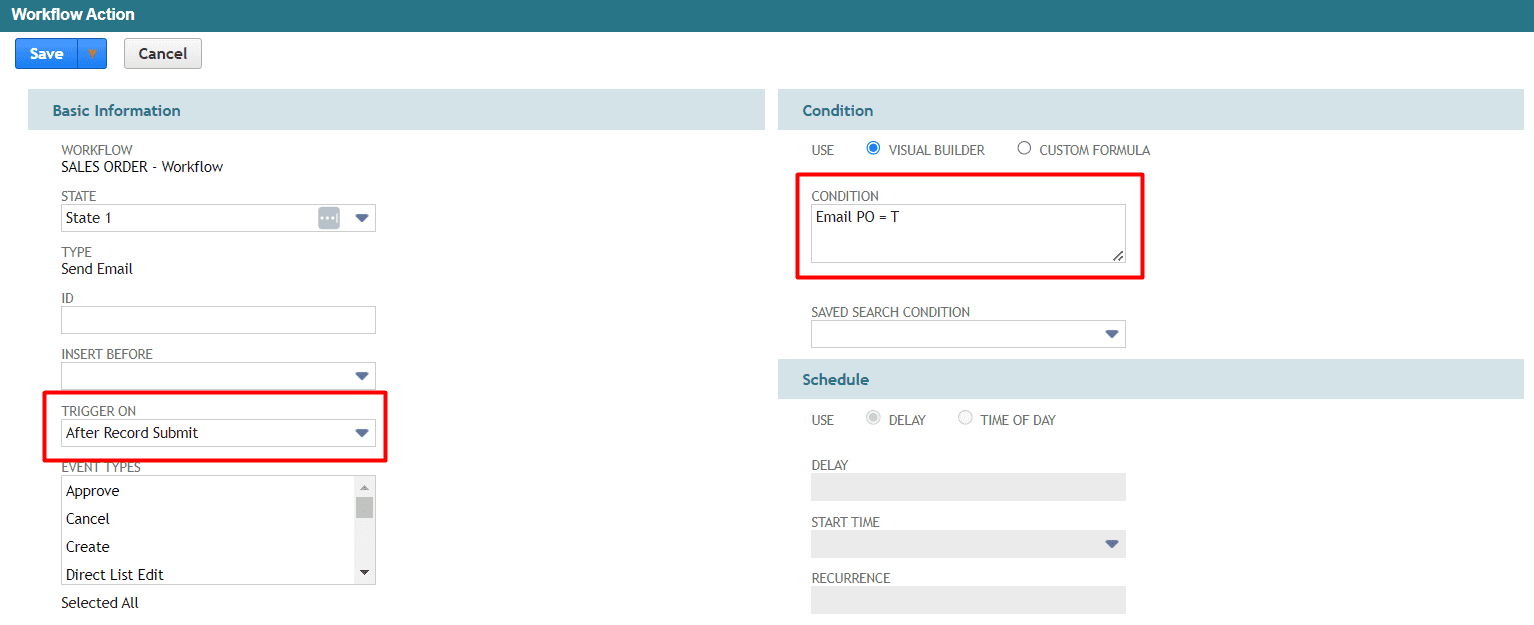
In the first state of the workflow click the New Action button then select Send Email from the list

We have added a custom field to the Purchase Order called "Email PO". It is a checkbox that we will use as the condition of our send email action. We will also use the After Record Submit trigger because we want the email to be sent right after someone saves the Purchase Order IF they have checked the "Email PO" box.
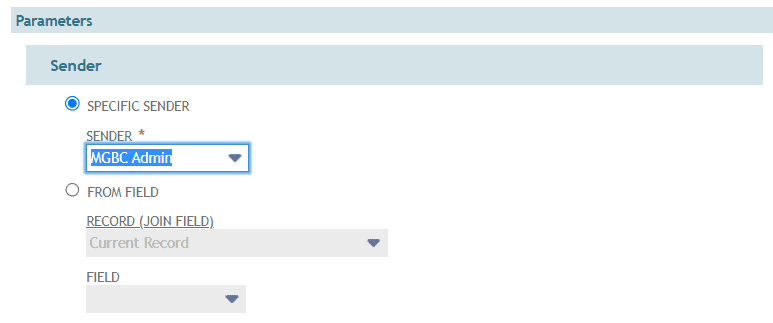
Now in the Parameters we have to first define the Sender and Recipient of the email. This is where the workflow action falls a little short of Saved Searches, because you are forced to select from a list of current users or contacts (or a field on the record that contains a reference to a list of contacts) as the sender. Wherein Saved Searches allow you to type in any email address/author into the Sender field for sending an email. This is not a huge burden to overcome as any email you would like to use as a sender can easily be added as an Employee record OR a Contact record in Netsuite and then selected in the workflow action.
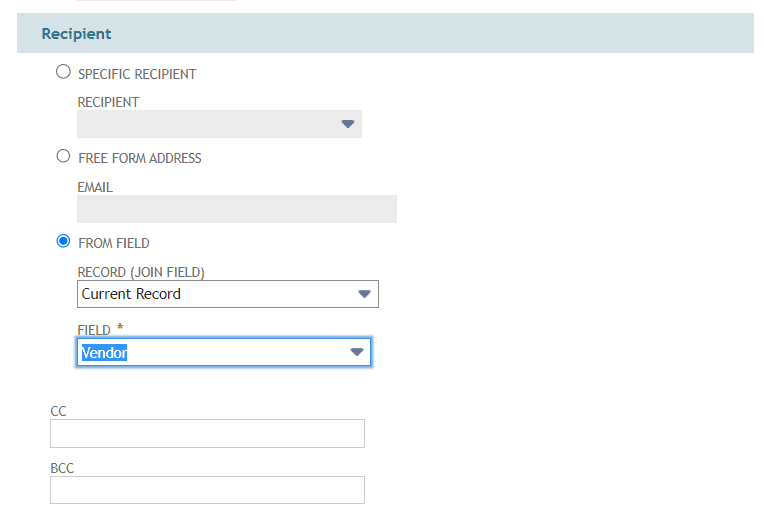
The recipient section provides more options for configuration, as you can select from a list of entities already in the system (ie. Employees, Customers, Vendors or Contacts), enter a free form address, OR use a field on the record to source the recipient email address.
NOTE - the field on the record must be either a Email Address field type OR a List/Record type with reference to an Entity list.
You can also type a free form address into the CC or BCC fields and they will be copied on the email. Alternatively, you can source a field value by using the field id in the CC or BCC fields to get an email address that is stored in a field on the record.
NOTE - This field does NOT have to be an Email Address type field, but the value of that field must be a valid email address or else the workflow will fail to perform the action
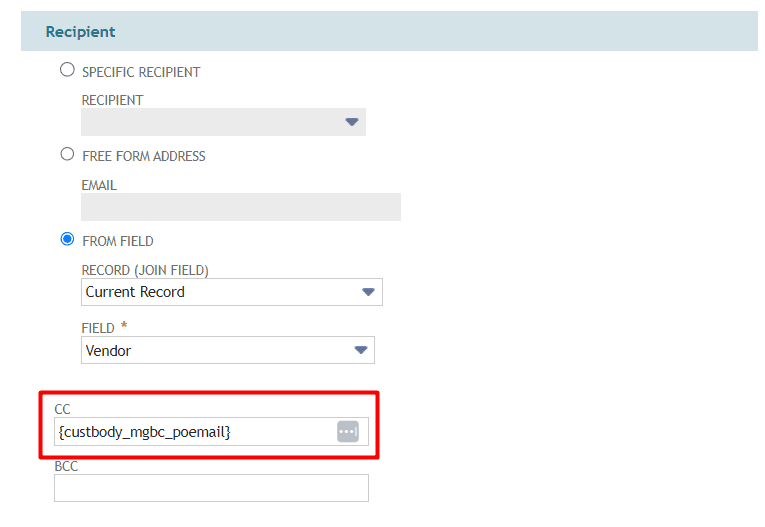

One question that we get asked frequently is; "How can I send an email to multiple addresses?" The best way to do this is to use the CC or BCC parameters within the Send Email action. You can create a custom field that is a Free Text field, then use that field ID as the value for the CC parameter. Since a Free Text field is NOT limited to the formatting constraints of an Email Address field you are able to type multiple email addresses into it separated by a comma. For example an Email Address type field can only accept "purchasing@mycompany.com" as a value. Where a Free Text field can accept "purchasing@mycompany.com, mysalesrep@mycompany.com, accountsreceivable@mycompany.com, receiving@mycompany.com"
This will then source all comma separated email addresses into the CC of the email that gets sent and all email addresses will be copied on the email.
Now we can move onto the content of the email. You can either use a template that you have already setup under Documents > Templates > Email Templates, or use a custom template that you build right within the parameter's of the workflow.
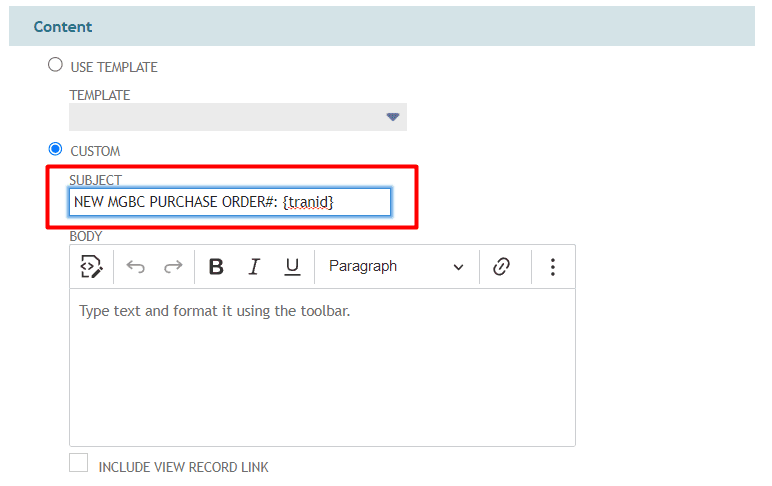
We will make a custom template and enter a custom Subject line and use the field ID to source the PO# into the Subject of the Email
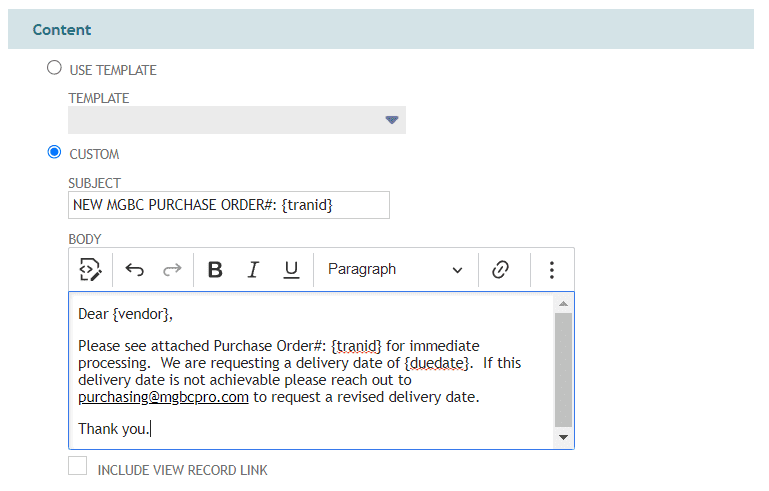
Then add text into the body of the email, again sourcing field values from the Purchase Order into the email body by using the field IDs
We will leave the "Include View Record Link" checkbox unchecked as we are sending this email to an external recipient. If you check this box a "View Record" link will be added to the bottom of the email that when clicked will attempt to take the person into your NetSuite environment to view the Purchase Order. We have a safeguard here in that most likely the Vendor will not have a valid login, however, it is best to leave this off the email to avoid confusion. If this email is only going to Internal users like an email requesting approval of a transaction the the View Record link might be helpful for that user to easily find their way to the record and approve it.
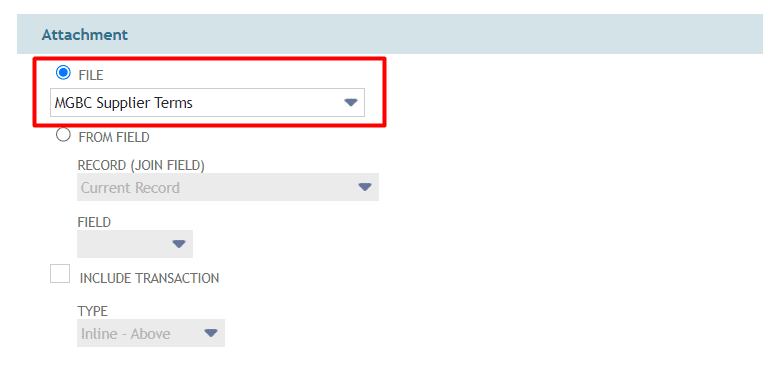
Lastly, we can add attachments to the email that gets sent. First, we will discuss the Attach File paramter. Here we can attach any file stored in the File Cabinet to this email by selecting it in the File parameter. Alternatively, you can use a Document type field on the record to store a File from the file cabinet and then use that field as the source of the file that should be attached. This is especially helpful if the file being attached is not always static but rather conditional based on certain criteria on the Purchase Order.
In this example we will set it to just one file which is our Supplier Terms file so each PO is sent along with our Supplier Terms. (Remember the file will be attached using the format that it is stored in the File Cabinet so if you have a Word Doc stored in the File Cabinet a Word Doc will be attached to the email.)
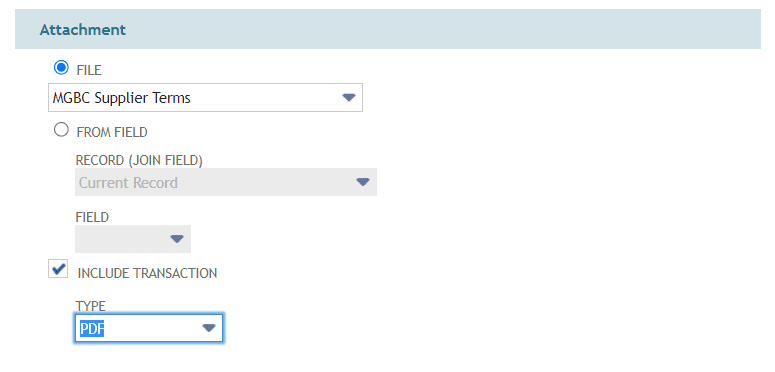
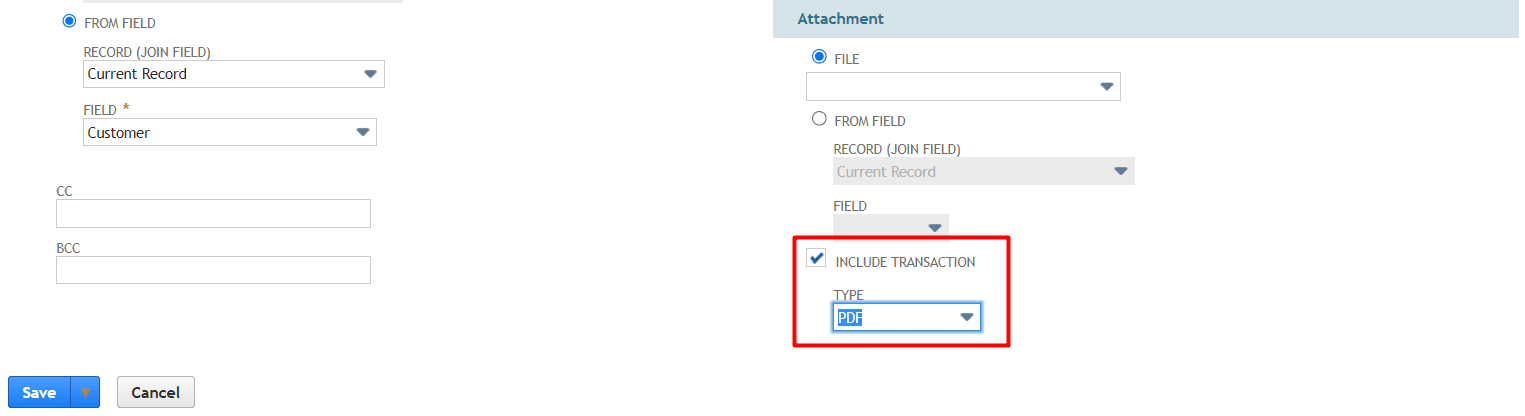
You can also choose to include a copy of the transaction as an attachment as well. The options are:
- Inline Above - This means a copy of the Purchase Order will be generated using the Advanced PDF Template set on the Transaction Form but it will be displayed within the body of the email ABOVE the written text you defined in the Body parameter.
- Inline Below - This means a copy of the Purchase Order will be generated using the Advanced PDF Template set on the Transaction Form but it will be displayed within the body of the email BELOW the written text you defined in the Body parameter.
- Default - The system will evaluate the Default Email Preferences of the Entity assigned to this transaction and use that preference to determine what type of document should be attached to the email.
- PDF - The Purchase Order will be attached as a PDF file to the email
- HTML - The Purchase Order will be attached as an HTML file to the email
Scheduled Workflow
You can also use a Scheduled Workflow to send an email based on a specific schedule. In this example we will use a Scheduled Workflow to send out Shipping Notifications to our customers at the end of the shipping day.
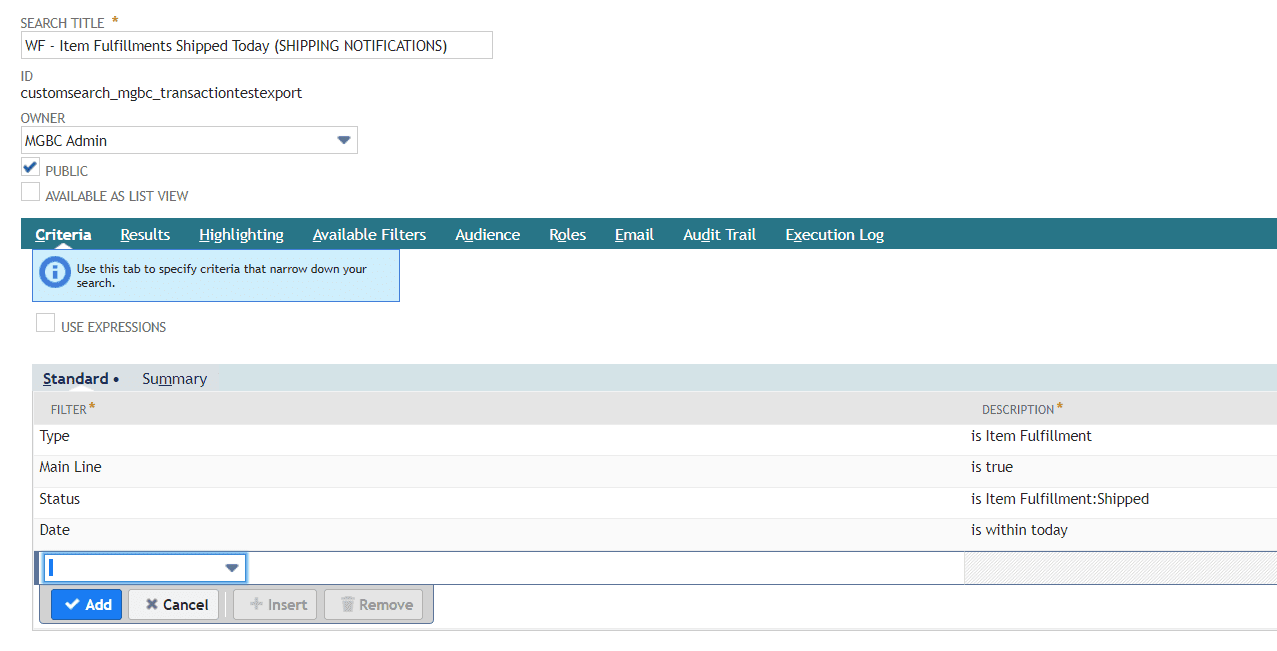
To do this first create a Saved Search that will be used as the criteria of our workflow. In this case we are looking for Item Fulfillments in Shipped Status where the date is TODAY.
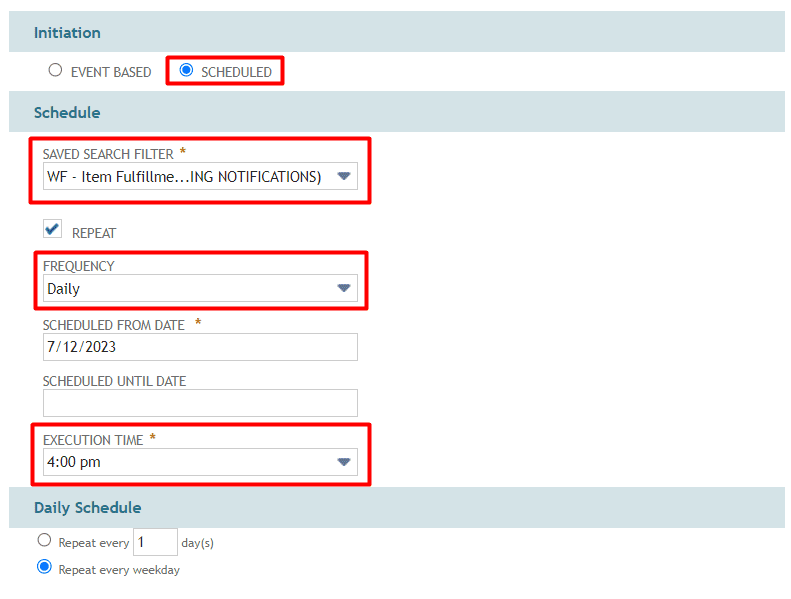
Now in the configuration of our workflow you can set the Saved Search as the criteria and set a schedule of Daily. Now everyday at 4pm the system will run the Saved Search above and if any records meet the criteria of that Saved Search it will trigger the actions within the workflow.
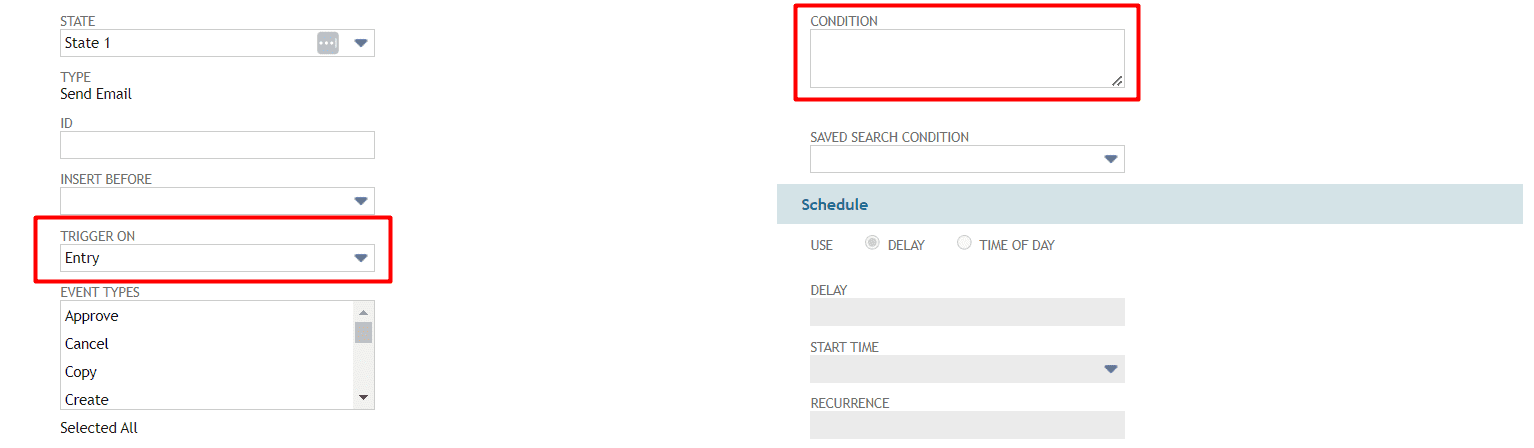
In the Send Email action we will use the Trigger of "Entry" because this is a Scheduled Workflow and the After Record Submit trigger is not valid for Scheduled Workflows. So we want to trigger the email as soon as the record enters the first state of the workflow. Also we are leaving the condition blank because the Saved Search that is initiating the entire workflow already has the condition that we need.
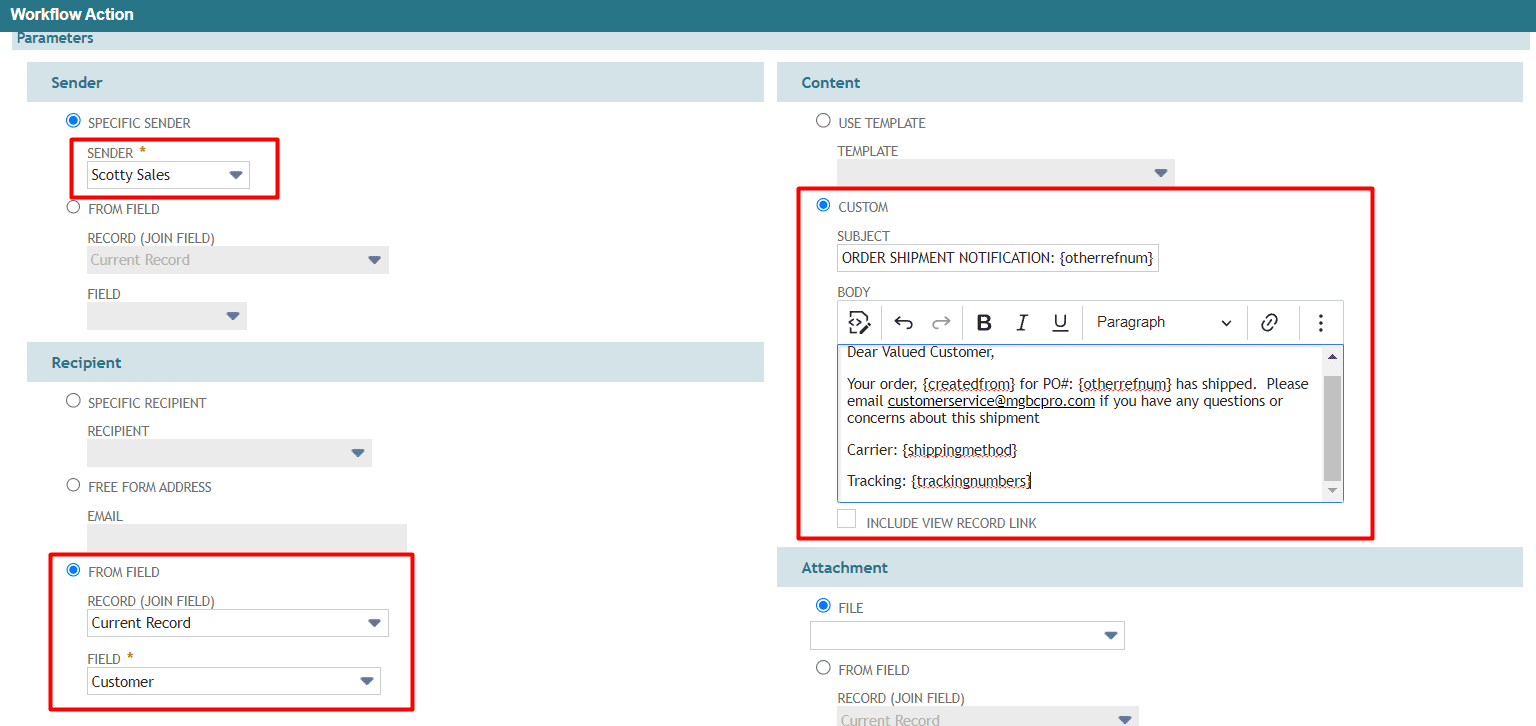
Now update the Sender, Receipient, Subject and Body of the Email to contain the proper information for your customers to receive a shipment notification.
We will also include the transaction as a PDF (which in this case will be a packing slip since this is running on the Item Fulfillment transaction).
Now our Shipment Notifications are easily sent to our customers at the end of everyday.
As you can see this Send Email action is much more powerful and versatile than the email functionality built into Saved Searches and can provide a TON of communication to both your internal users AND your external Customers and Vendors. One major gap in this action is the ability to choose different PDF templates when generating the attachment for this email. Unfortunately, NetSuite only allows you to use the PDF template attached to the transaction form set on the record. This can cause some headaches in that you either need to be constantly changing the Custom Form field on transactions to meet certain use cases, or struggle with a seriously customized PDF template to cover all use cases.
At MGBC we've created an easier way to manage this requirement. We have created a custom workflow action the generates a PDF document of the current record using ANY PDF template that you have defined. Then once you have generated that PDF document and stored it in a custom Document Type field on your record you can use it in the Attachment parameters in your Send email action. This way you can create and store PDF files of your transaction in ANY PDF template with completely customized criteria, then send them to your Customers and Vendors using the native Send Email action as described above.
Checkout our custom Create and Attach PDF workflow action today. OR email us at info@mgbcpro.com to learn more.